Tuesday, January 31, 2017

ORA-28001: the password has expired

when ever u are facing below error execute following step to bypass it.
An error was encountered performing the requested operation:
ORA-28001: the password has expired
28001. 00000 - "the password has expired"
*Cause: The user's account has expired and the password needs to be
changed
*Action: change the password or contact the DBA
Vendor code 28001
Step 1:- We are using SQLDeveloper else u can also use the command prompt
Right click on Connections > New Connection.
Connection Name: LOCALHOST
Username: SYSTEM
Password: (or your sys password)
Hostname: your database server IP
Port: 1521
SID: your sid
click connect.
Step 2:- Expand other users, and choose the user with the expired password.
Step 3:- Right click and "edit" the user, enter the new password and uncheck Passowrd Expired check box and confirm it.
Either follow this steps
https://shdhumale.wordpress.com/2016/03/14/ora-28002-the-password-will-expire/

Calling SOAP Service with AngularJS2

Before starting this please refer to this site
http://siddharathadhumale.blogspot.in/2017/01/angularjs2-rest-json-call-example.html
Now Lets try to consume SOAP Response using AngularJS2

Following are the changes made in the files
Step 1:- app.component.html
<!--button (click)="getSoapResponse()">Call SOAP Service<!--/button>
<!--div>
<!--label>SOAP Web Service Call http://10.38.113.143:8088/mockExposeWebServiceSoap11Binding: <!--/label>
{{ getSoapWebResponse }} 
<!--/div>
Step 2:- app.component.ts

getSoapResponse() {
this.siddhurestservice
.getSoapResponse().subscribe(
data => this.getSoapWebResponse = data, // put the data returned from the server in our variable
error => console.log("Error HTTP GET Service"), // in case of failure show this message
() => console.log("Job Done Get !")//run this code in all cases
);

}
Step 3:- siddhu-rest-service.service.ts
getSoapResponse(){
let options = new RequestOptions({
method: RequestMethod.Post,
url: this.getSoapResponseurl,
body: this.body
});
return this._http.request(new Request(options))
.map(this.extractData);


}

private extractData(res: Response) {
let body = res.text();
console.log(res.toString());
console.log(body);
return body;
}
Project Structure
image3image4

AngularJS2 REST JSON Call Example

This example show you how to call REST JSON response with AngularJS2
In this example we are using Eclipse IDE and REST JSON service from
http://services.groupkt.com/country/get/all
http://services.groupkt.com/country/get/iso2code/IN

Step 1:- Create an angularJS2 project in eclipse
right click --> New --> Other-->AngularJs2 project--> Give the name of the project
Above step will create and base project with node-module folder inside our project.
Step 2:- Lets create an service which is used to make an REST Call i.e. siddhu-rest-service.service.ts
In code we are using the concept of observable and map so import following below line inside the code.
import { Observable } from 'rxjs/Observable';
import 'rxjs/add/operator/map';
we are expecting the result in the form of JSON
getAllCountry(){
return this._http.get(this.getAllUrl)
.map(response => response.json());

}
Step 3:- Add newly created service inside at app.modules.ts so that it can be available to whole project
import { SiddhuRestServiceService } from './siddhu-rest-service.service';
providers: [SiddhuRestServiceService],

Step 4:- Modfiy html file to show the JSON response on the screen

<!--button (click)="getAllCountry()">Call Country Code Web Service<!--/button>

<!--label>The result after Post<!--/label> {{getJSONResponse}}

<!--div>
<!--label>Country Code: <!--/label> <!--input [(ngModel)]="countrycode"
placeholder="countrycode" />
<!--/div> 

<!--button (click)="getIsoofCountry(countrycode)">Call Country Code Web Service<!--/button>
<!--div>
<!--label>REST Response of http://services.groupkt.com/country/get/iso2code: <!--/label>
{{ getCountryCodeJSONResponse }}
<!--/div>
<!--/div>

2:- siddhu-rest-service.service.ts
import { Injectable } from '@angular/core';
import { Headers, Http } from '@angular/http';
import { Observable } from 'rxjs/Observable';
import 'rxjs/add/operator/map';
import 'rxjs/add/operator/toPromise';

@Injectable()
export class SiddhuRestServiceService {

private headers = new Headers({'Content-Type': 'application/json'});
private getAllUrl = 'http://services.groupkt.com/country/get/all'; // URL to web api

private getISOCode = 'http://services.groupkt.com/country/get/iso2code'; 
constructor(private _http: Http) { 

}

// getAllCountry(): Promise<{}> {
getAllCountry(){
/* console.log(this._http.get(this.getAllUrl)
.toPromise()
.then(response => response.json())
.catch(this.handleError));*/
// .map(response => response.json()));
/* return this._http.get(this.getAllUrl)
.toPromise()
.then(response => response.json().data)
.catch(this.handleError);*/
return this._http.get(this.getAllUrl)
.map(response => response.json());

}

// getIsoofCountry(id: string): Promise<{}> {
getIsoofCountry(id: string) {
const url = `${this.getISOCode}/${id}`;
/* console.log(this._http.get(url)
.toPromise()
.then(response => response.json())
.catch(this.handleError));*/
/*return this._http.get(url)
.toPromise()
.then(response => response.json().data)
.catch(this.handleError);*/
return this._http.get(url)
.map(response => response.json());

}

private handleError(error: any) {
console.error(error);
return Observable.throw(error.json().error || 'Server error');
}


}
3:- app.component.ts
import { Component } from '@angular/core';
import { SiddhuRestServiceService } from './siddhu-rest-service.service';
@Component({
selector: 'app-root',
templateUrl: './app.component.html',
styleUrls: ['./app.component.css']
})
export class AppComponent {
getJSONResponse:string;
getCountryCodeJSONResponse:string;

constructor(private siddhurestservice: SiddhuRestServiceService) { }
title = 'Calling REST Web service using AngularJS2';
getAllCountry() {
this.siddhurestservice
.getAllCountry().subscribe(
data => this.getJSONResponse = JSON.stringify(data), // put the data returned from the server in our variable
error => console.log("Error HTTP GET Service"), // in case of failure show this message
() => console.log("Job Done Get !")//run this code in all cases
);
}
getIsoofCountry(id : string) { 
console.log(id);

this.siddhurestservice
.getIsoofCountry(id).subscribe(
data => this.getCountryCodeJSONResponse = JSON.stringify(data), // put the data returned from the server in our variable
error => console.log("Error HTTP GET Service"), // in case of failure show this message
() => console.log("Job Done Get !")//run this code in all cases
);
}
}
4:- app.module.ts
import { BrowserModule } from '@angular/platform-browser';
import { NgModule } from '@angular/core';
import { FormsModule } from '@angular/forms';
import { HttpModule } from '@angular/http';
import { AppComponent } from './app.component';
import { SiddhuRestServiceService } from './siddhu-rest-service.service';
@NgModule({
declarations: [
AppComponent
],
imports: [
BrowserModule,
FormsModule,
HttpModule
],
providers: [SiddhuRestServiceService],
bootstrap: [AppComponent]
})
export class AppModule { }

image1image2

Monday, January 30, 2017

Simple Addition/Substration/Multiplication/Division Example using AngularJS2

Tool Used:-
Eclipse with AngularJS2 plugin
Chrome Browser
AngularJS2 is Typescript language i.e. developer write the code in Typescript language and at run time it get converted into JAVA script to display result on screen.
Here we are trying to create a simple angularJS2 example that shows us add,sub,multiplication and division.
We are using Routing concept as we have created 4 tab one for each operation
Step 1:- Create AngularJS2 Project with name i.e. AddSunDivMultiProject
Step 2:- Execute above created project i.e. right click on project --> Run as --> ng serve
open this url on browser http://localhost:4200
This will show defualt project screen on the browser.
Step 3:- Now create a new component for Add functionality i.e. right click on project --> new -> other --> AngularJS2--> Component
image2
This will create folder with our name provided by us along with three files
1- *.ts :- Code to have logic
2- *.html :- Code to display the page
3- *.css :- To give look and feel to our html files.
Folder Structure
image1
Files
1:- add-component.component.ts
import { Component, OnInit } from '@angular/core';
//import { NumberEnter } from './number-enter';
@Component({
selector: 'app-add-component',
templateUrl: './add-component.component.html',
styleUrls: ['./add-component.component.css']
})
export class AddComponentComponent implements OnInit {

answer : number;
constructor() { }
ngOnInit() {
}

addNumber(firstnumber, secondnumber) {
console.log(firstnumber)
console.log(secondnumber)
var myFirstNumber = +firstnumber
var mySecondNumner = +secondnumber
this.answer = myFirstNumber + mySecondNumner;
console.log(this.answer)

}
getAnswer()
{
return this.answer;
}

}
2- add-component.component.html
<!--div>
<!--h2>Add Number Screen!<!--/h2>
<!--div>
<!--label>firstnumber: <!--/label> <!--input
[(ngModel)]="firstnumber" placeholder="firstnumber" />
<!--/div>
<!--div>
<!--label>secondnumber: <!--/label> <!--input [(ngModel)]="secondnumber"
placeholder="secondnumber" />
<!--/div>
<!--button (click)="addNumber(firstnumber, secondnumber)">Add Number<!--/button>
<!--div>
<!--label>Answer: <!--/label>
<!--input type="text" value='{{ getAnswer() }}' />
<!--/div>
<!--/div>
Imply the same logic expect the operator in all other sub,div and multilication fies.
3- app-routing.module.ts
import { NgModule } from '@angular/core';
import { RouterModule, Routes } from '@angular/router';
import { AddComponentComponent } from './add-component/add-component.component';
import { SubComponentComponent } from './sub-component/sub-component.component';
import { DivComponentComponent } from './div-component/div-component.component';
import { MultiComponentComponent } from './multi-component/multi-component.component';
const routes: Routes = [
{ path: '', redirectTo: '/addcomponent', pathMatch: 'full' },
{ path: 'addcomponent', component: AddComponentComponent },
{ path: 'subcomponent', component: SubComponentComponent },
{ path: 'divcomponent', component: DivComponentComponent },
{ path: 'multicomponent', component: MultiComponentComponent }
];
@NgModule({
imports: [ RouterModule.forRoot(routes) ],
exports: [ RouterModule ]
})
export class AppRoutingModule {}

5 :- app.module.ts
import { BrowserModule } from '@angular/platform-browser';
import { NgModule } from '@angular/core';
import { FormsModule } from '@angular/forms';
import { HttpModule } from '@angular/http';
import { AppComponent } from './app.component';
import { AppRoutingModule } from './app-routing.module';
import { AddComponentComponent } from './add-component/add-component.component';
import { SubComponentComponent } from './sub-component/sub-component.component';
import { DivComponentComponent } from './div-component/div-component.component';
import { MultiComponentComponent } from './multi-component/multi-component.component';

@NgModule({
declarations: [
AppComponent,
AddComponentComponent,
SubComponentComponent,
DivComponentComponent,
MultiComponentComponent
],
imports: [
BrowserModule,
FormsModule,
HttpModule,
AppRoutingModule
],

providers: [],
bootstrap: [AppComponent]
})
export class AppModule { }

6:- app.component.html
<!--h1>{{title}}<!--/h1>
<!--nav>
<!--a routerLink="/addcomponent" routerLinkActive="active">Addition<!--/a>
<!--a routerLink="/subcomponent" routerLinkActive="active">Subtraction<!--/a>
<!--a routerLink="/multicomponent" routerLinkActive="active">Multiplication<!--/a>
<!--a routerLink="/divcomponent" routerLinkActive="active">Division<!--/a>
<!--/nav>
<!--router-outlet><!--/router-outlet>

7:- app.component.css
h1 {
font-size: 1.2em;
color: #999;
margin-bottom: 0;
}
h2 {
font-size: 2em;
margin-top: 0;
padding-top: 0;
}
nav a {
padding: 5px 10px;
text-decoration: none;
margin-top: 10px;
display: inline-block;
background-color: #eee;
border-radius: 4px;
}
nav a:visited, a:link {
color: #607D8B;
}
nav a:hover {
color: #039be5;
background-color: #CFD8DC;
}
nav a.active {
color: #039be5;
}
Run application right click on project --> run as --> ng serve
image3image4image5image6

Sunday, January 22, 2017

How to run/deploy your AngularJS2 application on Tomcat

Run following commnd on prompt inside your AngularJS2 project
npm build
This will create dist folder inside your AngularJS2 project.
Finally Edited index.html as and it worked fine

Running through Eclipse AngularJS2 plugin

Right Click Project --> Run As --> ng Server

Monday, January 16, 2017

AngularJS2 Architecture

image1
1- Modules: - AngulasJS2 App is collection of modules. Each module define/contains code to perform single task.It contain export class stating that this class is public and can be access by other modules in applications.
2- Components:- It is controller class with a view template that deals with view of application and logic on the page.
3- Template:- This define the view part of our AngularJS2 application
4- MetaData :- It is data inside data. If we refer to our component we use metadata to tell angularjs2 to create a component using decorator i.e. @Component is decorator.
@Component({
selector : 'mySelector',
template : '

Siddhartha dhumale

'
directives : [MyComponentDetails]
})
export class MySiddhuClass{...}
@Component is a decorator which uses Metadata to create the component and its view.
selector :- create instance of component,
template:- tells Angular what to display on the screen using tag and
directive:- represent array of components and directive.
5- Data Binding:- It binds data and view and viceversa
Interpolation: It displays the component value within the div tags.
Property Binding: It passes the property from the parent to property of the child. From Component to Template.
Event Binding: handle click event on the screen.
Two-way Binding: binding two way between template and component.
6- Service
Services are JavaScript functions use to do a specific task only. In AngularJS2 services are injected using Dependency Injection mechanism. Service example are loggin service, data service etc.
7- Directive
The directive is a class that represents the metadata. It is of three type:-
Component Directive: It creates custom controller by using view and controller.
Decorator Directive: This directive use decorator to decorates elements by giving them additional behavior.
Template Directive: It converts HTML into a reusable template.

Sunday, January 15, 2017

REST Assured API for Testing and Parsing REST JSON RESPONSE big file

Generally we use to Use JERSY in java to perform JSON REST call and then using traditional way we use to parse the output to get desired result.
Rest assured is best API available in its kind to do the same. It support all REST operation like GET/PUT/POST etc.
http://rest-assured.io/
Best use of rest assured is its well tested API to parse JSON response and get desired value.
Please find below given POC for the same
1- POM.xml
<!--project xmlns="http://maven.apache.org/POM/4.0.0" xmlns:xsi="http://www.w3.org/2001/XMLSchema-instance"
xsi:schemaLocation="http://maven.apache.org/POM/4.0.0 http://maven.apache.org/xsd/maven-4.0.0.xsd">
<!--modelVersion>4.0.0<!--/modelVersion>

<!--groupId>com.rest.assured<!--/groupId>
<!--artifactId>com.rest.assured.test<!--/artifactId>
<!--version>0.0.1-SNAPSHOT<!--/version>
<!--packaging>jar<!--/packaging>

<!--name>com.rest.assured.test<!--/name>
<!--url>http://maven.apache.org<!--/url>

<!--properties>
<!--project.build.sourceEncoding>UTF-8<!--/project.build.sourceEncoding>
<!--/properties>

<!--dependencies>
<!--dependency>
<!--groupId>junit<!--/groupId>
<!--artifactId>junit<!--/artifactId>
<!--version>4.12<!--/version>
<!--scope>test<!--/scope>
<!--/dependency>
<!--dependency>
<!--groupId>io.rest-assured<!--/groupId>
<!--artifactId>rest-assured<!--/artifactId>
<!--version>3.0.1<!--/version>
<!--scope>test<!--/scope>
<!--/dependency>
<!--dependency>
<!--groupId>io.rest-assured<!--/groupId>
<!--artifactId>json-path<!--/artifactId>
<!--version>3.0.1<!--/version>
<!--/dependency>
<!--dependency>
<!--groupId>io.rest-assured<!--/groupId>
<!--artifactId>xml-path<!--/artifactId>
<!--version>3.0.1<!--/version>
<!--/dependency>
<!--dependency>
<!--groupId>io.rest-assured<!--/groupId>
<!--artifactId>json-schema-validator<!--/artifactId>
<!--version>3.0.1<!--/version>
<!--scope>test<!--/scope>
<!--/dependency>

<!--dependency>
<!--groupId>org.apache.commons<!--/groupId>
<!--artifactId>commons-lang3<!--/artifactId>
<!--version>3.4<!--/version>
<!--/dependency>

<!--dependency>
<!--groupId>org.codehaus.groovy<!--/groupId>
<!--artifactId>groovy-json<!--/artifactId>
<!--version>2.4.6<!--/version>
<!--/dependency>
<!--dependency>
<!--groupId>com.oracle<!--/groupId>
<!--artifactId>ojdbc6<!--/artifactId>
<!--version>11.2.0.2.0<!--/version>
<!--/dependency>

<!--/dependencies>
<!--/project>
2- TestRestAssured
import static io.restassured.RestAssured.given;
import io.restassured.path.json.JsonPath;
import io.restassured.response.Response;
import io.restassured.response.ValidatableResponse;
import org.junit.Test;
public class TestRestAssured {
@Test
public void makeSureThatGoogleIsUp() {
//given().when().get("http://services.groupkt.com/country/get/iso2code/IN").then().statusCode(200);


/*
* //To check if result value in array is India
//given().when().get("http://services.groupkt.com/country/get/iso2code/IN").then().statusCode(200).body("RestResponse.result.name", equalTo("India"));
*/
//ValidatableResponse objValidatableResponse = given().when().get("http://services.groupkt.com/country/get/iso2code/IN").then().statusCode(200);
/*
* //To check response contain perticular string
Response response = given().when().get("http://services.groupkt.com/country/get/iso2code/IN");
JsonPath jsonPath = new JsonPath(response.getBody().asString());
String user_id = jsonPath.getString("RestResponse.result.name");
*/
/*
* //To check if response is 200
Response response = given().when().get("http://services.groupkt.com/country/get/iso2code/IN");
Long statusCode = new Long(response.statusCode());
Long id = null;
if(statusCode.toString().equals("200")){
System.out.println("This is test");
//make a db call
}*/
}
}
image1
For Reference
http://testdetective.com/rest-assured-framework-overview/
https://semaphoreci.com/community/tutorials/testing-rest-endpoints-using-rest-assured
https://github.com/rest-assured/rest-assured/wiki/GettingStarted
https://github.com/rest-assured/rest-assured/wiki/GettingStarted#jsonpath
https://github.com/rest-assured/rest-assured/wiki/Usage
https://github.com/rest-assured/rest-assured/wiki/Downloads
http://james-willett.com/2015/06/extracting-a-json-response-with-rest-assured/

Wednesday, January 11, 2017

AngularJS2 Introduction with Simple Programe


AngularJS2 is open source MIT License (Free to use software). AngularJS2 come with reach developmenmt expertise from AngularJS1.
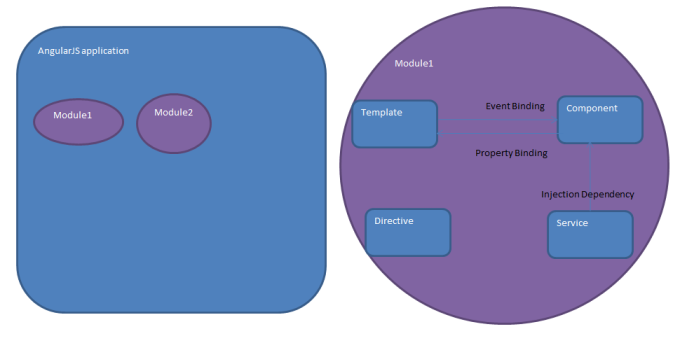
AngularJS2 programing pragadigm change from JAVA Scripting to Type Scripting along with Component Base Architecture. (i.e. Component is base of application and is responisible for Viewing and Modeling activities).
AngularJS2 comes with many in build advantages
1- It support Dependency Injection. Inshort hurry for developer as less number of code need to be written.
2- It is build with mobile first view i.e. Sites developed by AngularJS2 is highly Responsive in nature.
3- It support all browser
4- It is best suited for the application which required heavy load.
5- It support server side rendering.
6- It support cross browser scripting (remember access controll allow error)
7- It support component base architecture.
Lets see how AngularJs2 differe from AngularJS1.
AngularJS1 is build on JAVA Script and has brief separation of MVC architecture with concept like ng-app, controller, model, module, binding, Directive, Expression, From, Filter, Routing, http, Service, Scopr, Animation concept. But programing remain with JAVA script epicenter.

In AngularJS2 pragraming is shifted to TypeScript. Type script is superset of JAVA Script.
Lets see how exellent way is used to seperate configuration and application logic and execution in AngularJS2.
But before starting AngularJS2 programing make sure you have NodeJS installted, NPM installed in your PC.
AngularJS2 development strategies is broadly classfied in three different aspect
1- Creating:- Configuration JSON files.
2- Creating Base for angularjs2 project using NPM install command using above JSON files
3- Creating *.ts (Type Script) files which create and execute our AngularJS2 Project

Lets see one by one

Step 1:- Create folder in your PC i.e. C:\angularjs2_example
1- Creating:- Configuration JSON files.
Three JSON files are required
1- tsconfig.JSON files :- This is Type script compiler configuration files
2- typing.json :- This indicate which typing languages are using in the applications
3- package.json:- Indicate which packages, server, dependencies is used in application

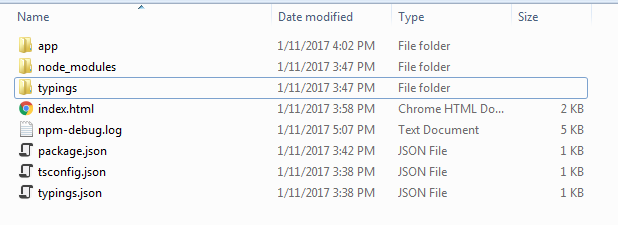
Step 2:- Now create a base for AngularJS2 application plateform using above *.JSON files using npm install command. This will create node_modules and typings folder inside our project folder.
cd :\ C:\angularjs2_example
C:\angularjs2_example> npm install
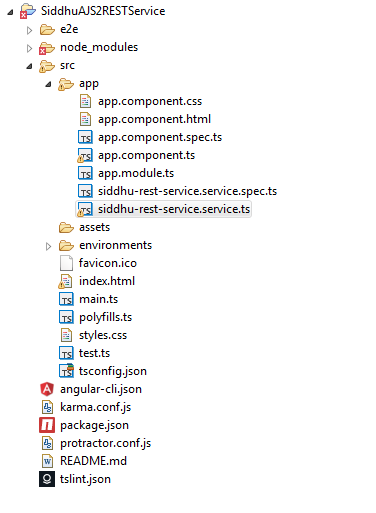
Step 3:- Create app folder and inside that app folder create following files
1:- environmentconfiguration_app.component.ts :- This Type script files declare Component and View Package used in out application
2:- environment_main.ts :- This is the main from where our programe is executed.
3:- Create one *.html files above app folder i.e. inside C:\angularjs2_example which is used to show UI part on the broswer.

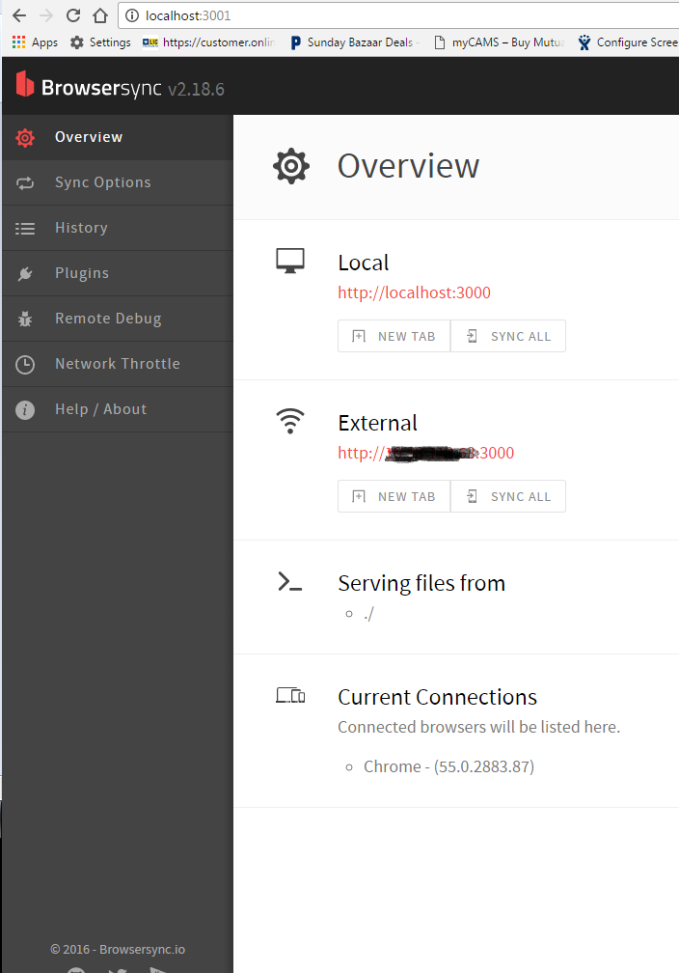
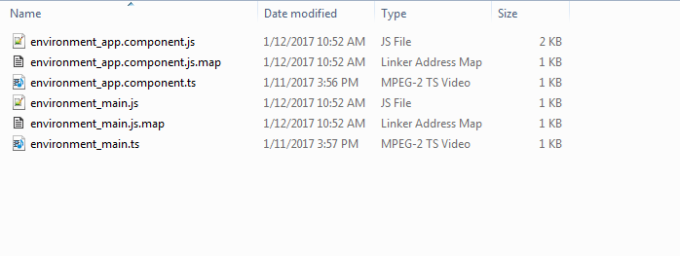
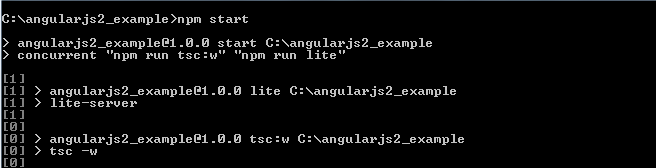
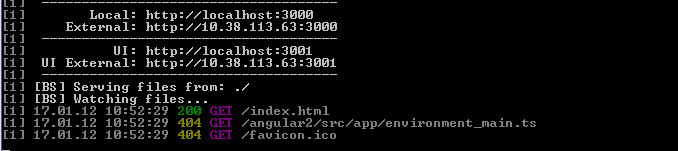
Final step exeute npm start command on prompt and you will our *.ts is converted to respective *.js files.
Code :-
1- tsconfig.json
{
"compilerOptions": {
"target": "es5",
"module": "system",
"moduleResolution": "node",
"sourceMap": true,
"emitDecoratorMetadata": true,
"experimentalDecorators": true,
"removeComments": false,
"noImplicitAny": false
},
"exclude": [
"node_modules",
"typings/main",
"typings/main.d.ts"
]
}
2- typings.json
{
"globalDependencies": {
"core-js": "registry:dt/core-js#0.0.0+20160602141332",
"jasmine": "registry:dt/jasmine#2.2.0+20160621224255",
"node": "registry:dt/node#6.0.0+20160621231320"
}
}

3:- package.json
{
"name": "angularjs2_example",
"version": "1.0.0",
"scripts": {
"start": "concurrent \"npm run tsc:w\" \"npm run lite\" ",
"tsc": "tsc",
"tsc:w": "tsc -w",
"lite": "lite-server",
"typings": "typings",
"postinstall": "typings install"
},
"license": "ISC",
"dependencies": {
"angular2": "2.0.0-beta.7",
"systemjs": "0.19.22",
"es6-promise": "^3.0.2",
"es6-shim": "^0.33.3",
"reflect-metadata": "0.1.2",
"rxjs": "5.0.0-beta.2",
"zone.js": "0.5.15"
},
"devDependencies": {
"concurrently": "^2.0.0",
"lite-server": "^2.1.0",
"typescript": "^1.7.5",
"typings":"^0.6.8"
}
}
4:- environmentconfiguration_app.component.ts
import {Component, View} from "angular2/core";
@Component({
selector: 'my-app'
})
@View({
template: '

Angular 2 App

'
})
export class AppComponent {
}
5:- environment_main.js
import {bootstrap} from "angular2/platform/browser"
import {AppComponent} from "./environmentconfiguration_app.component"
bootstrap(AppComponent);
6:- index.html
<!--!DOCTYPE html>
<!--!DOCTYPE html>
<!--html>
<!--head>
<!--title>Hello World<!--/title>
<!--script src="https://cdnjs.cloudflare.com/ajax/libs/es6-shim/0.33.3/es6-shim.min.js"><!--/script>
<!--script src="https://cdnjs.cloudflare.com/ajax/libs/systemjs/0.19.20/system-polyfills.js"><!--/script>
<!--script src="https://code.angularjs.org/2.0.0-beta.6/angular2-polyfills.js"><!--/script>
<!--script src="https://code.angularjs.org/tools/system.js"><!--/script>
<!--script src="https://code.angularjs.org/tools/typescript.js"><!--/script>
<!--script src="https://code.angularjs.org/2.0.0-beta.6/Rx.js"><!--/script>
<!--script src="https://code.angularjs.org/2.0.0-beta.6/angular2.dev.js"><!--/script>
<!--script>
System.config({
transpiler: 'typescript',
typescriptOptions: { emitDecoratorMetadata: true },
packages: {'app': {defaultExtension: 'ts'}},
map: { 'app': './app' }
});
System.import('app/environment_main')
.then(null, console.error.bind(console));
<!--/script>
<!--/head>
<!--body>
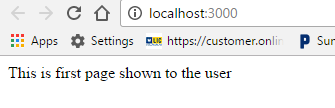
<!--my-app>This is first page shown to the user <!--/my-app>
<!--/body>
<!--/html>

image1image2image3image4

image5image6