Tuesday, August 25, 2020

Simple Spring Webflux example with MongoDB

 To have full use of reactive behaviour using spring Webflux we should think of complete pipeline as reactive not just our controller part. In application, we have UI, and then we have Middle ware i.e. controller, Service Layer and DAO and finally to DB. WE want all this unit to be reactive. Struggle comes in for DB. We have generally two type of DB SQL and NOSQL. Currently, for NOSQL database we have reactive driver i.e. Cassandra, MongoDb. Bur we are shortage of same for SQL database i.e.

Oracle:-
AoJ: ADBA over JDBC:-
ADBA is Asynchronous Database Access, a non-blocking database access api that Oracle is proposing as a Java standard.
https://github.com/oracle/oracle-db-examples/tree/master/java/AoJ

MongoDB:-
MYSQL:-
https://github.com/jasync-sql/jasync-sql
jasync-sql is a Simple, Netty based, asynchronous, performant and reliable database drivers for PostgreSQL and MySQL written in Kotlin
H or MSSQL Database:-
R2DBC – Reactive Relational Database Connectivity
https://github.com/r2dbc

For our example we are going to learn MongoDB NOSQL.

Lets first create the spring webflux project as shown below

Now lets try to create folder that define our framework structure for Spring Web Flux
Config:-
Here we will have three file for configuration
1- AppConfig
2- MongoConfig
3- WebFluxconfig
Controller:-
This contain our Controller class with logic.
DAO:-
This will contain interface that map with the findby method of MongoDB.
Model:-
This will contain our model class that has getter and setter along with @ID for mapping in Mongo DB field for particular document.
Service:-
This containt interface and its implementation method to act on Mongo DB.

You can find the code on following url of Github.

https://github.com/shdhumale/siddhuspringwebfluxexample

I am using Local MongoDB you can also use the MongoDb cloud.

Hit below url and see the result on the screen.
Create/insert
POST- http://localhost:8888
{
"id":1,
"name":"siddhu1",
"address":"address1",
"salary":100
}


Update-PUT http://localhost:8888/update
{
"id":1,
"name":"siddhu1 name updated",
"address":"address1",
"salary":100
}

Select- HTTP GET http://localhost:8888/

FindbyName
GET-http://localhost:8888/name/siddhu1 name updated

Note: If you are getting below error

org.springframework.core.convert.ConverterNotFoundException: No converter found capable of converting from type org.bson.types.ObjectId to type java.lang.Long
Make sure to convert your ID from Log to BigInteger
also create getter setter method for the same.

@Id
BigInteger id;

Monday, August 17, 2020

AngularJS Internationalization

First create AngularJS project using following command

npm install - g @angular/cli
ng new myAngularInternationalization
cd myAngularInternationalization
ng serve

You will be able to see the default screen for angular project

Note:- Make sure you already have node , npm etc is installed in the machine.

Now lets add internationalization

We can add internationalization (i18n) in Angular 10 via the ngx-translate package. [As our angular version in package.json is "@angular/core": "~10.0.6",]

Let's get started by installing the required dependencies using the following command:

npm install @ngx-translate/core @ngx-translate/http-loader

or

npm i @ngx-translate/core --save
npm i @ngx-translate/http-loader --save

Make sure both the packages are installed in package.json

"@ngx-translate/core": "^13.0.0",
"@ngx-translate/http-loader": "^6.0.0",

Next, add the following translations files:

cd src/assets/i18n
touch en.json
touch fr.json

Open the src/assets/i18n/en.json file and the following JSON content:

{
  "appText": "This is shown in Angular 9 Example"
}


Next, open the src/assets/i18n/fr.json:

{
  "appText": "Ceci est illustré dans l 'exemple angulaire 9"
}

Now that we have created the translation files, we need to import the ngx-translate module and loading the translations by adding the following code in the src/app/app.module.ts file

//Added for Internationalization of Project
import { HttpClient, HttpClientModule } from '@angular/common/http';
import { TranslateLoader, TranslateModule } from '@ngx-translate/core';
import { TranslateHttpLoader } from '@ngx-translate/http-loader';
export function httpTranslateLoader(http: HttpClient) {
return new TranslateHttpLoader(http);
}
imports: [
BrowserModule,
AppModule,
HttpClientModule,
TranslateModule.forRoot({
loader: {
provide: TranslateLoader,
useFactory: httpTranslateLoader,
deps: [HttpClient],
},
}),
],

Next, open the src/app/app.component.html file and update it as follows:

<h1>
  {{'appText' | translate }}
</h1>
<div>
  <button (click)="switchLang('en')">Click for English Language</button>
  <button (click)="switchLang('fr')">Click for French Language</button>
</div>

Next, we need to implement the useLanguage() method in our App component.

Open the src/app/app.component.ts file and update it as folows:

<!-- wp:paragraph -->
<p>import { Component } from '@angular/core';<br>import { TranslateService } from '@ngx-translate/core';</p>
<!-- /wp:paragraph -->

<!-- wp:paragraph -->
<p>@Component({<br>selector: 'app-root',<br>templateUrl: './app.component.html',<br>styleUrls: ['./app.component.css'],<br>})<br>export class AppComponent {<br>constructor(<br>public translate: TranslateService<br>) {<br>translate.addLangs(['en', 'fr']);<br>translate.setDefaultLang('en');<br>}</p>
<!-- /wp:paragraph -->

<!-- wp:paragraph -->
<p>switchLang(lang: string) {<br>this.translate.use(lang);<br>}<br>}</p>
<!-- /wp:paragraph -->

We simply inject TranslateService in our component and use the getBrowserLang and setDefaultLang methods to get the default browser language and set the default language.

Now, that we have implemented internationalization in our Angular 10 app, let's run it using the following command:

Note:- You can download the source code from below url
https://github.com/shdhumale/angularjsinternationalization.git


Friday, August 14, 2020

Understanding Spring Webflux

 Before staring this concept lets first understand what is difference between Spring MVC, Spring BOOT and Spring WebFlux.

In short Spring MVC provide the core framework using spring to develop Spring website [Model-View-controller]. Spring MVC is generally used to develop Spring Websites that's run on the browser.

Spring boot is build on Spring MVC but with different approach. Spring BOOT support concept of Microservice i.e Admin, Actuator, Eureka, Configuration, Hysteric, log, Swagger etc. It is generally used to expose the data from back end in form of REST. and support concept of Microservice i.e. For this concept we break the big monolithic system in to small part. Each part is specifically responsible for one of the functionality that whole system gives. Breaking down the big system in to small helps in easy and parallel development, testing, release. Many frameworks is available for microservice.

Spring WebFlux :- This is again develop or extends Spring Boot [Internally extending Spring MVC]. The main difference is that in both Spring MVC/Spring BOOT and Spring Webflux we have servlet container at the server side that work with blocking thread concept however spring Webflux work on non blocking concept. Additional spring Webflux work on concept of Reactive programming. Please refer to the below url for understanding Reactive Microservice.

http://siddharathadhumale.blogspot.com/2020/08/reactive-microservice.html

It is also useful to understand some of the below concept before directly moving to Spring WebFlux

1- Blocking [Spring MVC, Spring BOOT] VS Non blocking [Spring webFlux]

Blocking means .. when the user or UI make a call to server in MVC and BOOT its controller take the call and create a thread to satisfy this request. This request thread is blocked till the answer is generated from the Back end operatoin like fetching the data from DB or making another call or executing internal business logic. Once the data is obtain it is given to back to user i.e. ui or rest call user. We all know every servlet container i.e. tomcat, jetty has its own capacity to initialize servlet instance called as servlet pool. If the demand exceed then the new requester i.e. ui or rest call need to wait as all the servlet request thread are in block stage ….

1- Non Blocking:- For WebFlux above blocking is out of scope. The main reason is it used the concept of non-blocking servlet thread. Now the question is what is non blocking servlet thread. This means when ever any client i.e ui or rest call is made to controller it create a controller servlet thread but it will not wait till the data is fetched from the DB. It will delegate the work and will be ready to take the new request and when the data comes it will fetch that data and give to UI or requester. This is done with the help of callback method. Those who work with AJAX or GWT will know better what is call back method. In short call back method is executed when the response is give by the server for the specific request for which the request thread did not wait for result… This is also called as asynchronous request processing.

2- In non-blocking or asynchronous request processing, no thread is in waiting state. There is generally only one request thread receiving the request.

All incoming requests come with a event handler and call back information. Request thread delegates the incoming requests to a thread pool (generally small number of threads) which delegate the request to its handler function and immediately start processing other incoming requests from request thread. Small number of threads means less memory utilization and also less context switching as well.

When the handler function is complete, one of thread from pool collect the response and pass it to the call back function.

3- Reactive programming :- Means programming model that react on changes. It basically used or build arrond publisher-subscriber pattern (observer pattern). In reactive style of programming, we make a request for resource and start performing other things. When the data is available, we get the notification along with data inform of call back function. In callback function, we handle the response as per application/user needs.

Reactive web programming is great for applications that have streaming data, and clients that consume it and stream it to their users. It is not great for developing traditional CRUD applications. So if we are developing application like facebook or twitter where continuous stream of data is coming …a reactive API might be just what you’re looking for. So reactive programing use Reactive Streams api i.e. (Publisher, subscriber, Subscription and Processor)

There are many Reactive programming library/implementations available i.e RxJava (https://github.com/ReactiveX/RxJava), Reactor(https://projectreactor.io/), RxJS etc

Now lets come to Spring WebFlux:-

Spring WebFlux is parallel version of Spring MVC [ or Spring Boot] and supports fully non-blocking reactive streams.

Spring webflux uses project Reactor(https://projectreactor.io/) as reactive library. Reactor is a Reactive Streams library and, therefore, all of its operators support non-blocking back pressure.

Spring WebFlux uses two publishers :

Mono: Returns 0 or 1 element.
Mono mono = Mono.just("Siddhu");
Mono mono = Mono.empty();

Flux: Returns 0…N elements. A Flux can be endless, meaning that it can keep emitting elements forever. Also it can return a sequence of elements and then send a completion notification when it has returned all of its elements.

Flux flux = Flux.just("A", "B", "C");
Flux flux = Flux.fromArray(new String[]{"A", "B", "C"});
Flux flux = Flux.fromIterable(Arrays.asList("A", "B", "C"));
//To subscribe call method
flux.subscribe();

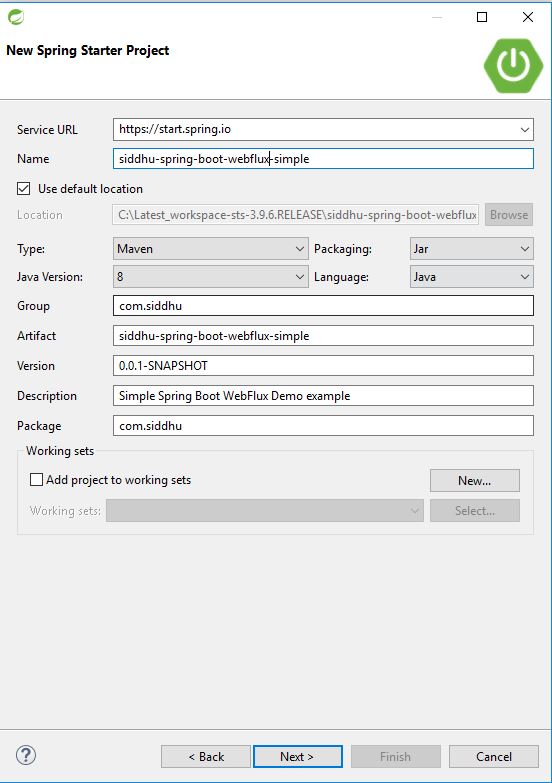
In next blog I will try to build a spring Boot WebFlux Example for better understanding

Reactive Microservice

 Much of the things on Reactive has been told and informed in many lectures and debates… Many has investigated and outcome with Reactive behavior understanding using Reactive programming. In short team if we want to know what is REACTIVE in terms of programming we can broadly classify into below given aspect

Responsive: This term is not related to UI/UX concept. Here it means the system responds in a timely manner if at all possible and should be active enough to give response in proper define time.

Resilient: The system stays responsive in the face of failure. This means it should have capabilities to overcome failure. This give highly-available for system.

Elastic: The system stays responsive under varying workload i.e. depending on the workload it can easily scale up and on low workload it should scale down to provide better performance.

Message Driven: Reactive Systems or its component should have the ability to talk with other asynchronous message these ensure loose coupling, isolation and location transparency between component.

Having said this if someone ask us what is the meaning of Reactive microservice we can say combination of Reactive behavior with Microservice concept.

Microservice :- For this concept we break the big monolithic system in the small part. Each part is specifically responsible for one of the functionality that whole system gives. Breaking down the big system in to small helps in easy and parallel development, testing, release. Many frameworks are available for microservice i.e. in java we have Spring Boot that support concept of Microservice as Admin, Actuator, Eureka, Configuration, Hysteric, log, Swagger etc.

When we add reactive to our microservice it contains all the above add-on of reactive behavior. Spring webflux provide the same to our microservice i.e it gives following advantages to our microservice

1- Our Microservice instance store the data/their respective state in memory. So that they should not go to the Database for fetching the value every time. This increase the performance timing. Even at one point it handle the single point failure as the data is in memory even though the DB is down our UI can work accordingly.
2- Reactive Microservice can talk to each other Asynchronously using message architecture.
3- Service automatically do the rebalancing of the work. Depending on Work load the Microservice instance can scale up and scale down for better performance.
4- They support the failure recovery principle. Means they can self-heal in case of failure.
So in short it is super fast, Ultra resilient, Hyper scalable and cloude native..

Thursday, August 06, 2020

Integration of BootStrap with AngularJS project

First lets have our own basic angularJS project using Angular CLI.

1- Setting Up An Angular Project With Angular CLI

npm install -g @angular/cli
ng new myAngularJSBootStrapProject
cd myAngularJSBootStrapProject
ng serve

if everything is fine you will be able to see the below screen.

2- Install Bootstrap

There are two ways to do it
1- Using CDN
2- using NPM Install
Method 1 - Adding Bootstrap 4 to Angular Using angular.json
Method 2 - Adding Bootstrap 4 to Angular Using index.html
Method 3 - Adding Bootstrap 4 to Angular Using styles.css

Lets see first using CDN

The include Bootstrap in your project we need to add two files:
Bootstrap CCS file and Bootstrap JavaScript file

Additional Bootstraps also depends on jQuery JavaScript library file. The CDN links for Bootstrap can be found at http://getbootstrap.com/getting-started/ and the link to jQuery can be found at https://code.jquery.com/

This files need to be added in our index.html files as shown below.

Image1

'<!doctype html>
'<html lang="en">

'<head>
'<!-- Required meta tags -->
'<meta charset="utf-8">
'<title>MyAngularJSBootStrapProject'</title>
'<base href="/">
'<meta name="viewport" content="width=device-width, initial-scale=1">
'<link rel="icon" type="image/x-icon" href="favicon.ico">
'<!-- Bootstrap CSS -->
'<link rel="stylesheet" href="https://stackpath.bootstrapcdn.com/bootstrap/4.5.1/css/bootstrap.min.css"
integrity="sha384-VCmXjywReHh4PwowAiWNagnWcLhlEJLA5buUprzK8rxFgeH0kww/aWY76TfkUoSX" crossorigin="anonymous">
'</head>

'<body>
'<app-root>'</app-root>
'<!-- Optional JavaScript -->
'<!-- jQuery first, then Popper.js, then Bootstrap JS -->
'<script src="https://code.jquery.com/jquery-3.5.1.slim.min.js"
integrity="sha384-DfXdz2htPH0lsSSs5nCTpuj/zy4C+OGpamoFVy38MVBnE+IbbVYUew+OrCXaRkfj"
crossorigin="anonymous">'</script>
'<script src="https://cdn.jsdelivr.net/npm/popper.js@1.16.1/dist/umd/popper.min.js"
integrity="sha384-9/reFTGAW83EW2RDu2S0VKaIzap3H66lZH81PoYlFhbGU+6BZp6G7niu735Sk7lN"
crossorigin="anonymous">'</script>
'<script src="https://stackpath.bootstrapcdn.com/bootstrap/4.5.1/js/bootstrap.min.js"
integrity="sha384-XEerZL0cuoUbHE4nZReLT7nx9gQrQreJekYhJD9WNWhH8nEW+0c5qq7aIo2Wl30J"
crossorigin="anonymous">'</script>
'</body>

'</html>

Now check the browser and you will find below screen with different look and feel this indicate we have successfully introduced Bootstrap 4.5 with our Angular project.

Image2

Now lets try to add one of the bootstrap component in our app.component.html and check if it is working

'<div class="container">
'<div class="jumbotron">
'<h1>This is bootstrap component'</h1>
'<h2>Angular & Bootstrap Demo'</h2>
'</div>
'<div class="panel panel-primary">
'<div class="panel-heading">Status'</div>
'<div class="panel-body">
'<h3>{{title}}'</h3>
'</div>
'</div>
'</div>

Image3

Now lets used bootstrap by installing it through NPM Install follow below given steps

npm install --save bootstrap
npm install --save jquery

Check both the packages Bootstrap and jQuery dependencies are added to the package.json file.

After both packages have been installed successfully the jQuery and Bootstrap files can be found at:
node_modules/jquery/dist/jquery.min.js
node_modules/bootstrap/dist/css/bootstrap.min.css
node_modules/bootstrap/dist/js/bootstrap.min.js

Now there are three ways to add bootstrap to your projects
Method 1:- Adding Bootstrap 4 to Angular Using angular.json

node_modules/bootstrap/dist/css/bootstrap.css in the projects->architect->build->styles array,
node_modules/bootstrap/dist/js/bootstrap.js in the projects->architect->build->scripts array,

"styles": [
"src/styles.css",
"./node_modules/bootstrap/dist/css/bootstrap.css"
],
"scripts": [
"./node_modules/jquery/dist/jquery.js",
"./node_modules/bootstrap/dist/js/bootstrap.js"
]

Image4

Method 2: - Adding Bootstrap 4 to Angular 10 Using index.html as we did above but this time we will give relative path to the html.

Open the src/index.html file and add the following:

A <link> tag for adding the bootstrap.css file in the <head> section,
A <script> tag for adding the jquery.js file before the closing </body> tag,
A <script> tag for adding the bootstrap.js file before the </body> tag.

'<!doctype html>
'<html lang="en">
'<head>
'<meta charset="utf-8">
'<title>Angular Bootstrap 4 Examples'</title>
'<base href="/">
'<meta name="viewport" content="width=device-width, initial-scale=1">
'<link rel="icon" type="image/x-icon" href="favicon.ico">
'<link rel="stylesheet" href="../node_modules/bootstrap/dist/css/bootstrap.css">

'</head>
'<body>
'<app-root>'</app-root>
'<script src="../node_modules/jquery/dist/jquery.js">'</script>
'<script src="../node_modules/bootstrap/dist/js/bootstrap.js">'</script>
'</body>
'</html>

Method 3: - Adding Bootstrap 4 to Angular Using styles.css

Open the src/styles.css file of your Angular project and import the bootstrap.css file as follows:
/* You can add global styles to this file, and also import other style files */
@import "~bootstrap/dist/css/bootstrap.css"