Thursday, September 22, 2022

Spring AOP with simple Example

 Note: We are using STS as IDE you can use any your favrouite IDE.

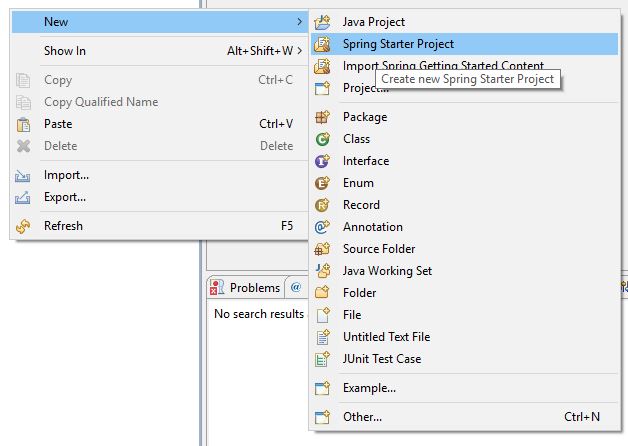
First create a simple SpringBoot application as showb below

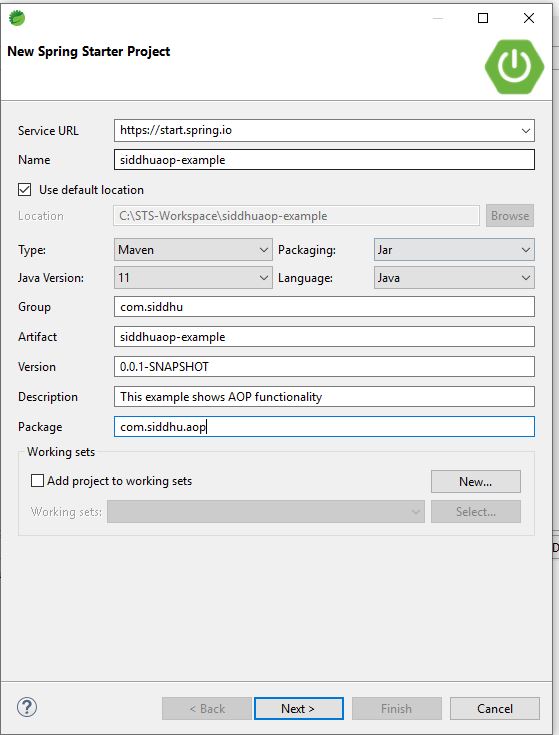
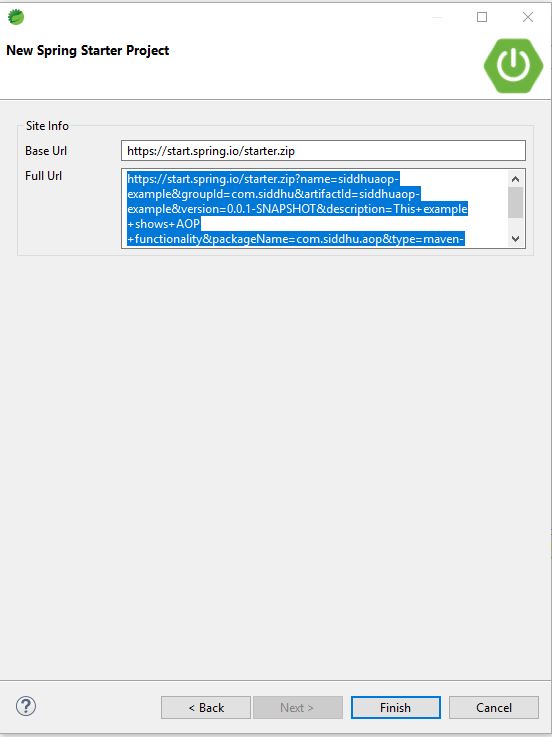
https://start.spring.io/starter.zip?name=siddhuaop-example&groupId=com.siddhu&artifactId=siddhuaop-example&version=0.0.1-SNAPSHOT&description=This+example+shows+AOP+functionality&packageName=com.siddhu.aop&type=maven-project&packaging=jar&javaVersion=11&language=java&bootVersion=2.7.3

Now lets add the AOP dependecies in pom.xml as given below.

<dependency>
			<groupId>org.springframework</groupId>
			<artifactId>spring-aspects</artifactId>
		</dependency>

Pom.xml

<?xml version="1.0" encoding="UTF-8"?>
<project xmlns="http://maven.apache.org/POM/4.0.0"
	xmlns:xsi="http://www.w3.org/2001/XMLSchema-instance"
	xsi:schemaLocation="http://maven.apache.org/POM/4.0.0 https://maven.apache.org/xsd/maven-4.0.0.xsd">
	<modelVersion>4.0.0</modelVersion>
	<parent>
		<groupId>org.springframework.boot</groupId>
		<artifactId>spring-boot-starter-parent</artifactId>
		<version>2.7.3</version>
		<relativePath /> <!-- lookup parent from repository -->
	</parent>
	<groupId>com.siddhu</groupId>
	<artifactId>siddhuaop-example</artifactId>
	<version>0.0.1-SNAPSHOT</version>
	<name>siddhuaop-example</name>
	<description>This example shows AOP functionality</description>
	<properties>
		<java.version>11</java.version>
	</properties>
	<dependencies>
		<dependency>
			<groupId>org.springframework.boot</groupId>
			<artifactId>spring-boot-starter</artifactId>
		</dependency>
		<dependency>
			<groupId>org.springframework</groupId>
			<artifactId>spring-aspects</artifactId>
		</dependency>
		<dependency>
			<groupId>org.springframework.boot</groupId>
			<artifactId>spring-boot-starter-test</artifactId>
			<scope>test</scope>
		</dependency>
	</dependencies>

	<build>
		<plugins>
			<plugin>
				<groupId>org.springframework.boot</groupId>
				<artifactId>spring-boot-maven-plugin</artifactId>
			</plugin>
		</plugins>
	</build>

</project>

Now lets create a compoenent class and call it in our main springboot application like below

package com.siddhu.aop;

import org.springframework.stereotype.Component;

@Component
public class siddhucomponent {

	public void showLog()
	{
		//log
		//security
		//transaction
		System.out.println("From SiddhuComponent class");
	}
}


package com.siddhu.aop;

import org.springframework.boot.autoconfigure.SpringBootApplication;
import org.springframework.context.annotation.AnnotationConfigApplicationContext;

@SpringBootApplication
public class SiddhuaopExampleApplication {

	@SuppressWarnings("resource")
	public static void main(String[] args) {
		//SpringApplication.run(SiddhuaopExampleApplication.class, args);
		// Annotation based spring context
		AnnotationConfigApplicationContext context	= new AnnotationConfigApplicationContext();
		context.scan("com.siddhu.aop");
		context.refresh();
		siddhucomponent objsiddhucomponent = context.getBean(siddhucomponent.class);
		objsiddhucomponent.showLog();
	}

}

now when we run the class we will get output as

12:43:49.937 [main] DEBUG org.springframework.jmx.export.annotation.AnnotationMBeanExporter – Autodetecting user-defined JMX MBeans
From SiddhuComponent class

Now generally in our class we have some common code i.e. logging, security and transaction which we can say an cross cutting consern we can either add this number of line in all the method but that is not good way of coding additional we can create a class and create a method in it with this common code i..e log(), security() and transaction() and then create an instance of this class and add in all the class ..but as said again this is not a good practise so best is to use the concept of AOP like given below

Before using this concept we need to understand some annotation i.e.

cross cutting concern :- This are the common line of code that we are planning to move from all main class to this @aspect class
Advice:- this annotation says when we want to do the things i.e before after etc.
pointcut:- this show on which method this need to be executed.

lets create a component class with Aspect behaviour as shown below

package com.siddhu.aop;

import org.aspectj.lang.annotation.Aspect;
import org.aspectj.lang.annotation.Before;
import org.springframework.stereotype.Component;

//cross cutting concern :- This are the common line of code that we are planning to move from all main class to this @aspect class 
//Advice:- this annotation says when we want to do the things i.e before after etc.
//pointcut:- this show on which method this need to be executed.

@Component
@Aspect
public class siddhuhelperaop {


	public void log()
	{
		System.out.println("called fom siddhuhelperaop");
	}

}

Now we need to add advice and point cut this can be done with belwo line above the cross cutting consern method log()

@Before(“execution(public void showLog())”)

so the final aspect class will be

package com.siddhu.aop;

import org.aspectj.lang.annotation.Aspect;
import org.aspectj.lang.annotation.Before;
import org.springframework.stereotype.Component;

//cross cutting concern :- This are the common line of code that we are planning to move from all main class to this @aspect class 
//Advice:- this annotation says when we want to do the things i.e before after etc.
//pointcut:- this show on which method this need to be executed.

@Component
@Aspect
public class siddhuhelperaop {

	@Before("execution(public void showLog())")
	public void log()
	{
		System.out.println("called fom siddhuhelperaop");
	}

}

Now lets run the applicaiton one more time and you will see this output.

12:56:50.989 [main] DEBUG org.springframework.jmx.export.annotation.AnnotationMBeanExporter – Autodetecting user-defined JMX MBeans
called fom siddhuhelperaop
From SiddhuComponent class

This shows that our common concern of loggin is called as per the AOP aspect using before advice and pointcut method showLog() this was we can add other security , transaction etc aspect to the project without touching the main bussiness logic.

you can download the code from below locations.
https://github.com/shdhumale/siddhuaop-example.git

Thursday, September 15, 2022

IPFS protocol and its uses in Blockchain concept using Solidity language with Ethereum along with Web3storage.

 IPFS also know as InterPlanetary File System a A peer-to-peer hypermedia protocol. Generally in centralize application we keep all the data in one DB or multiple DB that is hosted on some perticular IP/DNS name and exposed on some perticular port.IPFS is a distributed file system protocol it was created in 2015 by joan bennett its development is managed by a company called protocol labs IPFS is written in goleng and this is its repo on github https://github.com/ipfs.

But when we talk about decentralize entvironment like working with Block chaing concept using Centralize DB can by pass our all the aspect of
distribution behaviour, decentralize concept, concense acceptance , highly availability and immutaibility.More information can be found on https://IPFS.tech/

While using Solidity language for Ethereum platform if we want to store a file or large data we can do it on Blockchain as in therory we can store any thing in block chain. But doing this is not practically accepted. Each opreation that needed to be done on block chaing need some gas prise. More the storage and access more the Gas price. So in general when we deal with DB structure working with Block chain concept we prefer decentralize db like BigBlock , Cassandra but again setting them and maintaining them itself is huge operation in terms of resource and finance.

Here comes the benefit of IPFS system. Lets try to understand what IPFS protocol says on about its implemention.

So as said earlier storing data on the blockchain is expensive and for that reason blockchain application store large files on centralized servers but with a project called IPFS we can have both decentralization and an inexpensive storage. The IPFS network is composed of computers that run a software called the IPFS client. We can participate in the IPFS network either as an IPFS node that runs the IPFS client or as the user of the network to store and retrieve files. We can store any kind of file text music video images which can be very useful for NFTS for example contrary to http with IPFS the data is not tied to any location i.e. not the specific url https://dnname/filename.
but to content i.e. only hashcode values when you upload a file to IPFS you get a hash representing the content this hash uniquely identifies the content and can be used to retrieve the file if you upload another file its hash will be completely different and to make sure a file wasn’t altered you can always recompute the hash of the file locally and make sure it matches the original IPFS hash. With http a file is downloaded from one server at a time but with IPFS a file is downloaded from multiple nodes at once this allows to save up to 60 of bandwidth to retrieve a file there are two options either you use http urls provided by the IPFS gateway accessible with any web browser or you use IPFS urls which require to have access to an IPFS node and currently only the brave browser can understand these urls.

Let’s take a look at how IPFS stores files and makes them accessible to others. Files are stored inside IPFS objects and these objects can store up to 256kb worth of data and can contain links to other IPFS objects. In simple word if we want to store “Hello World” text file, which is very small, can be stored in a single IPFS object.

But what about files larger than 256kb? i.e. an image or video for instance. Those file are splited up into multiple IPFS objects that are all 256kb in size and afterwards the system will create an empty IPFS object that links to all the other pieces of the file.

Additional IPFS uses content based addressing, once something is added, it cannot be changed anymore. It’s an immutable datastore much like a blockchain. But then how do you change stuff/update the content on it? For this IPFS supports versioning of your files. Let’s say you’re working on an important document that you want to share with everyone over IPFS. When you do that, IPFS will create a new “Commit object” for you. It just tells IPFS which commit went before it and it links to the IPFS object of your file. Now let’s imagine that after a while you want to update this file.
Well, you just add your updated file to the IPFS network and the software will create a new commit object for your file. This commit object now links to the previous commit. IPFS will make sure that your file, plus it’s entire history is accessible to the other nodes on the network.

IPFS is not a blockchain and there is no guarantee of data availability if you want to make sure your data will be available you can either run your own IPFS node pay a node operator to store your data long term that’s what we call pinning or even most simple use an api that manages the pinning for you like web3 storage website https://web3.storage/
storage was created by protocol labs the company that created IPFS and it’s one of the most simple api for IPFS it exposes a classic http api to store pin and retrieve files from IPFS and it does the pinning for free and if you want to know more about web3 storage.

Now lets try to install IPFS on our sytem and access it using inbuild web ui.

desktop :-
https://docs.ipfs.tech/install/ipfs-desktop/
Command Line:-
https://docs.ipfs.tech/how-to/command-line-quick-start/
Companion:-
https://docs.ipfs.tech/install/ipfs-companion/
cluster:-
https://ipfscluster.io/

As we are using windows we will us windows download

https://github.com/ipfs/ipfs-desktop/releases

https://github.com/ipfs/ipfs-desktop/releases/download/v0.23.0/IPFS-Desktop-Setup-0.23.0.exe

Now lets try to add one small txt files in the desktop

You can copy CID from here for that files which can be used by user in IPFS system to access it.

CID = Qmbe7BChFBj9Q5vKBKp25pQdyQ8vDSerGPgbBYAfa7XGYn

you can also refer to this “How IPFS works” on this url https://IPFS.tech/

when we add extension in chrome we get this screen

You can stop your desktop using below steps

Now lets try to perform some operation on IPFS local host using java script i.e. additing file and accessfile.
refer to the below url for more information :-

https://docs.ipfs.tech/reference/

Turial for more information :- https://proto.school/tutorials?course=ipfs

But now lets try to do it by our self using java script

https://ipfs.tech/#install

https://js.ipfs.tech/

using above site you will find the ready made code to run and execute in browser or using node.js

Now lets check https url if they are giving the right data.

https://ipfs.io/ipfs/QmPq2aiZNHJxP3LFDsK3oXjkV64rKnxF4SsRiBEYhq7DZN

let try the same using cli command line

Go this url and downlaod the packages

https://dist.ipfs.tech/#kubo

extract the packages and you will find ipfs command in it. Add this to you path environment variable.

now execute the below command onthe cmd prompt and you will get the result using ipfs command line

Now lets try to use our web3storage to store the if you want to have a decentralized storage for your web 3 application ipfs is a great choice but it’s not easy to use with the web 3 storage api you can easily upload files to ipfs with a simple rest api for that we have web 3 storage api. Before we introduce web3 storage we need to talk of protocol labs. This protocol labs is an open source rnd lab it’s the team behind ipfs file coin and web3 storage ipfs is a decentralized file system in ipfs there is a network of nodes which stores data anybody can store and retrieve data from this network when you store data the content is retrievable thanks to the hash of the data this way clients can check that the data they get has not been altered even though ipfs is decentralized it’s not a blockchain there is no guarantee of data availability if you want to make sure that your data is available you either have to run your own ipfs node or pay another ipfs node to pin your data and this leads us to filecoin the next project created by protocol labs filecoin is a decentralized storage market built on top of ipfs technically it provides a protocol to incentivize ipfs nodes to pin your data by paying them with FIL token the token of filecoin this is a market and the bigger the demand for storage the higher the price of storage and conversely filecoin is great but it’s still too low level for application developers who just want an easy solution for storing data on ipfs and that’s why we need to go one level higher and talk about web 3 storage.

Web3storage is an api to store your data on ipfs it’s built on top of ipfs and filecoin. With ipfs it provides decentralized storage and with a filecoin it provides data persistence and all of this accessible with a simple http api no need to get into the details of a file coin or the ipfs protocol web3storage also provides data redundancy by storing your data on several ipfs nodes and it’s completely free and it allows 1TB data to be uploaded.

https://web3.storage/

If you are running your ipfs companion plugin in that case you will get this belwo url.

http://web3.storage.ipns.localhost:8080/

so this section we’re going to upload files to ipfs very easily by using web3 storage and for that we are going to follow their quick start tutorial

https://web3.storage/docs/

Follow the below step religiously

Step1 :- your first task will be to create a free account on web3 storage so you go to their website you click on login and you create a new account so you can use your email or directly login with github is even faster

Once you logged in you will be redirected to your dashboard

create an api token as given below by providing name

Copy the created token now lets try to use this in our programing language to upload and download the files. we are going to use node as ready made code is available on the site for the same :).

Create a folder web3storageexample and open VSCODE as editor .you can use any editor which you like.

Create a file called put-files.js and paste in the following code:

1
2
3
4
5
6
7
8
9
10
11
12
13
14
15
16
17
18
19
20
21
22
23
24
25
26
27
28
29
30
import process from 'process'
import minimist from 'minimist'
import { Web3Storage, getFilesFromPath } from 'web3.storage'
 
async function main () {
  const args = minimist(process.argv.slice(2))
  const token = args.token
 
  if (!token) {
    return console.error('A token is needed. You can create one on https://web3.storage')
  }
 
  if (args._.length < 1) {
    return console.error('Please supply the path to a file or directory')
  }
 
  const storage = new Web3Storage({ token })
  const files = []
 
  for (const path of args._) {
    const pathFiles = await getFilesFromPath(path)
    files.push(...pathFiles)
  }
 
  console.log(`Uploading ${files.length} files`)
  const cid = await storage.put(files)
  console.log('Content added with CID:', cid)
}
 
main()

Create another file called package.json and paste in the following code:

1
2
3
4
5
6
7
8
9
10
11
12
13
14
15
16
{
    "name": "web3storageexample",
    "version": "0.0.0",
    "private": true,
    "description": "Get started using web3.storage in Node.js",
    "type": "module",
    "scripts": {
        "test": "echo \"Error: no test specified\" && exit 1"
    },
    "dependencies": {
        "minimist": "^1.2.5",
        "web3.storage": "^3.1.0"
    },
    "author": "Siddharatha Dhumale",
    "license": "(Apache-2.0 AND MIT)"
}

Save both files, and then run npm install from your project folder:

npm install

now create a simple txt file which we neee to upload using below command

Now run below command to upload files

1
2
3
4
5
6
7
8
node put-files.js --token=<YOUR_TOKEN> ~/filename1 ~/filename2 ~/filenameN


PS C:\ipfs-workspace\web3storageexample> node put-files.js --token=<your api token> ./siddhuweb3storage.txt
Uploading 1 files
Content added with CID: bafybeiaag56c7xlngirbmv6w5laycs6st6sac2m62y67lvs7ziwb6ypf2y
PS C:\ipfs-workspace\web3storageexample>

Now go to site and check if the file is uploaded