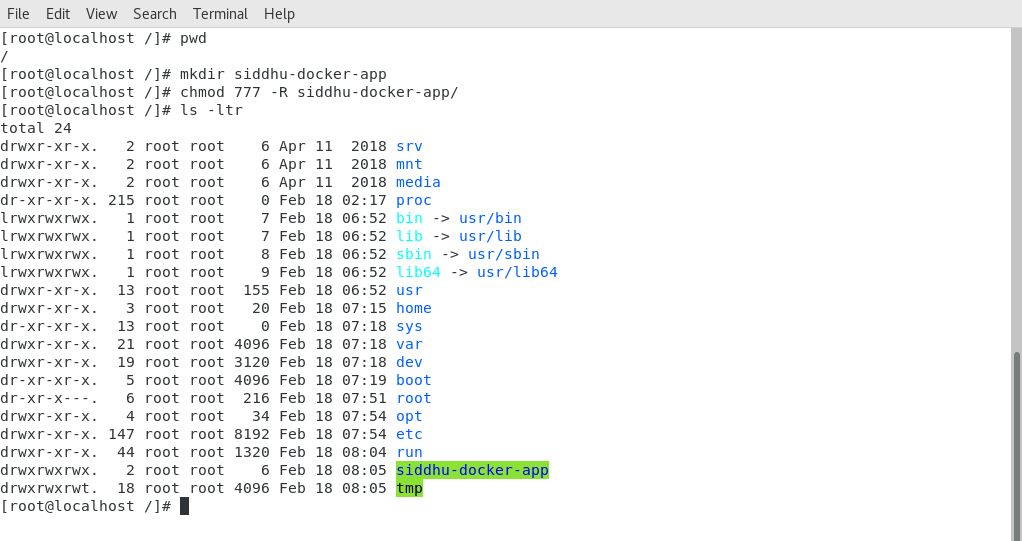
Thursday, February 27, 2020

Creating simple Docker File / Docker image and Docker container to execute hello world

1- Create folder
mkdir siddhu-docker-app
2- Provide all rights to this folder
chmod 77 -R siddhu-docker-app
Image1
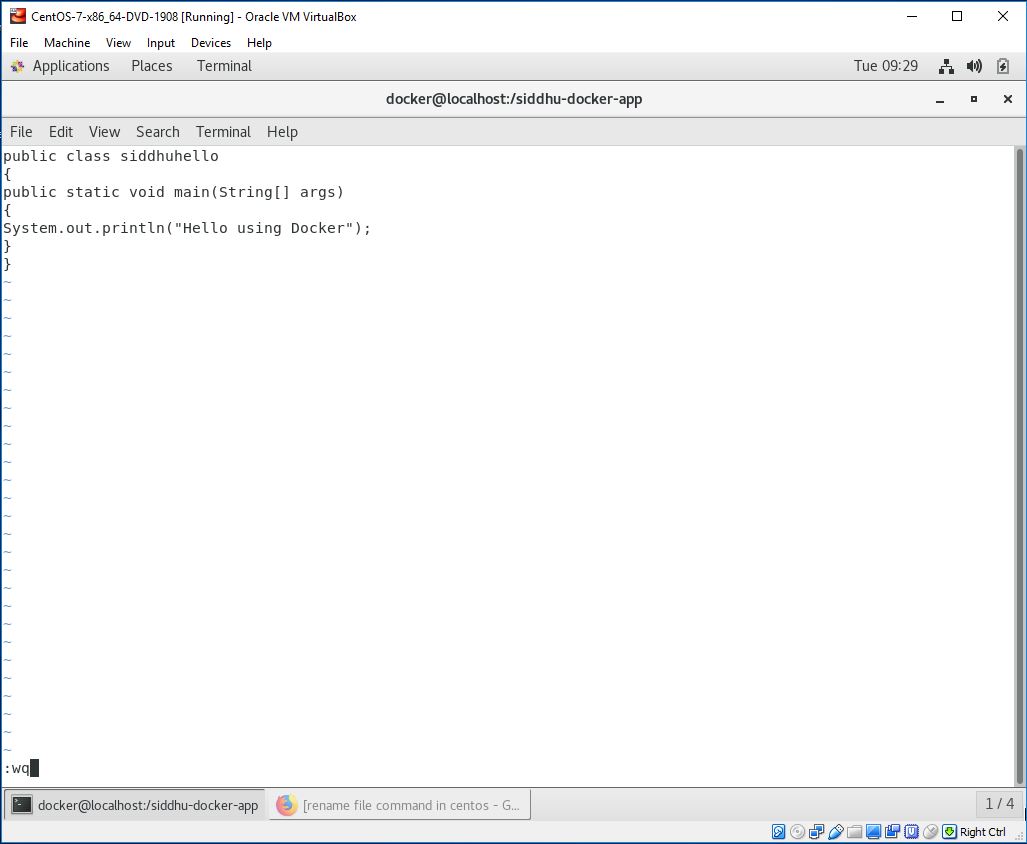
3- Create simple helloworld java programe
class sidduhello{
public static void main(String[] args){
System.out.println("Hello from using Docker");
}
}
Save it inside the directory siddhu-docker-app as sidduhello.java.
Image2Image3
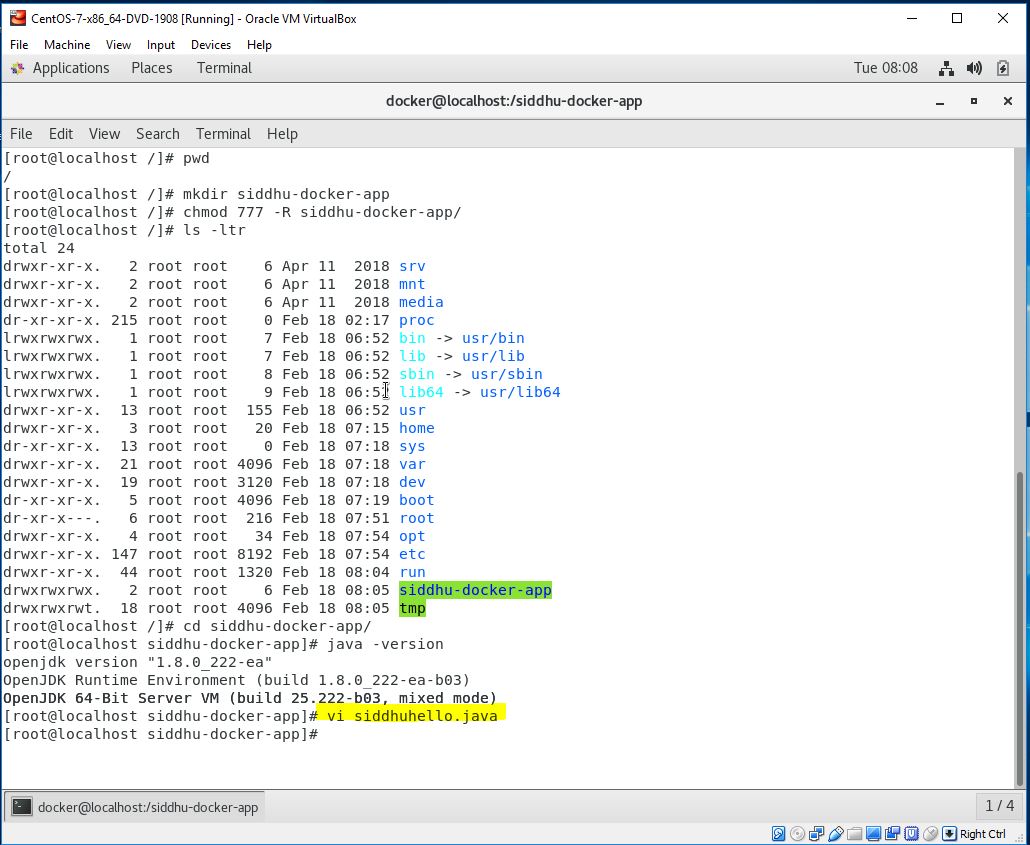
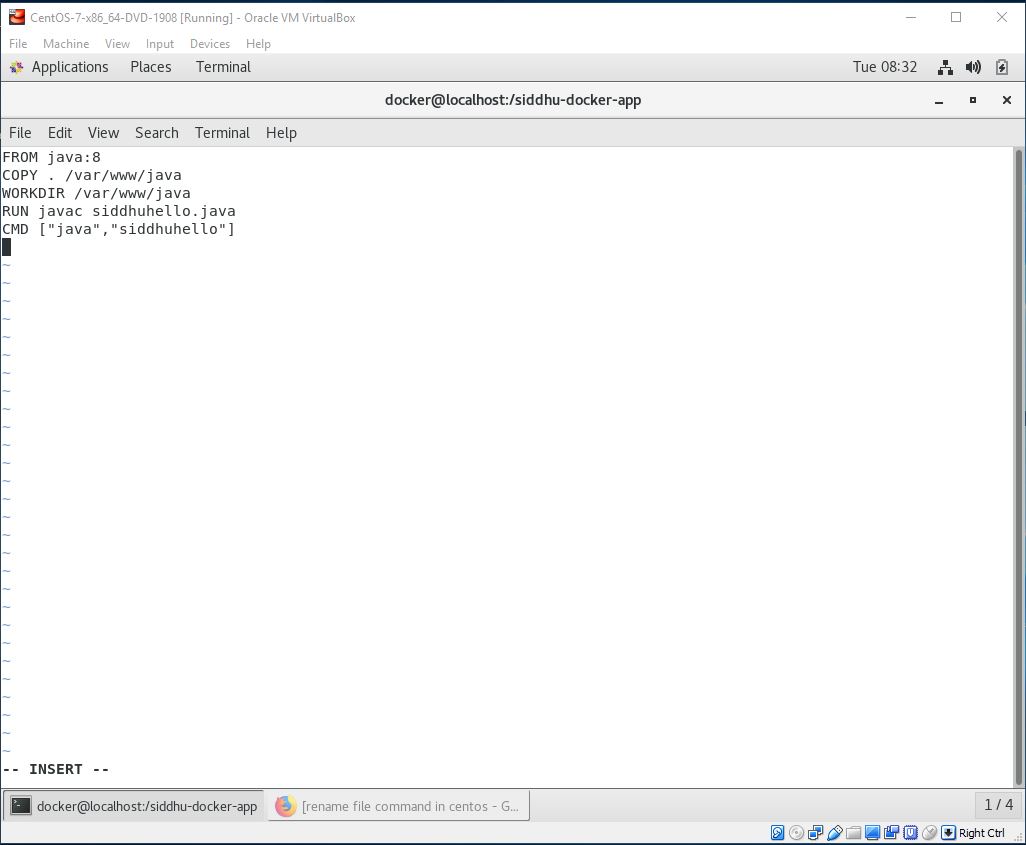
4- Lets Create a Dockerfile with name as "Dockerfile"
Dockerfile contains instructions for the Docker. It did not have any file extension.
// Start of Dockerfile text
FROM java:8
COPY . /var/www/java
WORKDIR /var/www/java
RUN javac sidduhello.java
CMD ["java", "sidduhello"]
// End of Dockerfile text
Note:- Write all instructions in uppercase because it is convention.
Image4
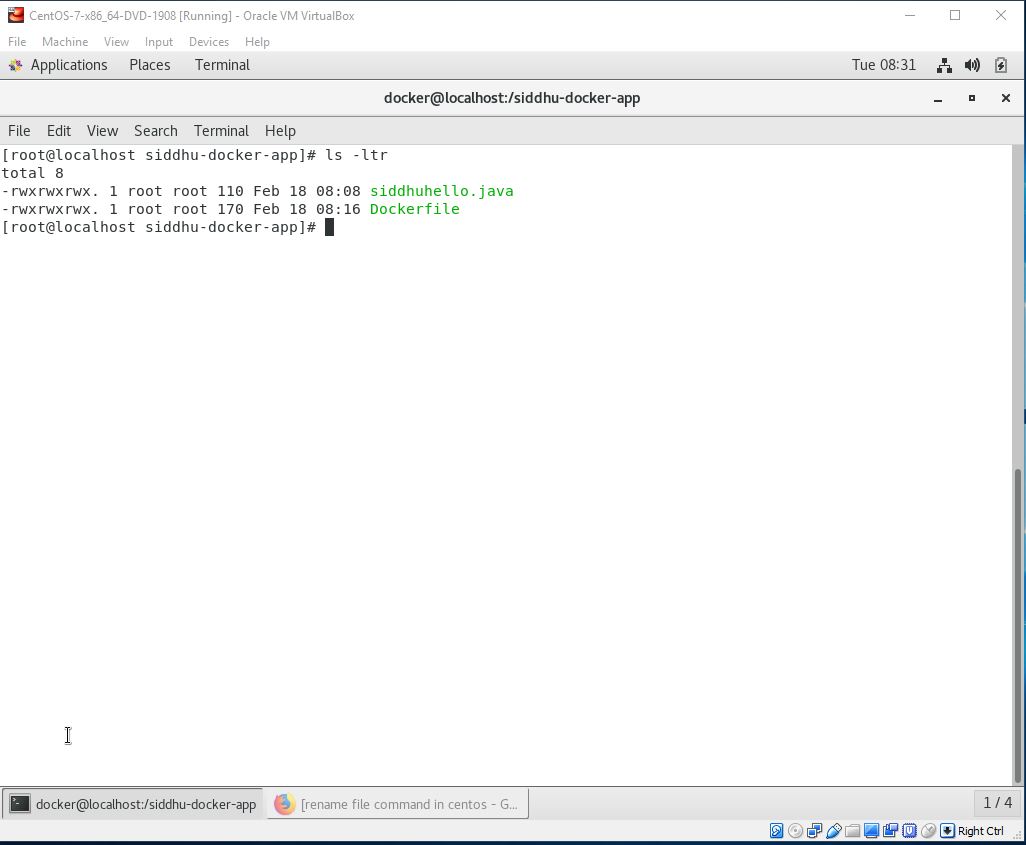
Now make sure to have our both files i.e. Dockerfile and sidduhello.java in out siddhu-docker-app directory.

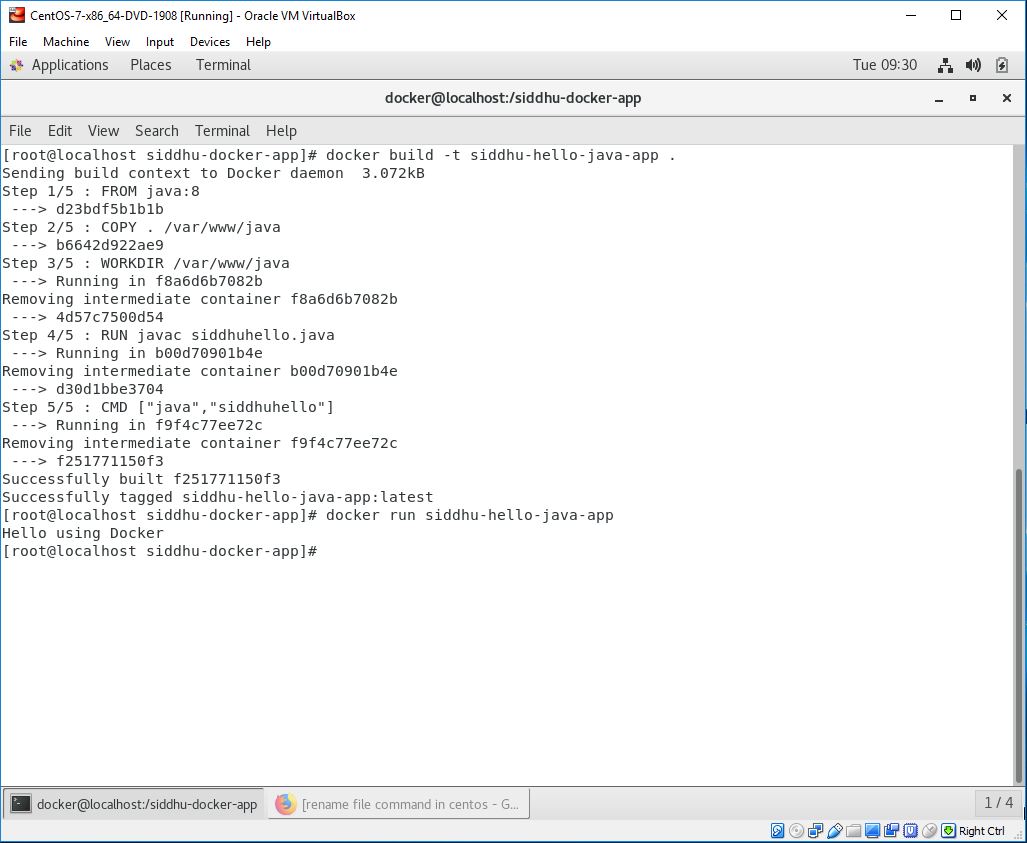
5- Lest Build Docker Image
After creating the docker Files we need to create the docker images.Docker image contains all the code+lib+class+packages etc that is required to be executed in docker containers.
Now change the working directory i.e. move inside our siddhu-docker-app folder
Give chmod 777 to both these file as shown below
Image5
Execute below command
docker build -t siddhu-hello-java-app .

Descriptions:-
docker:- this command tell installed docker progrmae to take some action
build :- This command is used to create the Images
siddhu-hello-java-app :- This is the name of the images and its upto you what name you want to give.
. :- final dots say that docker files which need to be used to create image is located in the current directory
Image6
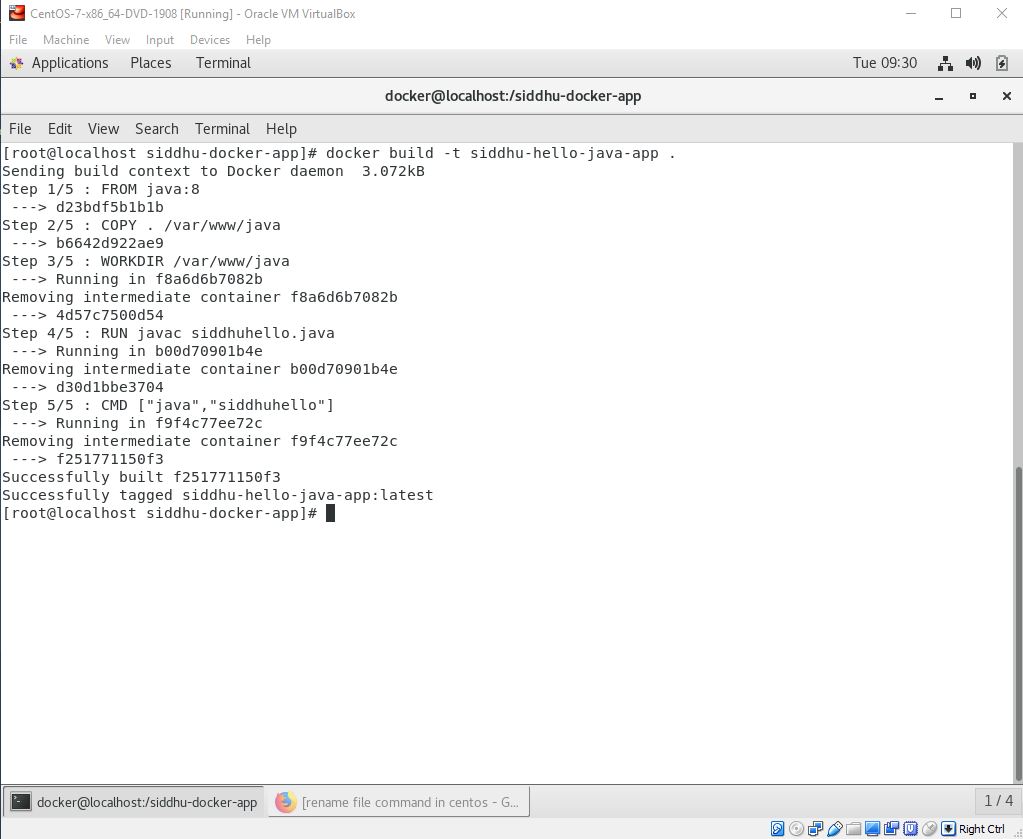
After successfully building the image. Now, we can run our docker image.
6- Now lets Run Docker Image
Once the docker image is build this can be taken as the core file to build docker container.
docker run siddhu-hello-java-app
Image7
In general practise Docker Images are huge in size so Devops engineer chose the option to download the docker files from Docker hub/Git hub using Jenkin and then using installed docker on the respective machine build docker files from it. And as on when required we execute this file using run command to create Docker container

There are many commands in Docker but most of the time you will be working on following commands

1- Start
2- Stop
3- Pull
4- Push
5- PS
6- PS all
7- log
8- exec -it
9- rm
10- rmi
11- image

Wednesday, February 26, 2020

Docker in simple terms

Docker is a tool designed to make it easier to create, deploy, and run applications by using containers. Containers allow a developer to package up an application with all of the parts it needs, such as libraries and other dependencies, and deploy it as one package.
Now we might think why we need Docker concept. Lets take simple example. We have a shooing web application which has the aspect such as login/security, product catalog, Account Service, Cart Server and order Server. In best practice we prefer to have micro service either build on Spring BOOT or other frame work. Micro-service has its own modeler benefits. now to run this in real environment we would have
1- Host machine
2- Many Virtual Machine to start/setup individual micro-service i.e. one for each Micro-service login/security, product catalog, Account Service, Cart Server and order Server.
Image1
But in above scenario there is lost of memory, space , ram, resource as every Micro-service consume one virtual machine. To over come this we have the concept of Docker
Image2


As you see above now our all Micro-server is kept in Docker Container which run on the one single Virtual Machine. Due to this docker container now the micro-service did not need to reboot individual but only one VM need to boot and all service are ready to operate ... additional benefits are they did not waste RAM as now only one Virtual machine is there its same ram is shared with other Micro-service instance.
To understand Docker we need to know following below points.
1- Docker Files:- A Dockerfile is a text document/file that contains all the commands a user could call on the command line to assemble/build an image.The docker "build command" builds an image from a Dockerfile and a CONTEXT. The build’s CONTEXT is the set/collections of files at a specified location PATH or URL. The PATH is a directory on your local file-system. The URL is a Git repository location. A CONTEXT is processed recursively.
2- Docker Image :- This is file created from Docker files. It is used to execute code in docker container. A Docker image includes the elements needed to run an application as a container -- such as code, config files, environment variables, libraries and run time. If the image is deployed to a Docker environment it can then be executed as a Docker container. The docker run command will create a container from a given image. Command example
docker run hello-world
docker => this command ask installed docker to take some action
run => use to inform docker to execute image with name as hello-world and finally run execute and create hello-world container.

3- Docker Container -
- This is Rum time instance of docker file
- It is Light weight alternative of virtual machine
- It did not need ram
- It did not need to boot
- Its use host O/S.
- It did not use huge hard disc
- It is also important to note that containers differ from virtual machines (VMs), which encapsulate an entire OS with the executable code atop an abstraction layer from the physical hardware resources.
4- Docker hub - cloud base repository for storing docker images. it has both public and private repository.
5- docker files -->docker images --> docker hub --> different system download the docker images from Hub and build the environment for it.
6- Docker images are huge in size so general practice is to have docker file on docker hub or git hub and then jenkin CI server take it from there and build docker images and then docker container from it finally deploy it on different server.
7- Docker Components
- Docker Register -> storage of docker images.either on public or private repository, local or cloud, git

8- Install docker
- first install prerequisite
- second install docker-engine
- start docker engine
- download centos image from docker hub
- run centos docker iamge and create centos docker container.
9- Docket compose:- it help to run the different docker container in a single command. rather than executing single individual command to run sepearate docker container we will have one docker compose and when we run this docker compose it will run different docker container in the sequence we want. This are written in YAML files.
Installation of Docker and Docker-compose

1- follow below steps
Steps
1- sudo yum install -y yum-utils device-mapper-persistent-data lvm2
2- sudo yum-config-manager --add-repo https://download.docker.com/linux/centos/docker-ce.repo
3- sudo yum install docker-ce
4- sudo usermod -aG docker $(whoami)
5- sudo systemctl enable docker.service
6- sudo systemctl start docker.service

2- Then check docker is installed properly using below command
docker info
docker run hello-world

3- Finally install docker-compose use below steps
curl -L "https://github.com/docker/compose/releases/download/1.23.2/docker-compose-$(uname -s)-$(uname -m)" -o /usr/local/bin/docker-compose
chmod +x /usr/local/bin/docker-compose
ln -s /usr/local/bin/docker-compose /usr/bin/docker-compose
4- Check if docker-compose is installed using below command
docker-compose --version
Reference
https://github.com/NaturalHistoryMuseum/scratchpads2/wiki/Install-Docker-and-Docker-Compose-(Centos-7)

https://www.hostinger.in/tutorials/how-to-install-docker-compose-centos-7/

Wednesday, February 05, 2020

Starting Apache FTP Server on window machine

1- download the appache server
https://mina.apache.org/ftpserver-project/downloads.html

2- Modify below things in as shown in below figure
C:\apache-ftpserver-1.1.1\apache-ftpserver-1.1.1\res\conf\users.properties
Image1
below folder will tell the FTPClien that this will be by default folder where we can do the operation
ftpserver.user.anonymous.homedirectory=C:\\Test_New

3- Make sure to add this tag inside
C:\apache-ftpserver-1.1.1\apache-ftpserver-1.1.1\res\conf\ftpd-typical.xml
Image2
<file-user-manager file="./res/conf/users.properties" encrypt-passwords="true"/>
This will make sure that password field which we mapped with user.properties as in encrypted mode.

3- No we are ready to connect to Apache FTP Server.
Start the server using following below command
C:\apache-ftpserver-1.1.1\apache-ftpserver-1.1.1\bin>ftpd.bat res/conf/ftpd-typical.xml
Using XML configuration file res/conf/ftpd-typical.xml...
FtpServer started

4- Connect using Filezilla or winscp. I am using WINSCP
Image3Image4

Note:By default the user id and password for apache ftp is admin admin