REST is wellknow and framework to access data from remote and in used extensively in the market. However REST has it own drawback when used extensively.
1- Using REST frame work we have one to one mapping of Resource and its data i.e. if we want to have the information such of user having specific product and available in which country. For this example we need to make three REST call
A- One for User data
B- One for Product Data
C- One of in which country it is available
Additional we will fetch many other information in all above call which is not needed i.e.
User Data:- id,name,address, etc
Product:- id, name, specification etc
Country:- id, name , states, pin code etc.
Now if you see our requirement we need
- User Name + Product Name + Coountry in which they are avaialble
For old traditional REST call we will have three call and then on each call we have to iterate and manupulate the response and then fetched the required value. Of course this will work but imagine if you have less network bandwidth, more request etc in that case for every user to get this information making three call is not justifiable.
So best approach would be to have only one url and some how you send the information i.e. in query form to the server that will automatically understand what is needed and gives you the data. For this purpose Graphql is developed by face book.
Old REST Call
Client -- 3 URL to fetch the data--> USER REST1, PRODUCT REST2, COUNTRY REST3
GraphQL
Client --Single URL--> query the data and server send the response the data as per request.
'- In short GraphQL is Modified or Enhance REST. Benefits are
'- No extra call i.e. in REST three call for user name, User Posts[], User Followers[]
'- Take only that value which is needed so less traffics and work in less band width.
'- Single One call and point of contact to make query.
'- Argument base and run time query
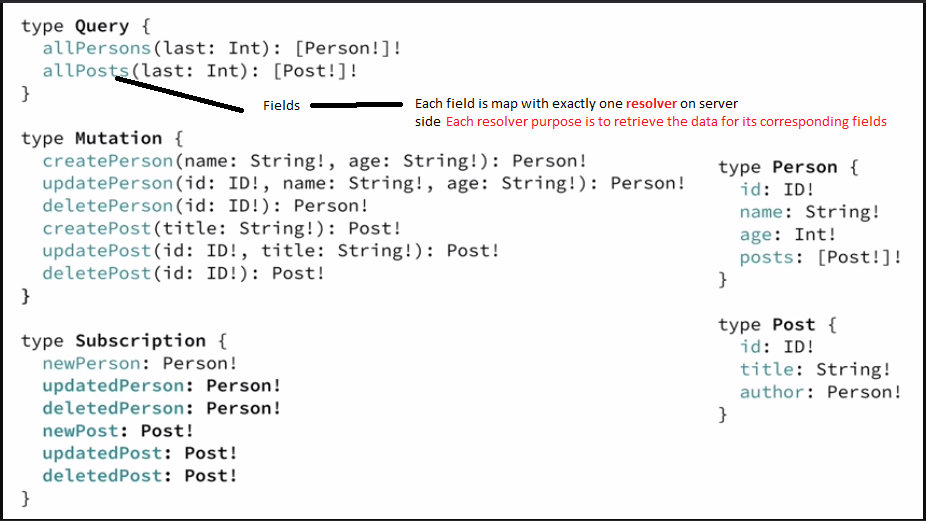
It follows Schema base architecture and support SDL- Schema Development Language to develop Schema.
Schema :- Collection of Type and developed using Schema definatin language.
Three main root type of schema
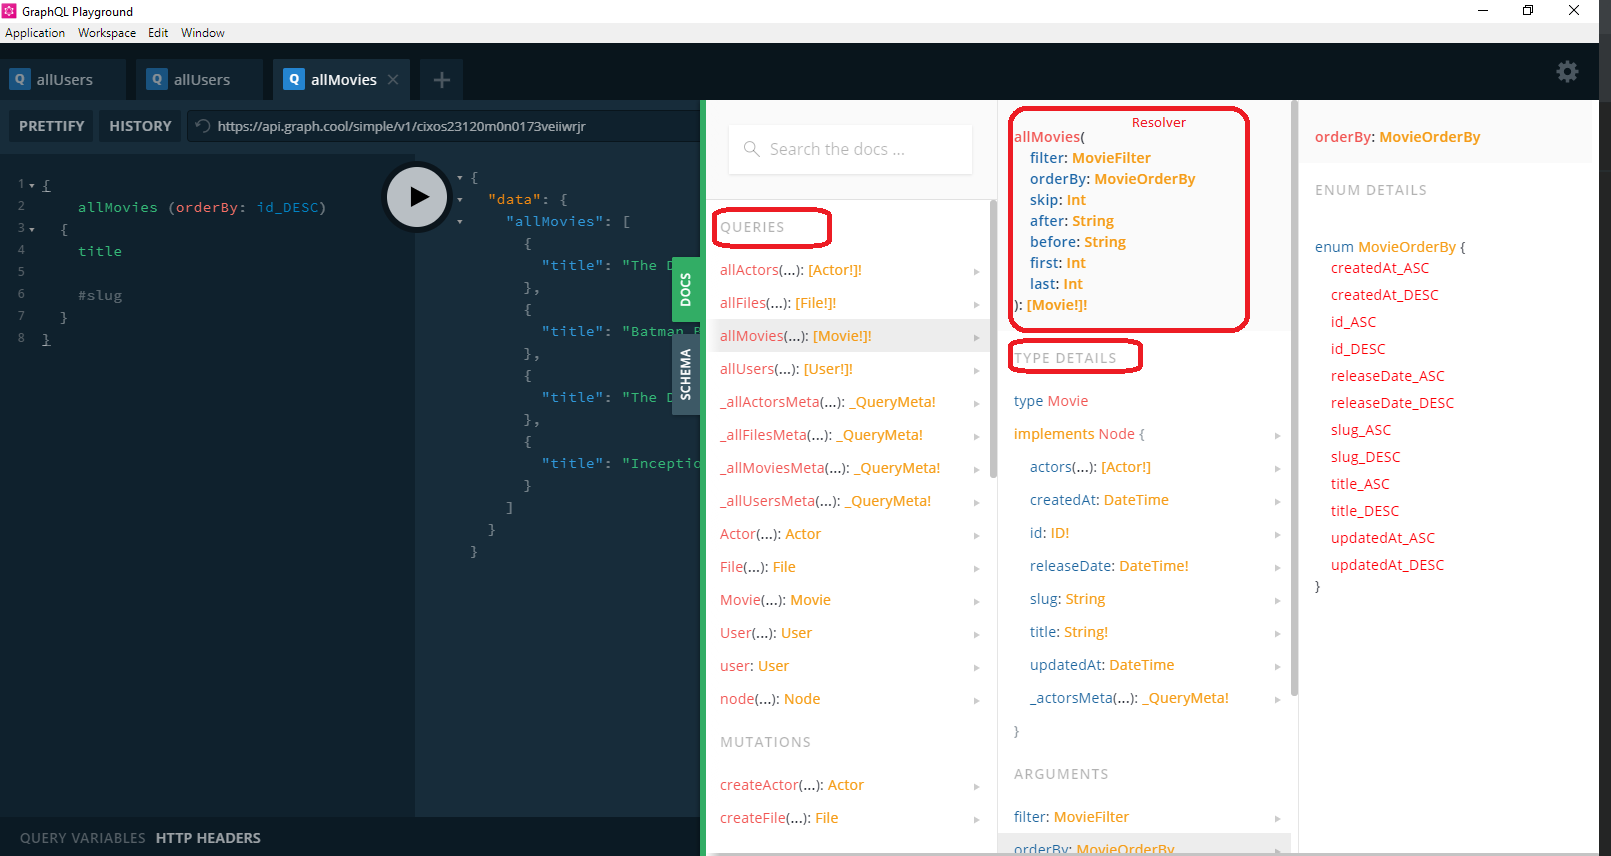
1- Query :- To fetch data
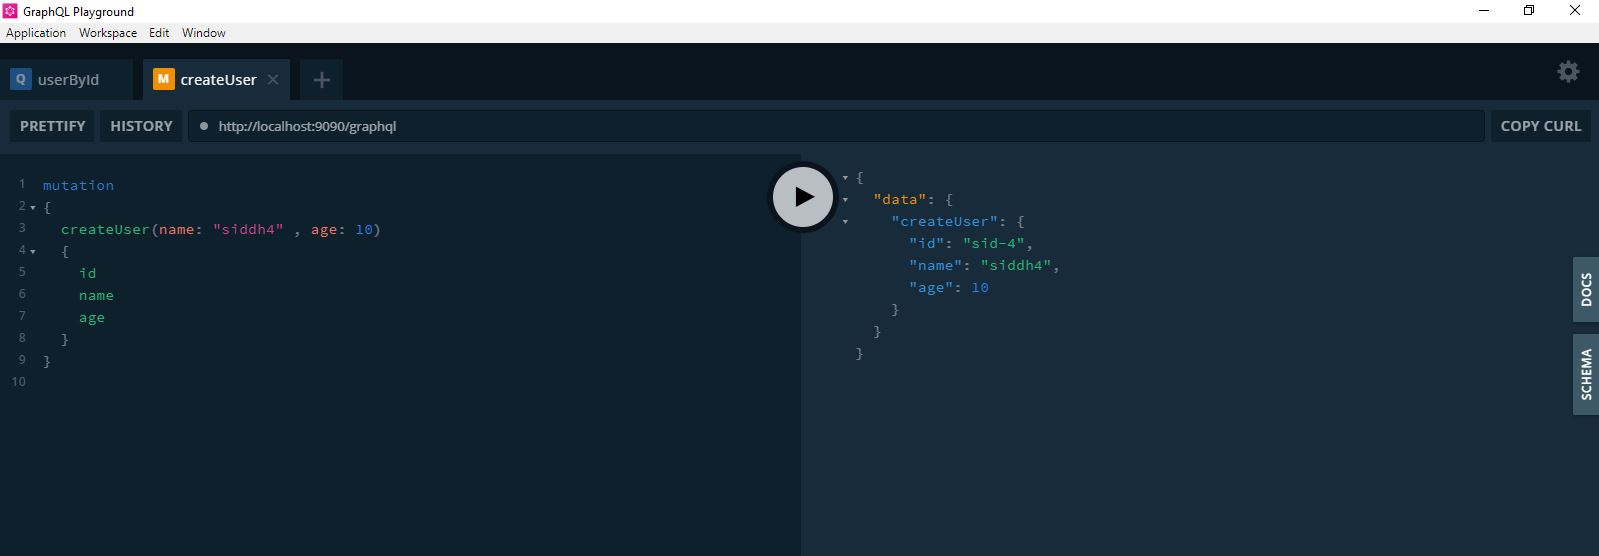
2- Mutation :- To perform Create, Update and Delete operations.
3- Subscription :- To get auto response from Server on certain change on data
For more details please refer to the below sites
https://graphql.org/learn/
short way to learn :- https://www.howtographql.com/
After reading above url you will be clear about GraphQL.
Now question here is how to implement GraphQL
1- We should have a GraphQL server which will expose the data need by the query
2- Client that send the data to the GraphQL
GraphQL server can be made with many languages please refer to the below given url
https://graphql.org/code/
We will try to build GraphQL Server using JAVA and you can use any client which you want to i.e. GraphQL Playground, Online GraphQL client, Apollo, Relay etc that depends on your need.
Before starting developing GraphQL server first lest try to understand few of the concept that is needed
1- Define Schema and Type.
This is the basic of GraphQL. As for other DB i.e Oracle we have schema stating information of Table, Views,Procedure etc same way for GraphQL also we have schema which that indicates Query, Mutations, Subscription, Type that are going to be used in that particular Applications.
Let's say we have following schema and store in the file named as schema.graphqls
type Query {
userById(id: ID): User
}
type User {
id: ID
name: String
age: Int
address: Address
}
type Address {
id: ID
houseName: String
country: String
}
2- Now to expose this GraphQL Schema we need to have either Spring Boot or any Spring REST or Any other Service which will expose our GraphQL service as REST. We are going to take SpringBoot as base project
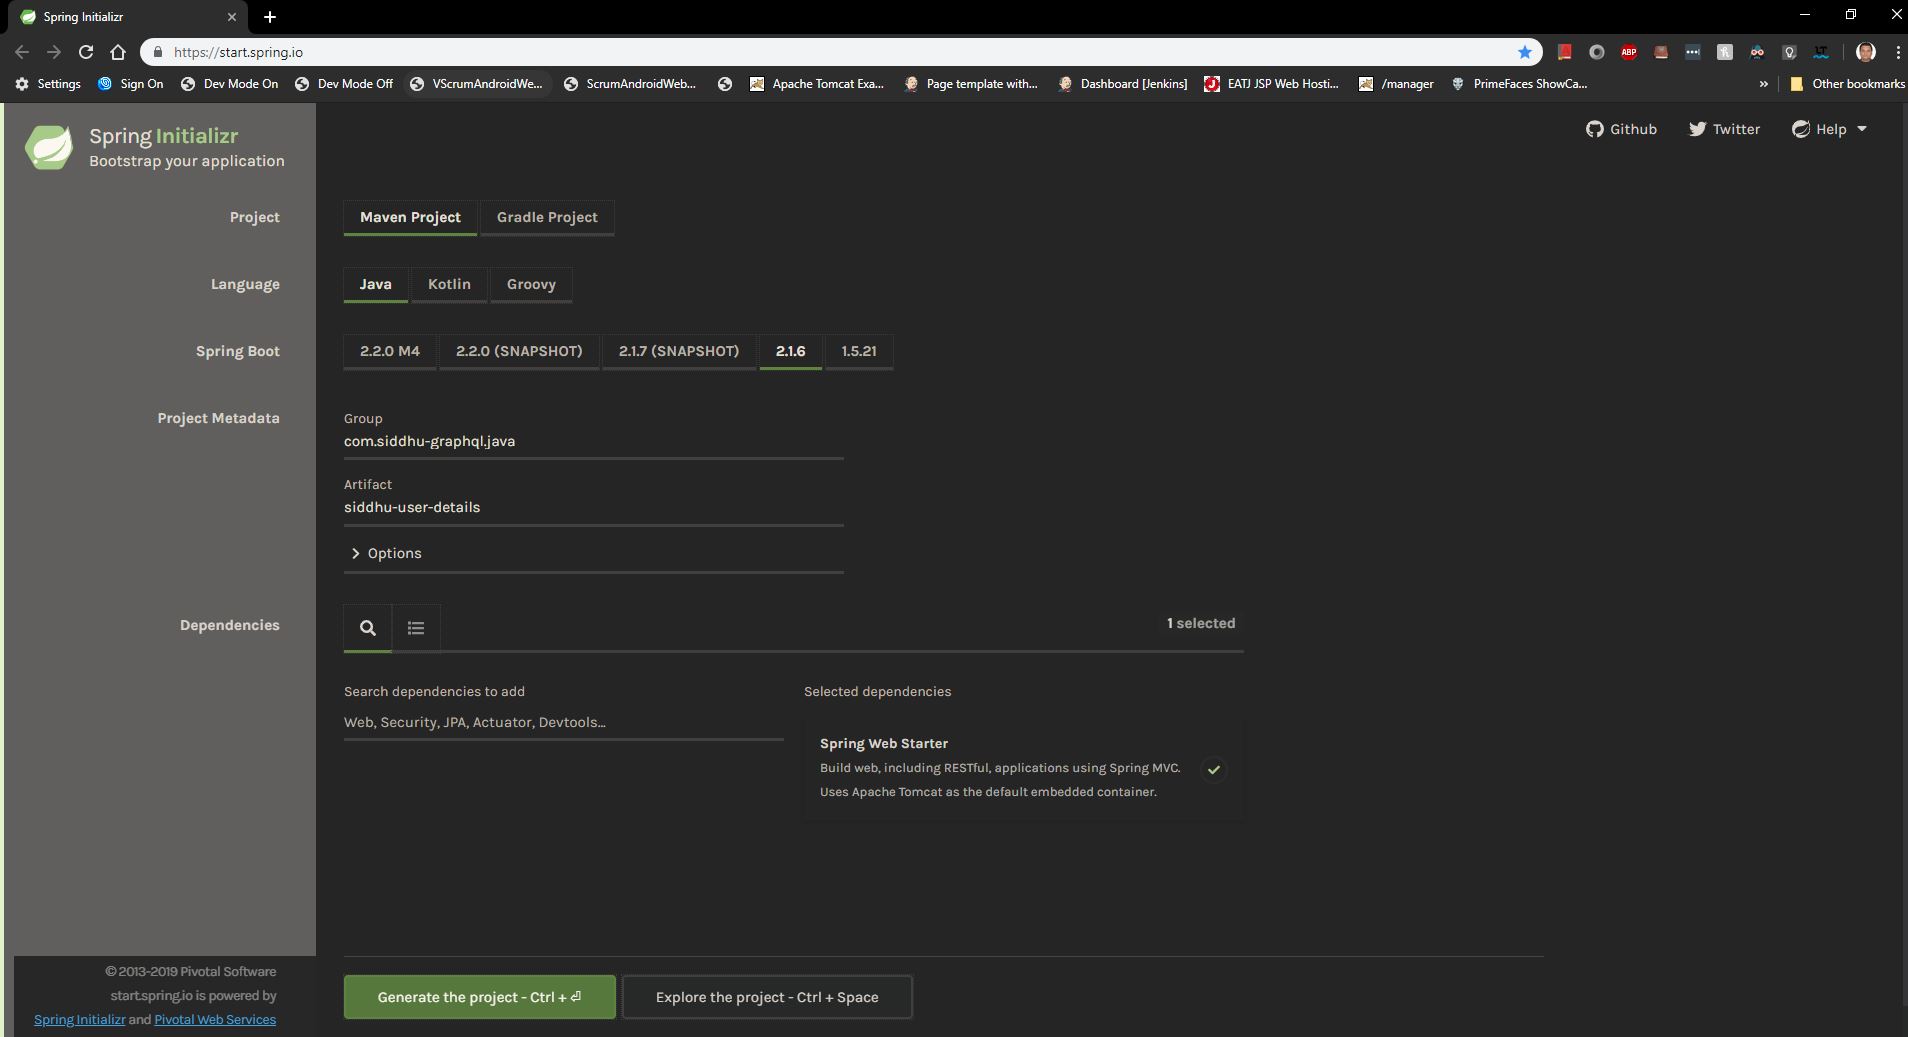
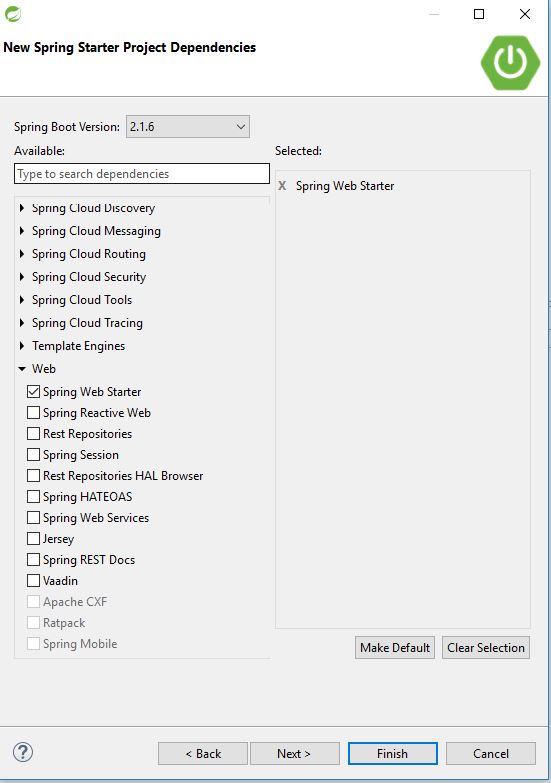
3- The easiest way to create a Spring Boot app is to use the “Spring Initializr” at https://start.spring.io/. But as I prefer to use IDE and its plugin lets first make Spring Boot Maven project.
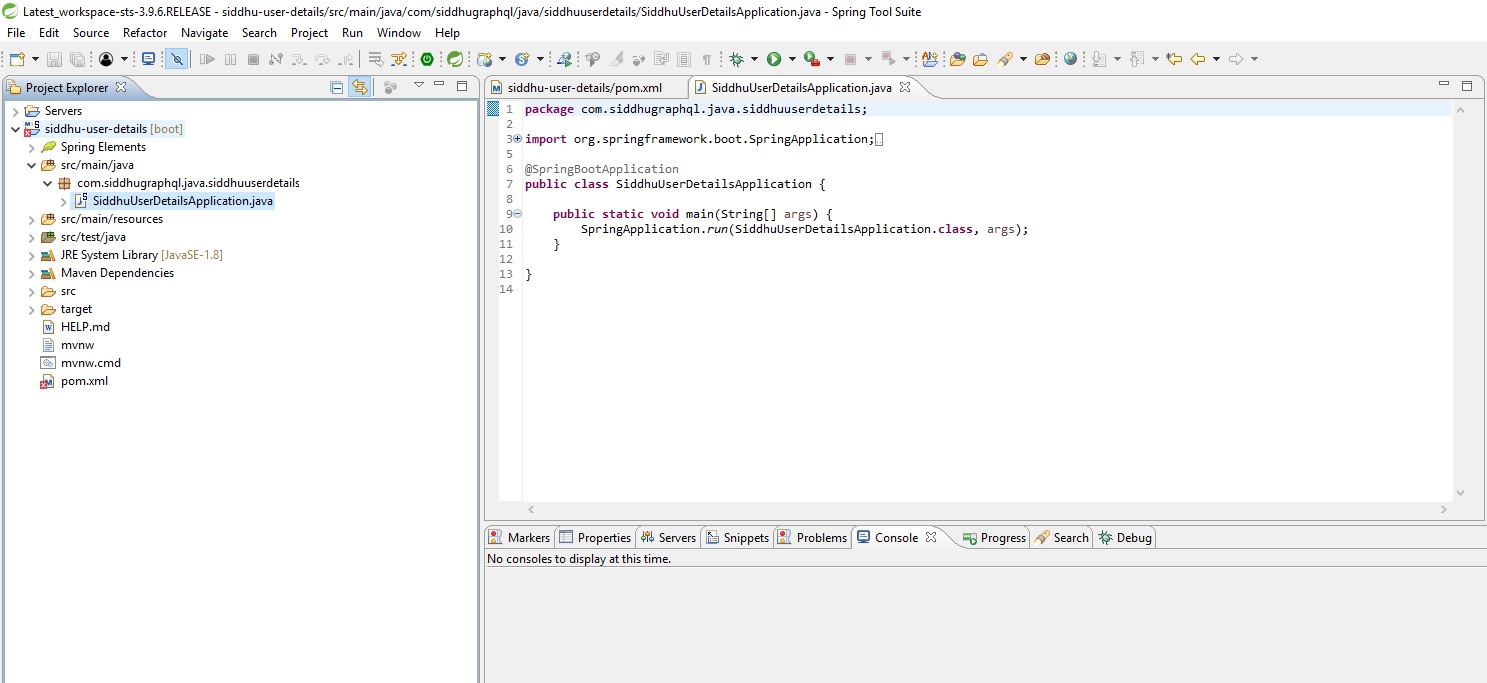
4- We are using STS to do the same. Please refer to the below given structure for creation of base Spring Boot project after creation
right click-->New project-->others-->Spring Boot->Spring Starter Project

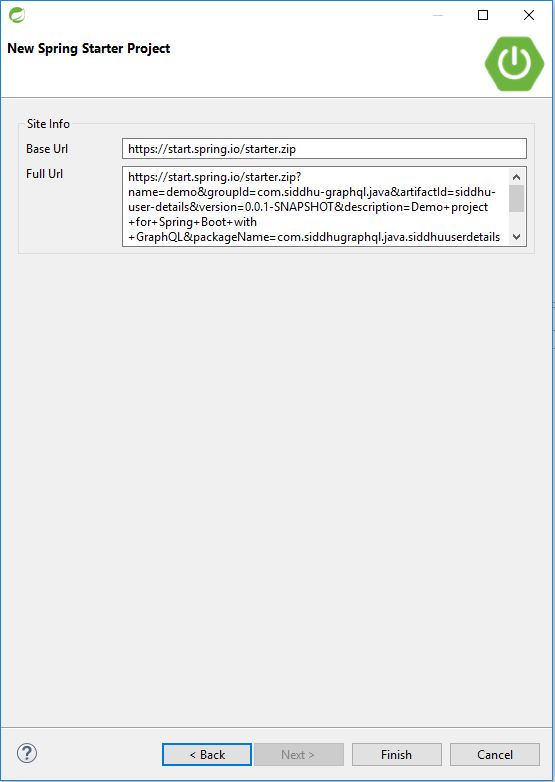
Note:- If you are using site https://start.spring.io/ to create the project in that case import this created project in STS as Maven project.
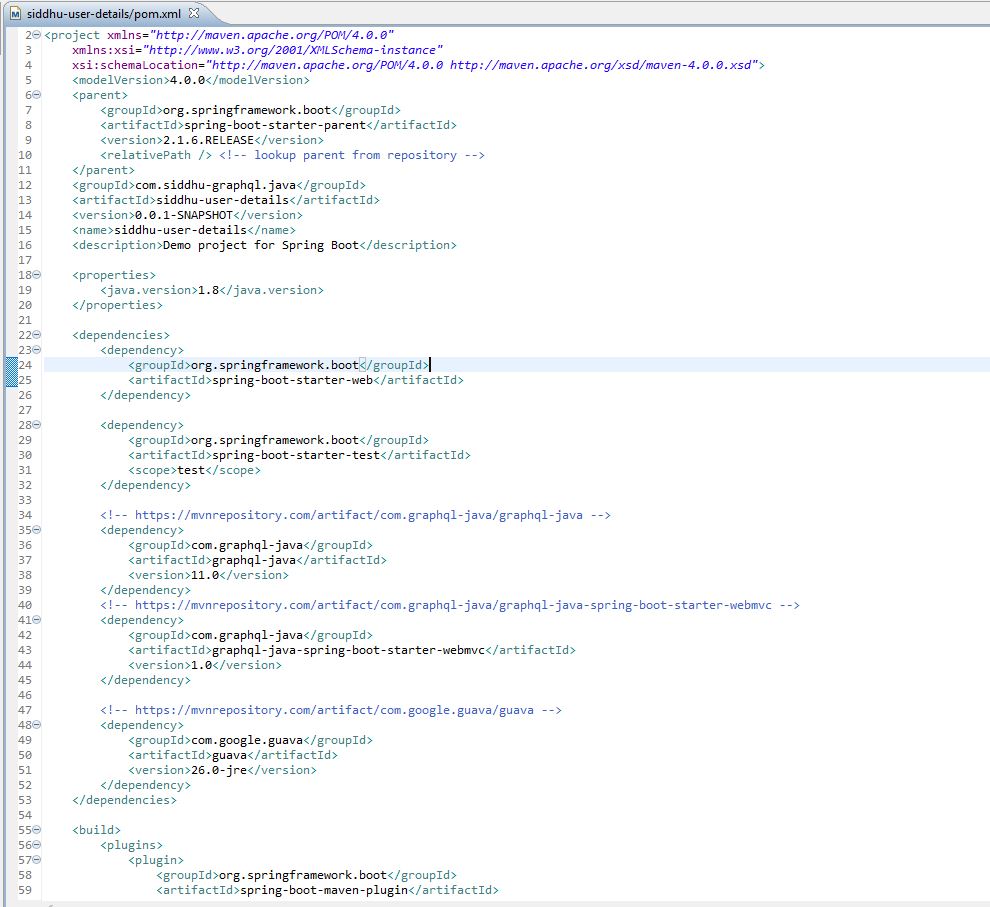
5- Modify your pom.xml as given below
<!-- https://mvnrepository.com/artifact/com.graphql-java/graphql-java -->
<dependency>
<groupId>com.graphql-java</groupId>
<artifactId>graphql-java</artifactId>
<version>11.0</version>
</dependency>
<!-- https://mvnrepository.com/artifact/com.graphql-java/graphql-java-spring-boot-starter-webmvc -->
<dependency>
<groupId>com.graphql-java</groupId>
<artifactId>graphql-java-spring-boot-starter-webmvc</artifactId>
<version>1.0</version>
</dependency>
<!-- https://mvnrepository.com/artifact/com.google.guava/guava -->
<dependency>
<groupId>com.google.guava</groupId>
<artifactId>guava</artifactId>
<version>26.0-jre</version>
</dependency>
6- Add your created Scehma in to your resource folder i.e. schema.graphqls

7- Create two class
1- GraphQLProvider.java
package com.siddhugraphql.java.siddhuuserdetails;
import com.google.common.base.Charsets;
import com.google.common.io.Resources;
import graphql.GraphQL;
import graphql.schema.GraphQLSchema;
import graphql.schema.idl.RuntimeWiring;
import graphql.schema.idl.SchemaGenerator;
import graphql.schema.idl.SchemaParser;
import graphql.schema.idl.TypeDefinitionRegistry;
import org.springframework.beans.factory.annotation.Autowired;
import org.springframework.context.annotation.Bean;
import org.springframework.stereotype.Component;
import javax.annotation.PostConstruct;
import java.io.IOException;
import java.net.URL;
import static graphql.schema.idl.TypeRuntimeWiring.newTypeWiring;
@Component
public class GraphQLProvider {
@Autowired
GraphQLDataFetchers graphQLDataFetchers;
private GraphQL graphQL;
@PostConstruct
public void init() throws IOException {
URL url = Resources.getResource("schema.graphqls");
String sdl = Resources.toString(url, Charsets.UTF_8);
GraphQLSchema graphQLSchema = buildSchema(sdl);
this.graphQL = GraphQL.newGraphQL(graphQLSchema).build();
}
private GraphQLSchema buildSchema(String sdl) {
TypeDefinitionRegistry typeRegistry = new SchemaParser().parse(sdl);
RuntimeWiring runtimeWiring = buildWiring();
SchemaGenerator schemaGenerator = new SchemaGenerator();
return schemaGenerator.makeExecutableSchema(typeRegistry, runtimeWiring);
}
private RuntimeWiring buildWiring() {
return RuntimeWiring.newRuntimeWiring()
.type(newTypeWiring("Query")
.dataFetcher("userById", graphQLDataFetchers.getUserByIdDataFetcher()))
.type(newTypeWiring("User")
.dataFetcher("address", graphQLDataFetchers.getUserDataFetcher()))
.build();
}
@Bean
public GraphQL graphQL() {
return graphQL;
}
}
As show above
.type(newTypeWiring("Query")
- Map with our Parent Query field i.e. type Query
.dataFetcher("userById", graphQLDataFetchers.getUserByIdDataFetcher()))
- Map with our userById filed in Scehma present inside parent Query i.e. userById(id: ID): User
.type(newTypeWiring("User")
- Map with our Parent User field i.e. type User
.dataFetcher("address", graphQLDataFetchers.getUserDataFetcher()))
- Map with our address filed in Scehma present inside parent Query i.e. User
2- GraphQLDataFetchers.java
package com.siddhugraphql.java.siddhuuserdetails;
import com.google.common.collect.ImmutableMap;
import graphql.schema.DataFetcher;
import org.springframework.stereotype.Component;
import java.util.Arrays;
import java.util.List;
import java.util.Map;
@Component
public class GraphQLDataFetchers {
private static List<Map<String, String>> users = Arrays.asList(
ImmutableMap.of("id", "sid-1",
"name", "Siddharatha dhumale 1",
"age", "1",
"addressId", "address-1"),
ImmutableMap.of("id", "sid-1",
"name", "Siddharatha dhumale 2",
"age", "2",
"addressId", "address-2"),
ImmutableMap.of("id", "sid-3",
"name", "Siddharatha dhumale 3",
"age", "3",
"addressId", "address-3")
);
private static List<Map<String, String>> address = Arrays.asList(
ImmutableMap.of("id", "address-1",
"houseName", "Siddharatha Dhumale House Name 1",
"country", "Australia"),
ImmutableMap.of("id", "address-2",
"houseName", "Siddharatha Dhumale House Name 2",
"country", "UK"),
ImmutableMap.of("id", "address-3",
"houseName", "Siddharatha Dhumale House Name 3",
"country", "India")
);
public DataFetcher getUserByIdDataFetcher() {
return dataFetchingEnvironment -> {
String userId = dataFetchingEnvironment.getArgument("id");
return users
.stream()
.filter(user -> user.get("id").equals(userId))
.findFirst()
.orElse(null);
};
}
public DataFetcher getUserDataFetcher() {
return dataFetchingEnvironment -> {
Map<String, String> user = dataFetchingEnvironment.getSource();
String addressId = user.get("addressId");
return address
.stream()
.filter(author -> author.get("id").equals(addressId))
.findFirst()
.orElse(null);
};
}
}
8- Start our project as spring boot App from STS
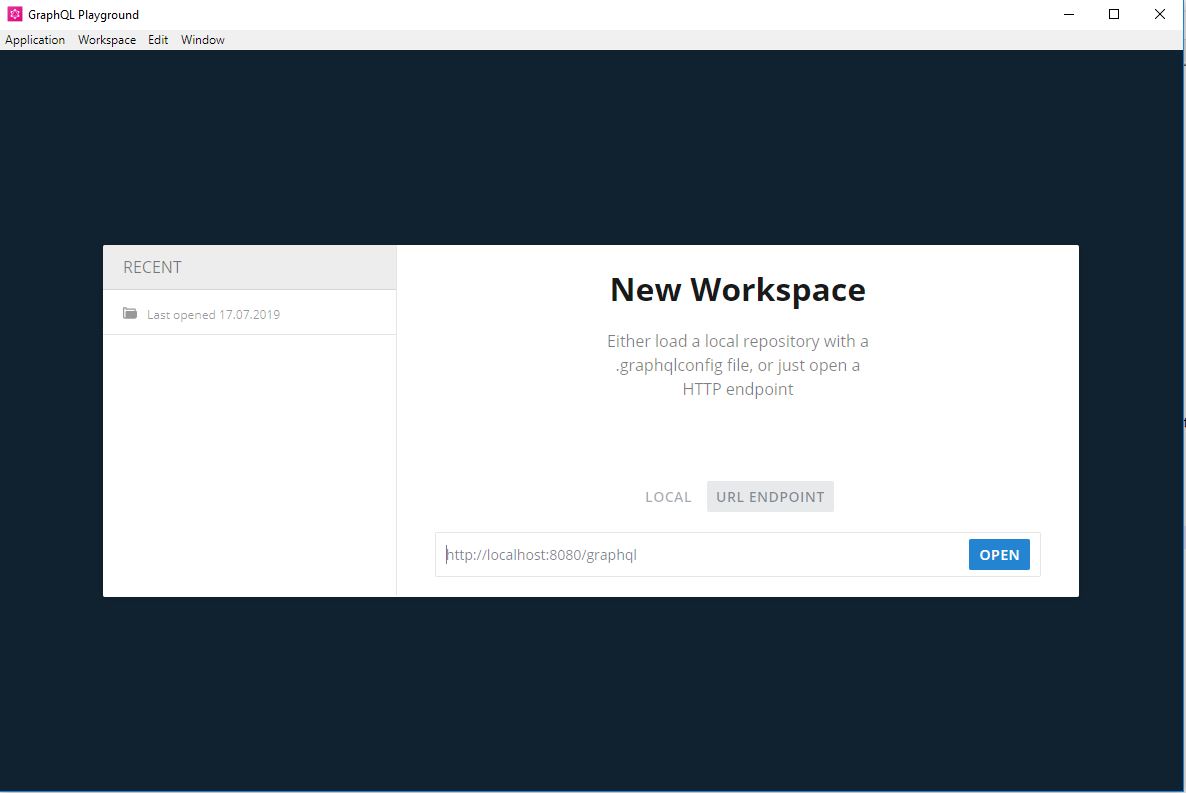
9- Start your GraphQl Play Ground
Note:- By default Spring Boot will run the application on port 8080. If you get error stating port 8080 is used add the different port in application.properties places inside our src/main/resource folder
server.port = 9090
Enter below given URL
http://localhost:9090/graphql
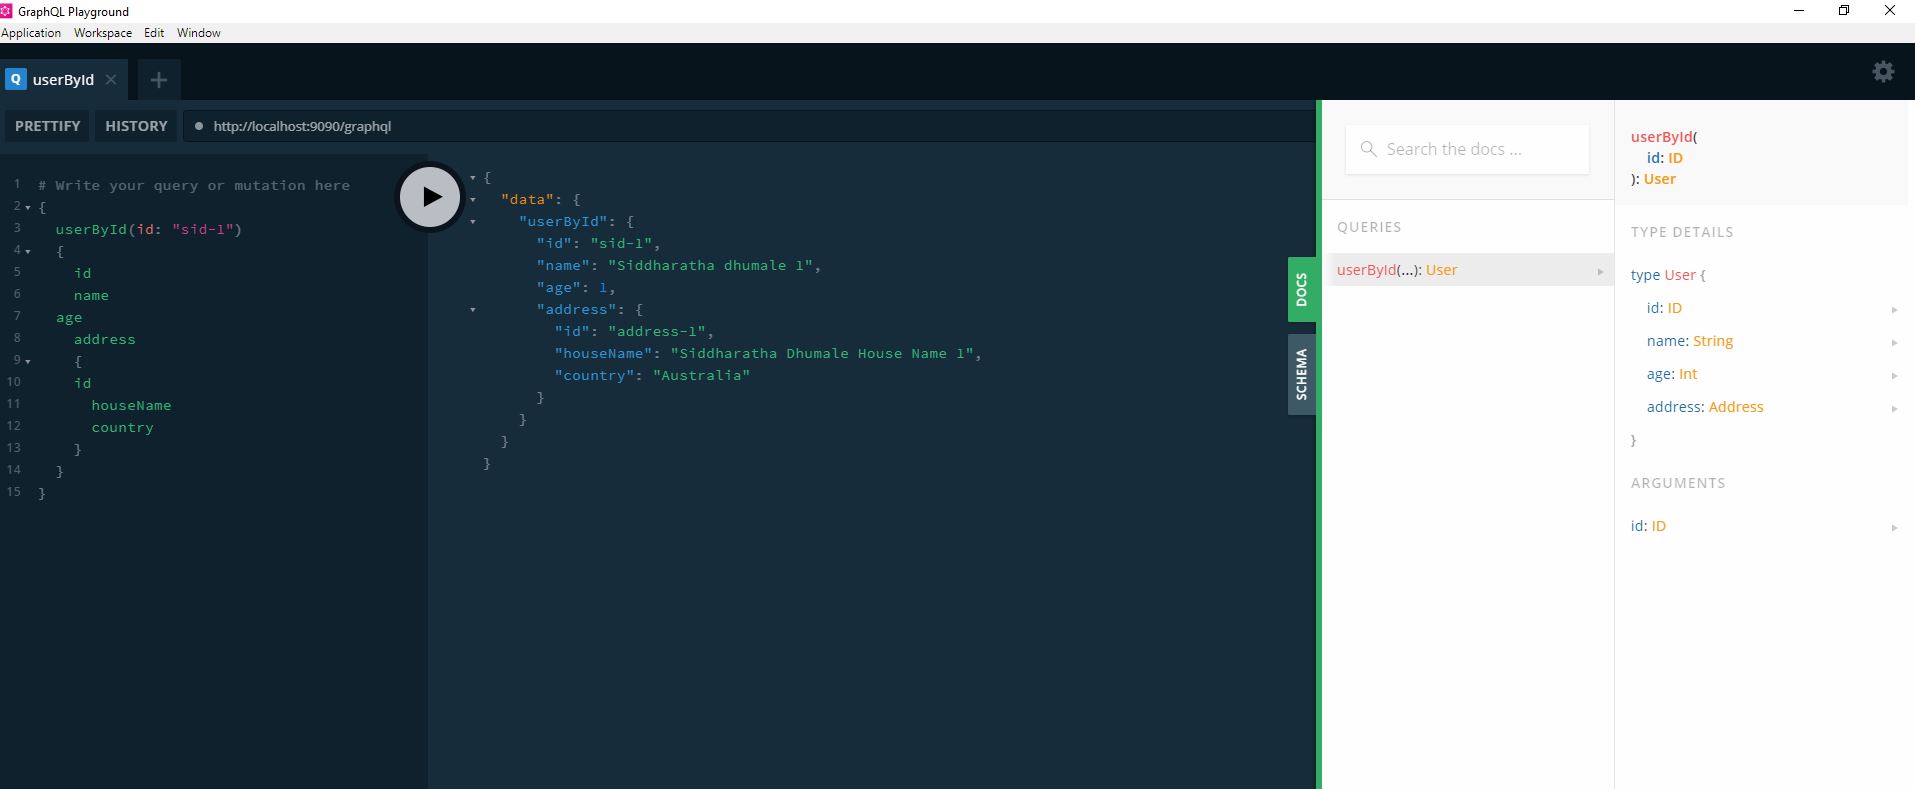
and run below given query
# Write your query or mutation here
{
userById(id: "sid-1")
{
id
name
age
address
{
id
houseName
country
}
}
}
You will get proper response as JSON format from GraphQL server
Just play with the given schema and its command on it.
Download this code from:-
https://github.com/shdhumale/siddhu-user-details