package com.test.siddhu;
import java.io.File;
import com.mongodb.DB;
import com.mongodb.MongoClient;
import com.mongodb.gridfs.GridFS;
import com.mongodb.gridfs.GridFSDBFile;
import com.mongodb.gridfs.GridFSInputFile;
public class MongoDBImage {
public static void main( String args[] ) {
try{
MongoClient mongoClient = new MongoClient( "localhost" , 27017 );
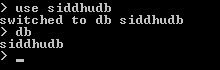
DB db = mongoClient.getDB("siddhudb");
//DBCollection table = db.getCollection("user");
String newFileName = "siddhu-new-image-name";
File imageFile = new File("C:\\workspace-mongodb\\MongoDbProject\\src\\com\\test\\siddhu\\image\\siddhu.png");
GridFS gfsPhoto = new GridFS(db, "photo");
GridFSInputFile gfsFile = gfsPhoto.createFile(imageFile);
gfsFile.setFilename(newFileName);
gfsFile.save();
//String newFileName = "mkyong-java-image";
//GridFS gfsPhoto = new GridFS(db, "photo");
GridFSDBFile imageForOutput = gfsPhoto.findOne(newFileName);
System.out.println(imageForOutput);
}catch(Exception e){
System.err.println( e.getClass().getName() + ": " + e.getMessage() );
}
}
}
Note: You can also use MongoDB IDE for the same. As we are using sqldeveloper/TOAD etc for oracle and mysql DB.
http://www.mongobooster.com/downloads
import java.io.File;
import com.mongodb.DB;
import com.mongodb.MongoClient;
import com.mongodb.gridfs.GridFS;
import com.mongodb.gridfs.GridFSDBFile;
import com.mongodb.gridfs.GridFSInputFile;
public class MongoDBImage {
public static void main( String args[] ) {
try{
MongoClient mongoClient = new MongoClient( "localhost" , 27017 );
DB db = mongoClient.getDB("siddhudb");
//DBCollection table = db.getCollection("user");
String newFileName = "siddhu-new-image-name";
File imageFile = new File("C:\\workspace-mongodb\\MongoDbProject\\src\\com\\test\\siddhu\\image\\siddhu.png");
GridFS gfsPhoto = new GridFS(db, "photo");
GridFSInputFile gfsFile = gfsPhoto.createFile(imageFile);
gfsFile.setFilename(newFileName);
gfsFile.save();
//String newFileName = "mkyong-java-image";
//GridFS gfsPhoto = new GridFS(db, "photo");
GridFSDBFile imageForOutput = gfsPhoto.findOne(newFileName);
System.out.println(imageForOutput);
}catch(Exception e){
System.err.println( e.getClass().getName() + ": " + e.getMessage() );
}
}
}
Note: You can also use MongoDB IDE for the same. As we are using sqldeveloper/TOAD etc for oracle and mysql DB.
http://www.mongobooster.com/downloads