Lets start with DJango framework to create Python Web application.
Django comes with excellent CLI command but as usual being java developer love to have IDE and that also Eclipse is my favourite :).
We had used Eclipse Neon and pyDev with Django plugin.
Make sure you had Python and Django instlled in your sytem. We had used Python 35 and Django 1.10
Lets first create hello world Django Python Project
Step1:- Create a new Django project
File --> New -> Other -> Inside PyDev select PyDev Django Project
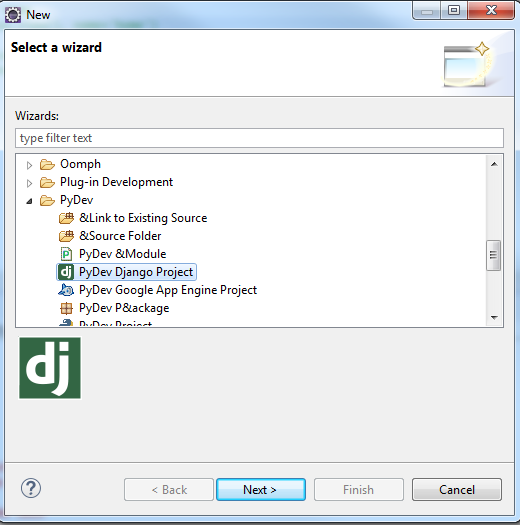
Step 2:- Click Next and follow the below given images.
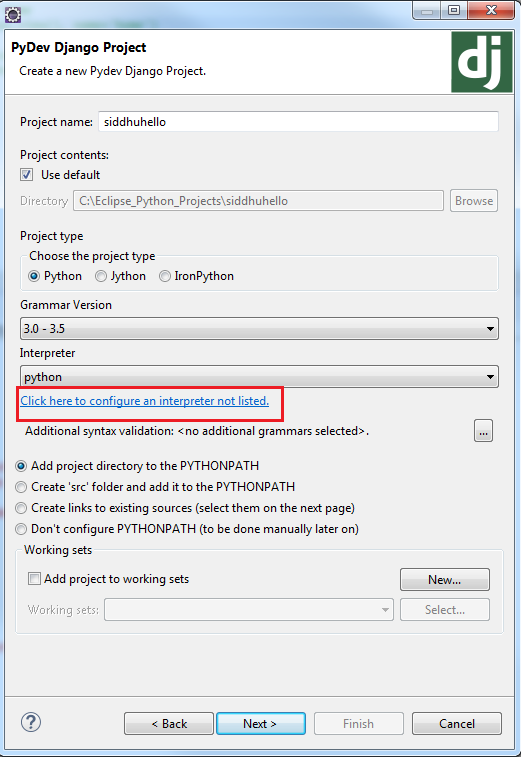
If we had different version of python and want to change the python interpretor click on the link given in red colour box following screen will be opened.
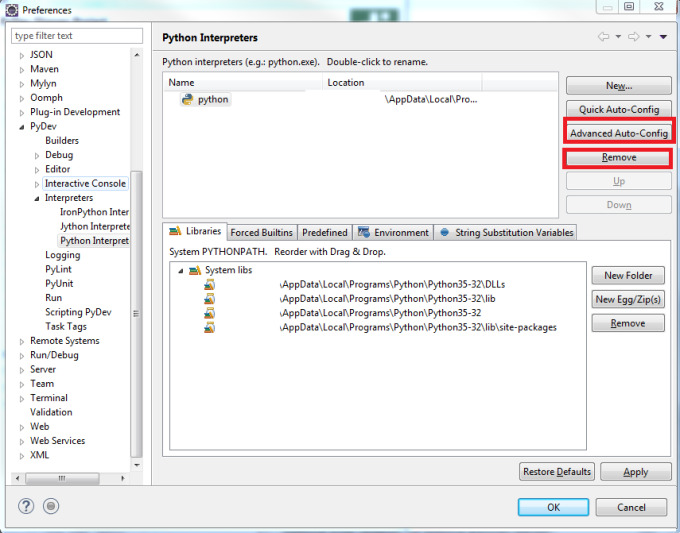
to remove current python interpretor use remove button and to configure antoher one click on Advance Auto-cofig button it will list down the multiple python version we had installed select approriate for your applications.
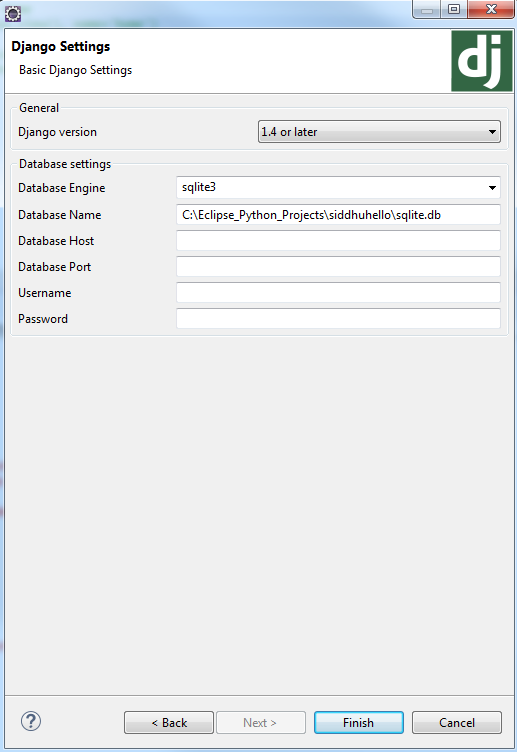
Step 3:- Click next-next of step 2 and you will see the following screen. Please select approriate Django version i.e. our is 1.10 so select approprate value in combobox. For now we are not going to perform any DB operation so please neglect rest field.
Once you click finish you will be able to see the Django project structure created for you with following few files
1- manage.py :- This is the entry point from where your Django start application. It do two things (1) It set our project to sys.path and (2) it helps in adding our project setting files to DJANGO_SETTINGS_MODULE
2- _inti_.py :- this is empty file just to say it is Python Django project.
3- setting.py :- This is the files used to do the configuration of our project. It set all the required modules needed for Django to make our application run as web i.e. our database setting, wsgi application setting, template setting, base url, defualt installed app provided by Django Frame work etc.
4- urls.py :- This files help us to route our request to perticular page. For now consider it as a files that send our URL request to perticular function of Python.
5- wsgi.py :- WSGI stands for web server gateway interface. This is the gateway or interface specification between Web server and Python application. It helps and provide specification which help webserver and python application to talk each other.https://wsgi.readthedocs.io/en/latest/
Lets create a new python file and name it as siddhuview.py and add follwing code in it
from django.http import HttpResponse
def hello(request):
return HttpResponse('Hello, World')
6- Make modification in url.py
return HttpResponse('Hello, World')
6- Make modification in url.py
from siddhuhello import siddhuviews
urlpatterns = [
url(r'^admin/', admin.site.urls),
url(r'^$', siddhuviews.hello),
]
7- Execute the programe i.e. right click on application -->runas --> django project
refer to the console if you get below line i.e. starting development serever at http://127.0.0.1:8000/ you are done
You have 13 unapplied migration(s). Your project may not work properly until you apply the migrations for app(s): admin, auth, contenttypes, sessions.
Run 'python manage.py migrate' to apply them.
March 03, 2017 - 16:45:29
Django version 1.10.5, using settings 'siddhuhello.settings'
Starting development server at http://127.0.0.1:8000/
Quit the server with CTRL-BREAK.
Run 'python manage.py migrate' to apply them.
March 03, 2017 - 16:45:29
Django version 1.10.5, using settings 'siddhuhello.settings'
Starting development server at http://127.0.0.1:8000/
Quit the server with CTRL-BREAK.
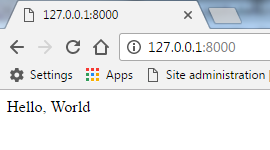
8- open your brower and paste http://127.0.0.1:8000/ and see the output.
Note:- If you observe your url.py u will find one entry for admin. To set the new Admin or Supre user use below comand and open the same url adding admin/ in it i.e. http://127.0.0.1:8000/admin
How to reset the admin or superuser password
python manage.py createsuperuser
Username: admin
Email address: admin@admin.com
Password:
Password (again):
Superuser created successfully.
python manage.py createsuperuser
Username: admin
Email address: admin@admin.com
Password:
Password (again):
Superuser created successfully.
No comments:
Post a Comment