Monday, October 26, 2015

Configuring Jenkin tool for Building Maven GWT application.

We assume that you had already installed JDK, Jenkins and Maven in your build machine. If not please install Maven from https://maven.apache.org/download.cgi
Please refer to the below screen for configuring Maven Build for Jenkin.
Step 1: - First click on New Item and fill the necessary information as shown in below screen
Image_1

Ste2: Click on Ok button and fill the necessary information as shown below:
Image_2
Set actual path of pom.xml
Image_3
Click on save button
Click on Build project and check the out out by clicking on console output.
Image_4 Image_5
If you did not set Maven in the hudson/jenking then you need to set it first time see below screen to do the same.
As you set the path for JDK in same fashion give the path till which maven in installed.

How to Create, Compile and Run GWT applicaiton using Maven and Eclipse

Step 1:- Make sure you had already installed Apache MAVEN in your machine. We can download Apache MAVEN from https://maven.apache.org/download.cgi
Once you installed Apache MAVEN you will be able to see this folder structure.
Image_1

Step 2- Make sure you have installed m2eclipse plugin for Eclipse. Once you installed this in ecplise you will be able to right click and then run and debug the application while running it as Maven projects. In STS IDe it is by default available.
The goal of the m2ec project is to provide a first-class Apache Maven support in the Eclipse IDE, making it easier to edit Maven's pom.xml, run a build from the IDE and much more.
Source: http://eclipse.org/m2e/
Step 3:- Install gwt maven plugin gwt-maven-plugin-2.7.0.jar download the same from the http://mvnrepository.com/artifact/org.codehaus.mojo/gwt-maven-plugin/2.7.0
First we need to install this plugin before using the same in Eclipse. for doing this use this command.
Go to bin folder of your installed maven
C:\apache-maven-3.2.5\bin>mvn install:install-file -DgroupId=org.codehaus.mojo -DartifactId=gwt-maven-plugin -Dversion=2.7.0 -Dpackaging=jar -Dfile=C:/to_delete/gwt-maven-plugin-2.7.0.jar
Image_2
=============You will see following message ===================================
C:\apache-maven-3.2.5\bin>mvn install:install-file -DgroupId=org.codehaus.mojo -DartifactId=gwt-maven-plugin -Dversion=2.7.0 -Dpackaging=jar -Dfile=C:/to_delete/gwt-maven-plugin-2.6.0-rc1.jar
[INFO] Scanning for projects...
[INFO]
[INFO] ------------------------------------------------------------------------
[INFO] Building Maven Stub Project (No POM) 1
[INFO] ------------------------------------------------------------------------
[INFO]
[INFO] --- maven-install-plugin:2.4:install-file (default-cli) @ standalone-pom ---
[INFO] Installing C:\to_delete\gwt-maven-plugin-2.7.0.jar to C:\Users\XXXX\.m2\repository\org\codehaus\mojo\gwt-maven-plugin\2.7.0\gwt-maven-plugin-2.7.0.jar
[INFO] Installing C:\Users\XXXX\AppData\Local\Temp\mvninstall1372865269736446628.pom to C:\Users\XXXX\.m2\repository\org\codehaus\mojo\gwt-maven-plugin\2.7.0\gwt-maven-plugin-2.7.0.pom
[INFO] ------------------------------------------------------------------------
[INFO] BUILD SUCCESS
[INFO] ------------------------------------------------------------------------
[INFO] Total time: 0.995 s
[INFO] Finished at: 2015-10-26T12:25:25+05:30
[INFO] Final Memory: 6M/119M
[INFO] ------------------------------------------------------------------------

Step 4:- Restart your eclipse and create a new MAven Project
right click --> new --> other -->Maven -->Maven Project-->Next-->Select our Maven installed files (refer to the below image)-->Fill all necessary information and
Image_3 Image_4 Image_5
Step 5:- After this project wil be created in Eclipse as shown below
Image_6
Step 6:- In our created project we found that their is no GreetingServiceAsync . We must generate them by triggering a Maven command or let Maven generate them automatically for you.i.e. gwt:generateAsync
right click on proect-->Run configuration --> inside MAven--> see below screen and click run
Image_7
on success we will see this on console prompt
[INFO] Scanning for projects...
[INFO]
[INFO] ------------------------------------------------------------------------
[INFO] Building GWT Maven Archetype 0.0.1-SNAPSHOT
[INFO] ------------------------------------------------------------------------
[INFO]
[INFO] --- gwt-maven-plugin:2.7.0:generateAsync (default-cli) @ gwt-maven-plugin ---
[INFO] ------------------------------------------------------------------------
[INFO] BUILD SUCCESS
[INFO] ------------------------------------------------------------------------
[INFO] Total time: 1.684 s
[INFO] Finished at: 2015-10-26T14:14:16+05:30
[INFO] Final Memory: 12M/150M
[INFO] ------------------------------------------------------------------------

Step 7:- Finally run install command of maven to create build
right click on proect-->Run configuration --> inside MAven--> see below screen and click run
Image_8
we will get this log.
[INFO] ------------------------------------------------------------------------
[INFO] BUILD SUCCESS
[INFO] ------------------------------------------------------------------------
[INFO] Total time: 41.543 s
[INFO] Finished at: 2015-10-26T14:17:03+05:30
[INFO] Final Memory: 27M/195M
[INFO] ------------------------------------------------------------------------

Deploy our build on tomcat and see the screen
Image_9

Friday, October 16, 2015

Installing Visualsvn server, Accessing it with tortoise svn tutorial & eclipse svn integration

Now lets talk about installing SVN Server and Accessing it with Tortois SVN Client and http/https URL. Finally Lets play with SVN Tortoise client with Eclipse on this SVN Server

Visualsvn server is a subversion server used for software versioning and revision control.
Here we will use visualsvn server as subversion server and tortoise svn as client. Finally we will do eclipse svn integration.
Step 1:- Install SVN Server
Download and install visual svn server from below link and given necessary information as on when ask for directory name where all your repositories will be stored.
visualsvn server download link :- https://www.visualsvn.com/server/download/
Step 2:-Configuring and creating our own SVN Server Repsitory
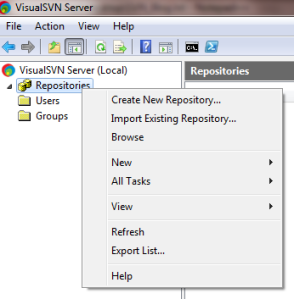
Once you install Visual SVN Server we will be able to see the below screen.
Right click on and select Create New Repository option and follow the wizard. When asked enter your Repsitory Name and at the end of wizard we will get url for now copy that url.
https://My-PC/svn/Siddhu_SVN_Server_Repository

Image_1
Step 3:- Now create project structure for uploading the files.
right click on step1 created repository --> New --> Project Structure

Image_2
Enter project name
Image_3
Finally we will be able to see this structure of our Repository Screen

Image_4
Step 4:- If needed you can also create user that can access your repository i.e. Now Right Click on Users –> Create New User –> Enter all the details and press ok.
From here we had installed our SVN Server and now its time to see are we able to access the repository. For that
https://My-PC/svn/Siddhu_SVN_Server_Repository
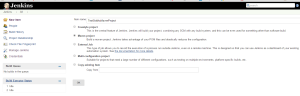
We will be able to see this screen

Image_5
Step 5:- Performing check in and check out option with SVN Tortoise Client.
Before staring I preassume that we had already installed Tortose SVN in our window machine. While I was writting this blog latest version was TortoiseSVN 1.9.2 for 64 bit O/S.
Site to download :- http://tortoisesvn.net/downloads.html
Just create a folder in your window machine where we want the code to be check out. At present we dont have anything in the respository so nothing will be copied. Just right click and select SVN check out below url https://My-PC/svn/Siddhu_SVN_Server_Repository/Siddhu_SVN_Server_First_Project and click ok
Image_6
We will see all the three folder in it.

Image_7
Lets add few files in our repository now. Copy some files i.e.txt files in side trunk folder and right click it and select add option in SVN client and then commit it.
We will be able to see this file in
Image_8

Image_9

Image_10
Step 6:- Install SubVersion Eclipse Plugin
First install eclipse plugin from below link.
http://subclipse.tigris.org/
After the installation we will be able to see the SVN repository view. Right Click on this prospective and click on "Repository Location". Fill below url that is created for our project.
https://My-PC/svn/Siddhu_SVN_Server_Repository/
Finally we will be able to see this screen

Image_11
Step 7:- Performing check in and checkout operation using eclipse.
Now lets do the final operation of doing check in and check out from eclipse.
just follow below steps for GWT Project

1- right click --> New -- > Other --> SVN --> Check out project from SVN.
Image_12


2- Select SVN branch
Image_13


3- Select branch and click finish
Image_14

4- Then follow step for GWT project and we will see below screen.
Image_15

For Reference use below site:-
http://www.technonutty.com/2014/05/visual-svn-server-tortoise-svn-eclispse.html

Step to set up Tortoise SVN Repository on Windows Machine

I had used many repository sub version on windows, linux etc but I agree SVN specially Tortose SVN is one of the best among all.
As a repository manager or developer we need to do small changes and we are all set to use our Sub repository system.
Lets now implement force and set our own SVN repository and Project on Window. Please follow belwo step to do the same
Before staring i preassume that we had already installed Tortose SVN in our window machine. While I was writting this blog latest version was TortoiseSVN 1.9.2 for 64 bit O/S.
Site to download :- http://tortoisesvn.net/downloads.html
Step 1:- Let say my project name is GWT_Project. So first create C:\SVN_TORTOISE_REPOSITORY\GWT_Project
Step 2:- Right Click on your GWT_Project and click on "Create Repository here".
Image_1
This converts C:\SVN_TORTOISE_REPOSITORY\GWT_Project into a repository with the following contents.
Image_2
Step 3. Initial import. Somewhere in your hard drive (e.g. in C:\temp) create a directory (e.g. \new) with the following three subdirectories. You can also use your own naming convention i.e. instare of temp give temp_ProjName and instead of new given new_ProjName
C:\temp\new\branches
C:\temp\new\tags
C:\temp\new\trunk
Move the contents of C:\SVN_TORTOISE_REPOSITORY\GWT_Project into the trunk subdirectory (C:\temp\new\trunk).
Now right click on above "new" created folder and select import option.
Image_3
Selelect URL as file:///C:/SVN_TORTOISE_REPOSITORY/GWT_Project
Image_4
Right-click on C:\SVN_TORTOISE_REPOSITORY\GWT_Project and start TortoiseSVN/Repo-browser and you will be able to see your code in trunk.

Step 4. Creating a working directory. This is simple just create your folder and right click and use the option as check out
Image_5

It is done :)...
Explore more for Tortos SVN from belwo sites
http://tortoisesvn.net/

Tuesday, September 29, 2015

How to create GWT module using Eclipse

1- Lets first create inbuild plugin GWT Project i.e. CreateGWTModule


2- Click on Project CreateGWTModule in project explore

2.1- Right Click on Project


2.2- Click on other - Go to Google Web tool kit and click on Module


2.3- Click next and fill the information


2.4- Click finish


our Module Project xml will be like below
<-- encoding="”UTF-8″?" version="”1.0″" xml="">
<--!DOCTYPE module PUBLIC “-//Google Inc.//DTD Google Web Toolkit 2.6.0//EN” “http://google-web-toolkit.googlecode.com/svn/tags/2.6.0/distro-source/core/src/gwt-module.dtd”&gt;
<--module>
<--inherits name=”com.google.gwt.user.User” />
<--source path=”client”/>
<--/module>
3- Our project will look like below


4- Create a java class

public class TestMyClass {
private String firstName;

public String getFirstName() {
return firstName;
}


public void setFirstName(String firstName) {
this.firstName = firstName;
}
}


5- In our project GWT make following line changes by importing the newly created project
@Override
public void onModuleLoad() {
TestMyClass p = new TestMyClass();
p.setFirstName("Lars");
Label label = new Label("Hello " + p.getFirstName());
RootPanel.get().add(label);
}

6- Run the project and see the result


Wednesday, September 23, 2015

How to do data analysis from twitter using JAVA Code.

Data mining and analysis is most happening concept right now in the IT market. Company want to first gather the information from social site like Facebook, Twitter etc to do data analysis and get the market trend before developing any software.


In case of Twitter their are ready made API available that help us to do the Data analysis or study the market trand.

We can down load the Twitter api from site

http://twitter4j.org/en/index.html#download


We can us following code to

import java.util.ArrayList;
import java.util.List;

import twitter4j.Query;
import twitter4j.QueryResult;
import twitter4j.Status;
import twitter4j.Twitter;
import twitter4j.TwitterException;
import twitter4j.TwitterFactory;

public class TweetManager {

    public static ArrayList getTweets(String topic) {

        Twitter twitter = new TwitterFactory().getInstance();
        ArrayList tweetList = new ArrayList();
        try {
            Query query = new Query(topic);
            QueryResult result;
            do {
                result = twitter.search(query);
                List tweets = result.getTweets();
                for (Status tweet : tweets) {
                    tweetList.add(tweet.getText());
                }
            } while ((query = result.nextQuery()) != null);
        } catch (TwitterException te) {
            te.printStackTrace();
            System.out.println("Failed to search tweets: " + te.getMessage());
        }
        return tweetList;
    }
}


import java.util.ArrayList;
import java.util.Iterator;


public class SiddhuMainClass {

public static void main(String args[])
{
TweetManager obTweetManager = new TweetManager();
ArrayList objArrayResult = obTweetManager.getTweets("dhumale");
Iterator iterator = objArrayResult.iterator();
while (iterator.hasNext()) {
System.out.println(">>>>>>>>>>>>"+iterator.next());
}
}


}


Out put :

>>>>>>>>>>>>Shooting #shotgun #beretta #thuglife #madeindorset #rah @ Axnoller - Dorset https://t.co/tT6l7HlXez
>>>>>>>>>>>>@beetlejuiceltd #looemusicfestival @ Looe Music Festival https://t.co/FpWbkCAd66
>>>>>>>>>>>>View from the queue #looemusicfestival #beetlejuice #cocktails @beetlejuiceltd @ Looe Music Festival https://t.co/IG8jgSHwEq
>>>>>>>>>>>>Crazy weekend at Looe Music Festival! #cocktails #dreamteam #beetlejuice #looemusicfestival… https://t.co/u08MsXnuh5
>>>>>>>>>>>>Fal Week 2014 #throwback #falmouth #summer #beetlejuice #barmen #dreamteam #cocktails https://t.co/IICVhUpOCP
>>>>>>>>>>>>@narendramodi , happy b'day sir....  May god fullfill your all wishesh and ours too..
>>>>>>>>>>>>2nd family #cornwall #friends #squad #rock #jack #goodbyesummer https://t.co/zppUUoIa0e
>>>>>>>>>>>>email reply from staff admin to me..

To Remo Dhumale Sep 15 at 12:41 PM
Dear Sir,
..............

Note: To execute the programe make sure to add all *.jar files that we had downloaded from the above link.

Site also contain some of the inbuild example for
- post a Tweet
- Sending / Receiving Direct Messages
- Pagination control


Understanding UI binder code with plain JAVA code.


  Split Dropdown
 
 
    Item 1
    Item 2
    Item 3


//represent
final ButtonGroup obButtonGroup = new ButtonGroup();

//represent
final DropDownMenu objDropDownMenu = new DropDownMenu();

//represent
final AnchorListItem objAnchorListItem1 = new AnchorListItem("Item  One");
final AnchorListItem objAnchorListItem2 = new AnchorListItem("Item  two");
final AnchorListItem objAnchorListItem3 = new AnchorListItem("Item  three");


objDropDownMenu.add(objAnchorListItem1);
objDropDownMenu.add(objAnchorListItem2);
objDropDownMenu.add(objAnchorListItem3);


final Button siddhuButton1 = new Button("Siddhu1");
siddhuButton1.setDataToggle(org.gwtbootstrap3.client.ui.constants.Toggle.DROPDOWN);
//Adding all button in and menu in Group
obButtonGroup.add(objDropDownMenu);
obButtonGroup.add(siddhuButton1);


Tuesday, September 15, 2015

GWT code for printing

Step -1

Add following line in our HTML file

 iframe id="printIT" style="width:0;height:0;border:0"

Step -2
Add following native method in GWT client Entry point class.


public static native void printMethod(String html) /*-{
var frame = $doc.getElementById('printing');
if (!frame) {
$wnd.alert("Error:  Can't find printing frame. Make sure you had added iframe with id=printIT in HTML file");
return;
}
frame = frame.contentWindow;
var doc = frame.document;
doc.open();
doc.write(html);
doc.close();
frame.focus();
frame.print();
}-*/;


Step -3

Add following line of code on click on button or where you want to implement print functionality.

We had selected GWT in build example and try to print the text it is showing on dialogBox. We can use any widget text to print even images.

String printText = dialogBox.asWidget().getElement().getInnerHTML();
printMethod(printText);


Running the soap ui using command prompt

Inside bin folder of SOAPUI we find command mockservicerunner which is used to run the soapui throung command prompt.

mockservicerunner.bat -m "WeatherSoap MockService" "C:\Soap_UI\TestWeatherWSDL-soapui-project.xml"

To cross verify open the SOAPUI and run the request we will get our mock response


Note:To run SOAP UI as a service use nohup command in linux.

Monday, September 14, 2015

Downloading data in PDF, XLS, WORD format in GWT

hree step are needed to perform operation to download the data in PDF, XLS, WORD format in GWT
Step -1 :-
At client side set the url from where we are going to download the data with file name as given below.

String url = GWT.getModuleBaseURL() + "downloadService?fileInfo1=" + "SiddhuFile";
Window.open( url, "_blank", "status=0,toolbar=0,menubar=0,location=0");


Step -2 :-

Make sure to enter the servlet mapping in web.xml


downloadService
com.test.pdf.server.DownloadServlet


downloadService
/testpdffileproject/downloadService


Step -3 :- Create a servlet that will do the functinality of downloading the data from server side to client side.

protected void doGet( HttpServletRequest req, HttpServletResponse resp ) throws ServletException, IOException
{

String fileName = req.getParameter( "fileInfo1" );
ServletOutputStream out = resp.getOutputStream(); 
int BUFFER = 1024 * 100;
String reportContents = getServletContext().getServerInfo();
//for PDF
resp.setContentType("application/pdf");
resp.setHeader("Content-Disposition", "attachment;filename=" + fileName + ".pdf");

//for CVS files
//resp.setContentType("text/csv"); 
//resp.setHeader("Content-Disposition", "attachment; filename="+ fileName + ".csv"); 
   
//for Word Document
//resp.setContentType("text/doc"); 
//resp.setHeader("Content-Disposition", "attachment; filename="+ fileName + ".doc"); 

resp.setContentLength( Long.valueOf( reportContents.length() ).intValue()); 
resp.setBufferSize(BUFFER);
out.write(reportContents.getBytes()); 
out.flush(); 
out.close(); 


}

Note:- Code to download the data in xls and word is also attached. Please uncomment it if you want to download the data in specific format.


Thursday, September 10, 2015

Oracle SQL Statment to create user, grant permission , Creating Table, views, Trigger and Procedure

Reference:- http://www.techonthenet.com/oracle/schemas/create_schema.php

=======Table Space
#1 - PERMANENT TABLESPACE
CREATE BIGFILE TABLESPACE tbs_perm_siddhu_01
  DATAFILE 'tbs_perm_siddhu_01.dat'
    SIZE 10M
    AUTOEXTEND ON;

===DROP TABLESPACE tbs_01 
INCLUDING CONTENTS 
CASCADE CONSTRAINTS; 

#2 - TEMPORARY TABLESPACE

CREATE TEMPORARY TABLESPACE tbs_temp_siddhu_01
  TEMPFILE 'tbs_temp_siddhu_01.dbf'
    SIZE 5M
    AUTOEXTEND ON;

#3 Creating User called siddhu/siddhu

CREATE USER siddhu
  IDENTIFIED BY siddhu
  DEFAULT TABLESPACE tbs_perm_siddhu_01
  TEMPORARY TABLESPACE tbs_temp_siddhu_01
  QUOTA 20M on tbs_perm_siddhu_01;

#4 Assigning Role to the user siddhu

GRANT create session TO siddhu;
GRANT create table TO siddhu;
GRANT create view TO siddhu;
GRANT create any trigger TO siddhu;
GRANT create any procedure TO siddhu;
GRANT create sequence TO siddhu;
GRANT create synonym TO siddhu;  


--From here we can login to the oracle db with user siddhu


#5 Create Table
CREATE TABLE customers
( customer_id number(10) NOT NULL,
  customer_name varchar2(50) NOT NULL,
  address varchar2(50),
  city varchar2(50),
  state varchar2(25),
  zip_code varchar2(10),
  CONSTRAINT customers_pk PRIMARY KEY (customer_id)
);

#6 Create View

CREATE VIEW view_customers AS
  SELECT customers.customer_id, customers.customer_name, customers.city
  FROM customers
  WHERE customers.customer_name like '%siddhu%';


#7 Grant Object Privilage

GRANT ALL ON  customers TO siddhu;  

#7 CREATE SYNONYMS FOR OBJECTS

CREATE PUBLIC SYNONYM customers
FOR siddhu.customers;

-- Now we can execute select queries direcly on customers i.e. SELECT * FROM customers; without giving schema names.


#8 Delete all rows of the Table
DELETE FROM customers;

#8 Alter table
alter table
   customers
add
   salary  NUMBER NOT NULL;

#8 Trigger

CREATE OR REPLACE TRIGGER trigger_siddhu
BEFORE DELETE OR INSERT OR UPDATE ON customers
FOR EACH ROW
WHEN (NEW.CUSTOMER_ID > 0)
DECLARE
   sal_diff NUMBER;
BEGIN
   sal_diff := :NEW.salary  - :OLD.salary;
   dbms_output.put_line('Old salary: ' || :OLD.salary);
   dbms_output.put_line('New salary: ' || :NEW.salary);
   dbms_output.put_line('Salary difference: ' || sal_diff);
END;
/


#10 Procedure
CREATE OR REPLACE PROCEDURE adjust_salary(
    new_customer_id IN NUMBER,
    salary IN NUMBER
) IS
BEGIN
 IF salary > 7000 
THEN 
UPDATE customers
   SET salary = '7007'
   WHERE customer_id = new_customer_id;
END IF;
END;

How to run Video file in GWT project


Use following belwo given code to execute file bbb_trailer_360p.webm of type webm to run on the screen using GWT application.

Video videoPlayer = Video.createIfSupported();
if (videoPlayer == null) {
RootPanel.get().add(new Label("Your browser doesn't support HTML5 Video"));
return;
}
//Video videoPlayer = new Video("siddhugwtvideoexample/videos/bbb_trailer_3601p.webm");

videoPlayer.addSource("siddhugwtvideoexample/videos/bbb_trailer_360p.webm", VideoElement.TYPE_WEBM);
videoPlayer.setControls(true);
videoPlayer.setPoster("siddhugwtvideoexample/videos/bbb480.jpg");
videoPlayer.setPixelSize(960, 640);
RootPanel.get().add(videoPlayer);


There is also another method which gives you addition control to run the file on the screen for that we need follwing jar files

https://code.google.com/p/gwt-html5-video/downloads/list

VideoWidget videoPlayer = new VideoWidget(true, false, null);

List sources = new ArrayList();
sources.add(new VideoSource("siddhugwtvideoexample/videos/bbb_trailer_3601p.webm", VideoType.WEBM));

videoPlayer.setSources(sources);
videoPlayer.setControls(true);
videoPlayer.setAutoPlay(false);
videoPlayer.setPoster("siddhugwtvideoexample/videos/bbb480.jpg");
videoPlayer.setPixelSize(960, 640);
RootPanel.get().add(videoPlayer);


Wednesday, August 26, 2015

How to resolve [org.jboss.as] JBAS015899: JBoss AS 7.1.1.Final "Brontes" starting error

While starting your jboss-as-7.1.1.Final sometimes it happen that our JBoss stop after this line on command prompt

[org.jboss.as] JBAS015899: JBoss AS 7.1.1.Final "Brontes" starting


This is know issue with JBoss in JDK8.


To get ride of this please add following line in your standalone.bat

rem setting JAVA_HOME by siddhu
set JAVA_HOME=C:\Program Files\Java\jdk1.7.0_75

Note: Make sure we need to add above given lines below 
set JAVA_OPTS=-Dprogram.name=%PROGNAME% %JAVA_OPTS%

by stating set JAVA_HOME=C:\Program Files\Java\jdk1.7.0_75 we force JBoss to take JDK7 for execution.