Now lets see how we can itegrate Keycloak as external IDP in this case we will have two instance of keycloak running.
1- this keycloak running on port 8080 will be broker
2- this keycloak running on port 8000 will be IdP
Our flow will be user hit the url that will try to access our spring boot service running port 8081 and the request will be send to keyclock 8080 broker further this request will be send to keycloak 8000 for identity verification as IDP server and login screen will be provided to the end user. Once the user successfully logged in to the keycloak they will be able to see the defined/secure url. This is our server setup for this example.
Spribgboot 8081 –> Keycloak broker 8080 –> Keycloak Identity provider 8000
i am using a single springboard application and two key clock servers one server is acting as the identity broker andother one is acting as the identity provider. Identity provider is the entity which contains identity information identity broker is the entity which connects identity provider and service provider also you can see i have mentioned the port numbers of each server
Step 1- So now lets start our first keycloak broder on 8080

Step 2- Start another instance of keycloak as IdP on port 8000 using below command
kc start-dev –http-port=8000

Step 3-
first step is springboot application integration with the identity broker using oidc. In the second step we need to integrate the identity broker with the identity provider using oidc in this case both are key clock servers.
first step is springboot application integration with the identity broker you can refer to my previous blog
https://shdhumale.wordpress.com/2022/12/29/integration-of-keycloak-with-spring-boot-application-as-identity-broker/
In the second step now we are going to integrate the identity broker with the identity provider. For that we need to configure both identity provider and identity broker. First i will do the identity provider configurations. for doing the integration we need to create a client application to represent the identity broker and therefore we are visiting to the clients page and we will create new client. Follow the belwo steps.
we create new client and we set the name as idp client. since this integration is happening through open id connect protocol we keep the client protocol as open id connect now save the client.


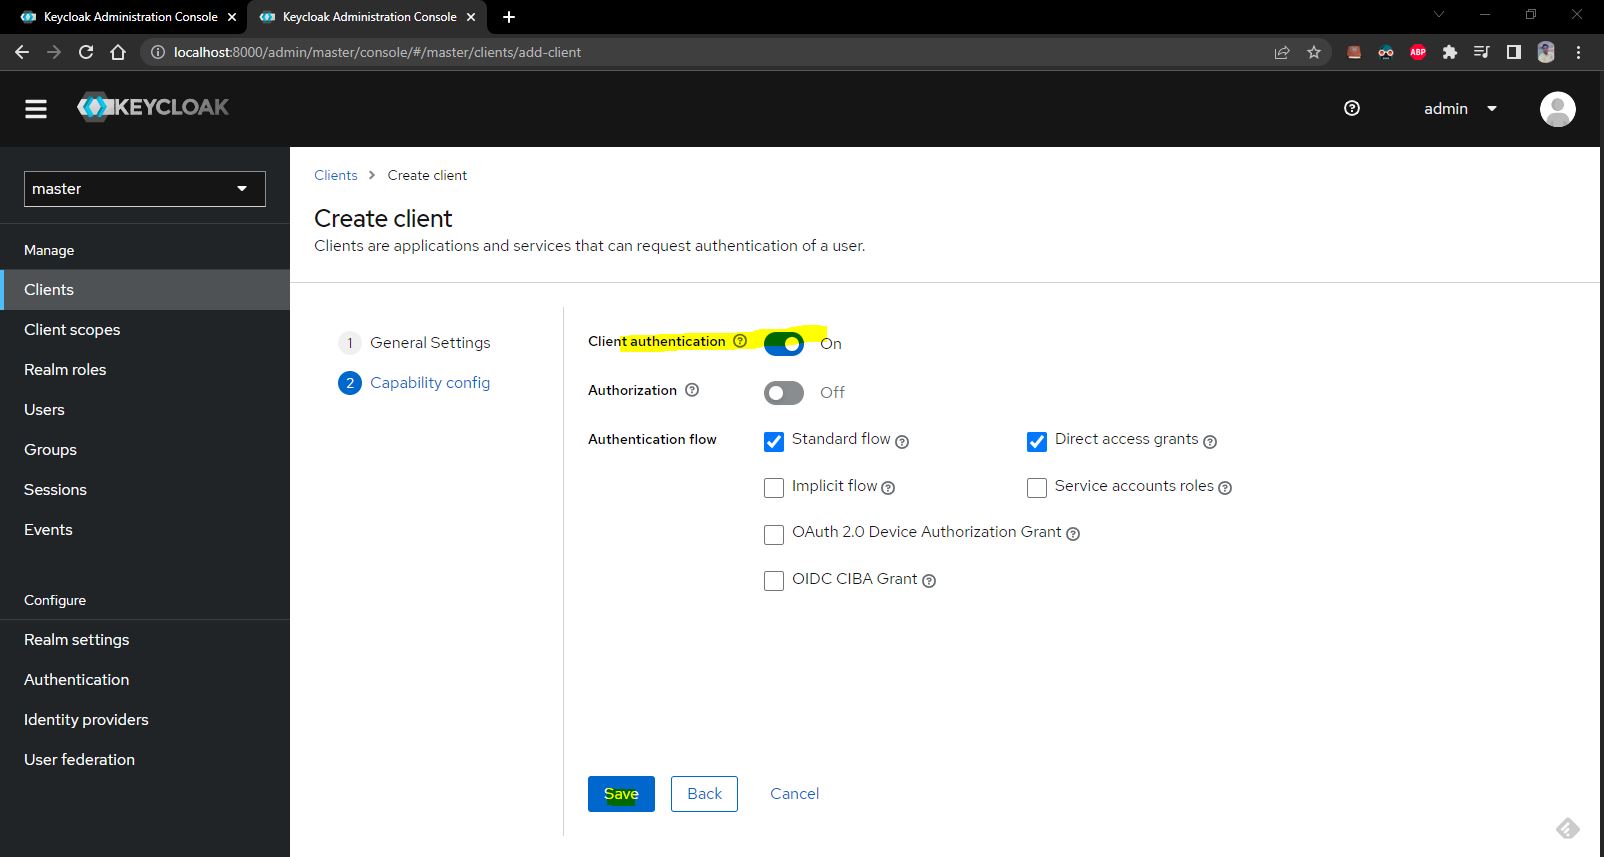
Make sure to confirm the we have set the client access type as confidential and also we need to set the valid redirect url back to our Keyclaok Identiry broker running on 8080 port.
i.e. http://localhost:8080/*


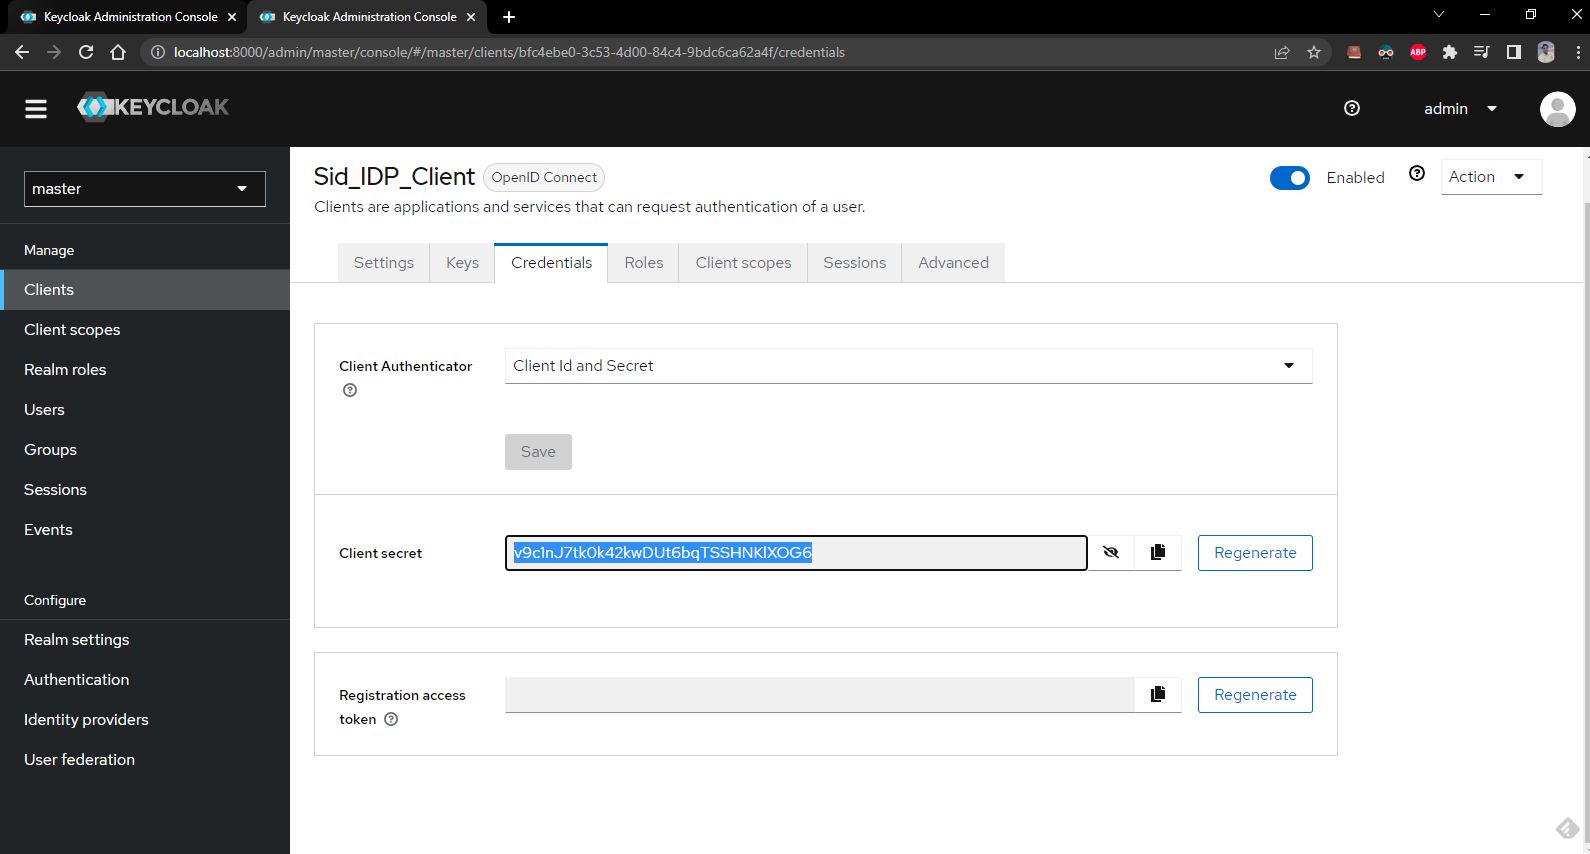
Now note down the client secret of IDP for the credential tab as shown below. We will need this in few min.
v9c1nJ7tk0k42kwDUt6bqTSSHNKlXOG6
Now lets try to connect our IDP with the Itendity broker for this things we need below three things form the IDP
Properties from IDP
1- client id :- Sid_IDP_Client
2- client secret :- v9c1nJ7tk0k42kwDUt6bqTSSHNKlXOG6
3- Identity provider metadata
For idp metadata you need to go to the realm settings page and here you can see there are two endpoints
OpenID Endpoint Configuration
SAML 2.0 Identity Provider Metadata

http://localhost:8000/realms/master/.well-known/openid-configuration
Now i am going to configure the identity broker. Migrate to our Identity broker running on port 8080 and configure a new identity provider
For this go to identity provider and configure new identity provider in identity broker. Please follow below steps religiously on our Identity broker.


Now copy our IDP metadata as shown below
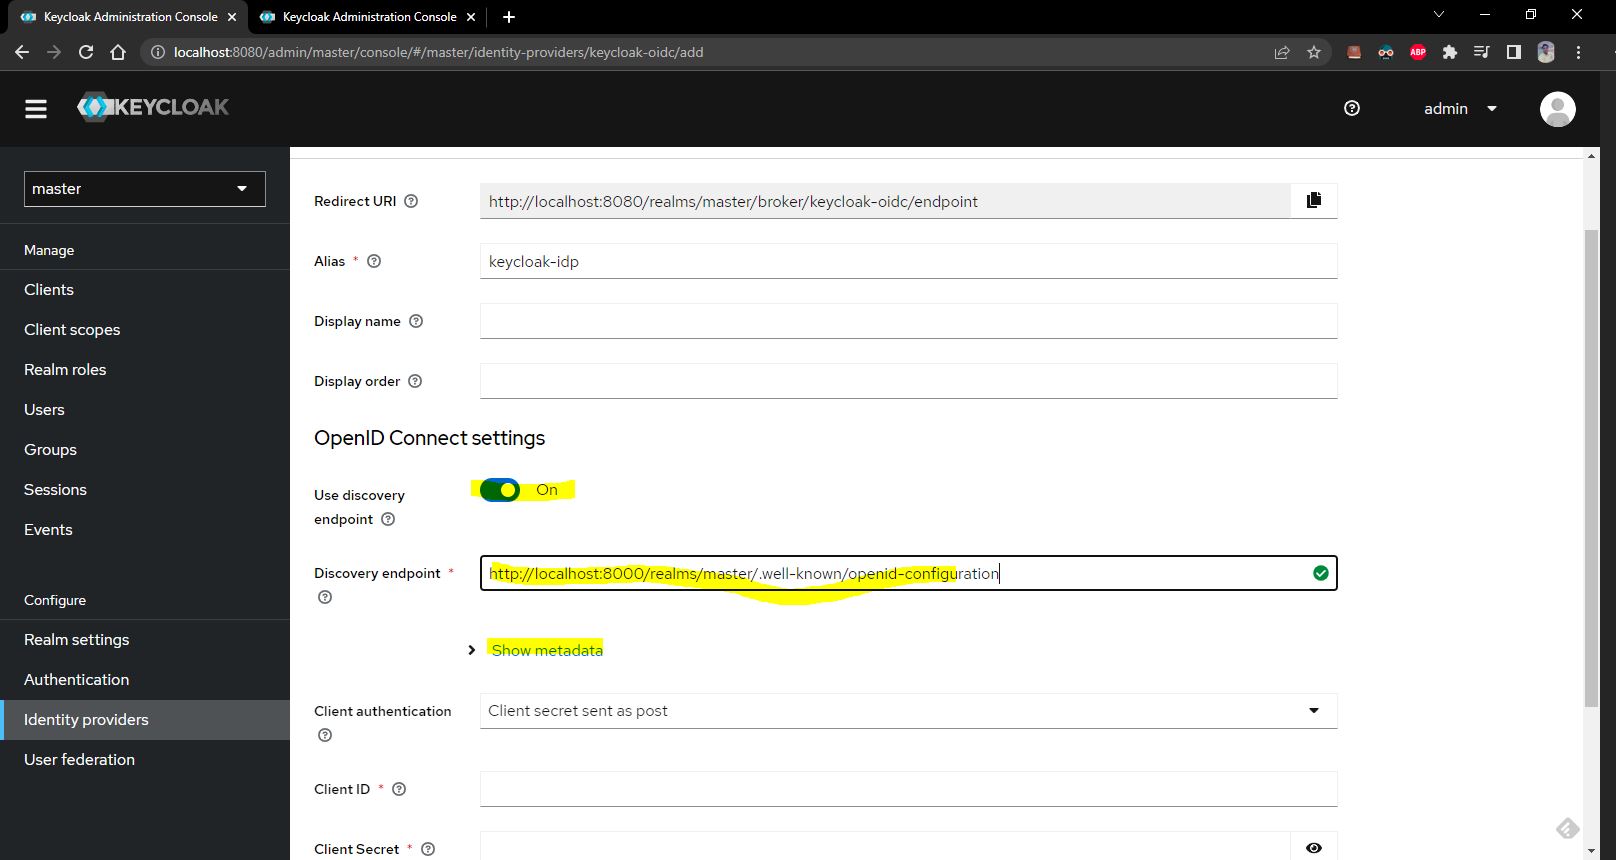
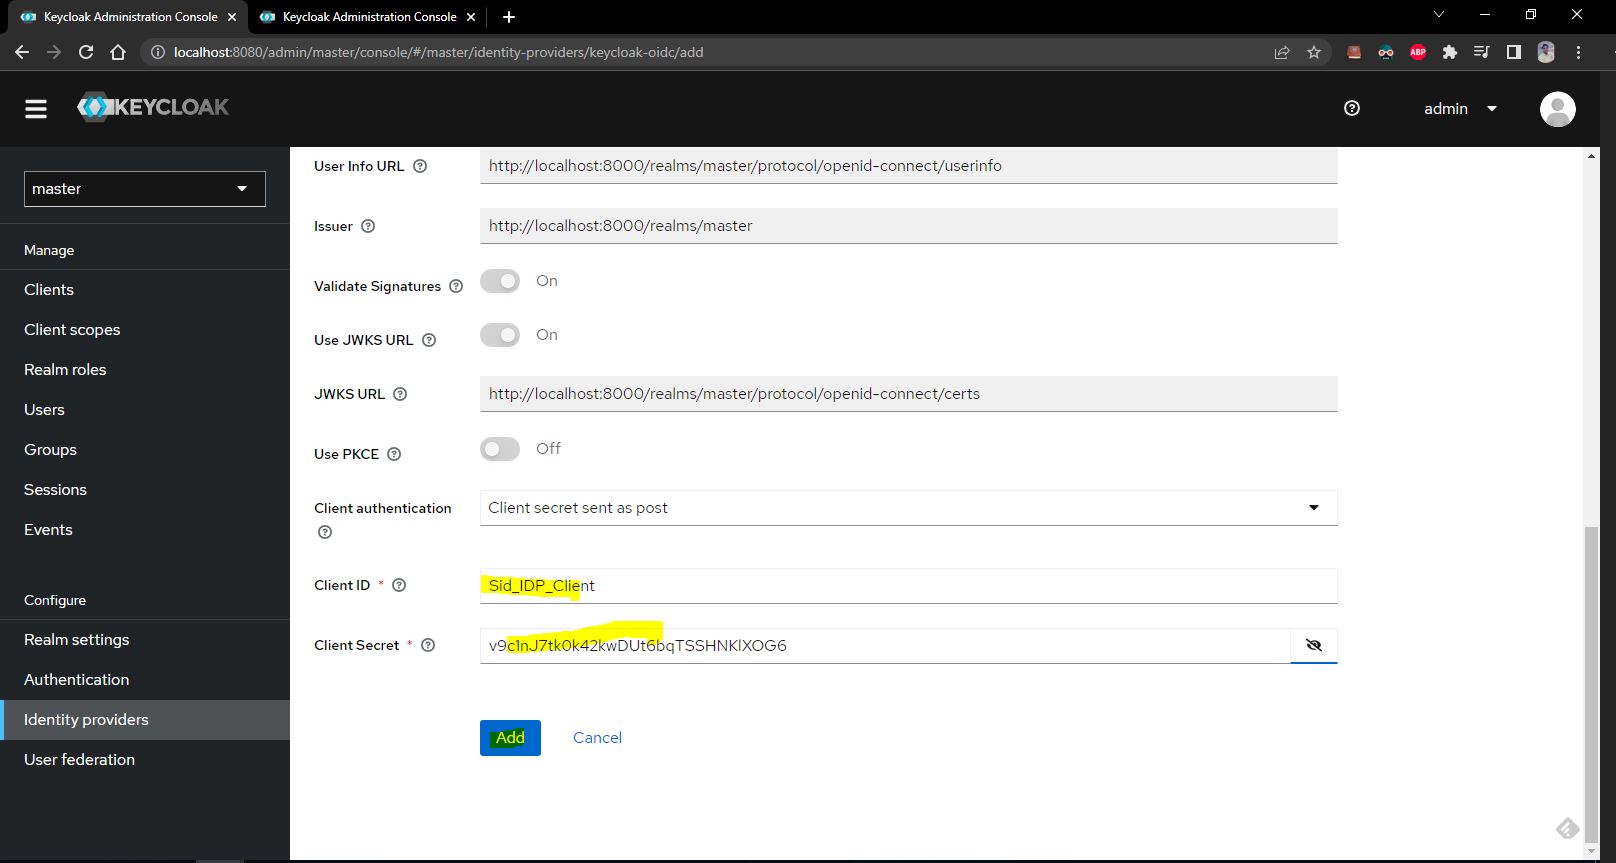
once imported you can see many mandatory fields are autocompleted. Now i only need to add the client details only.i set the client id and secret belong to the idp client and we created a short while ago client id is Sid_IDP_Client. Also paste the secret as well and save this configuration

Now as you know that springboot application can access only the users having a special client role named sid-springboot-oidc-client-role therefore we need to map that role to all the users coming from this idp provider for that we need to create a mapper for this we go to mappers tab
Let create a new mapper as shown below

select the mapper type as hard coded role and then select that special role named sid-springboot-oidc-client-role

role select client client name is sid-springboot-oidc-client

sid-springboot-oidc-client-role role is found and select client role.
Let set the name as hard coded role mapper


Now any user coming from this idp will automatically get the sid-springboot-oidc-client-role client. Now the integration is complete it is the time to
test our setup
Lets start our springboot application running on 8081.

now hit our http://localhost:8081/private it will redirect to our identity brokers login page.

now select newly configured idp key clock idp and now it takes us to the identity providers login page this idp already has a user named admin after entering the credential click sign in.

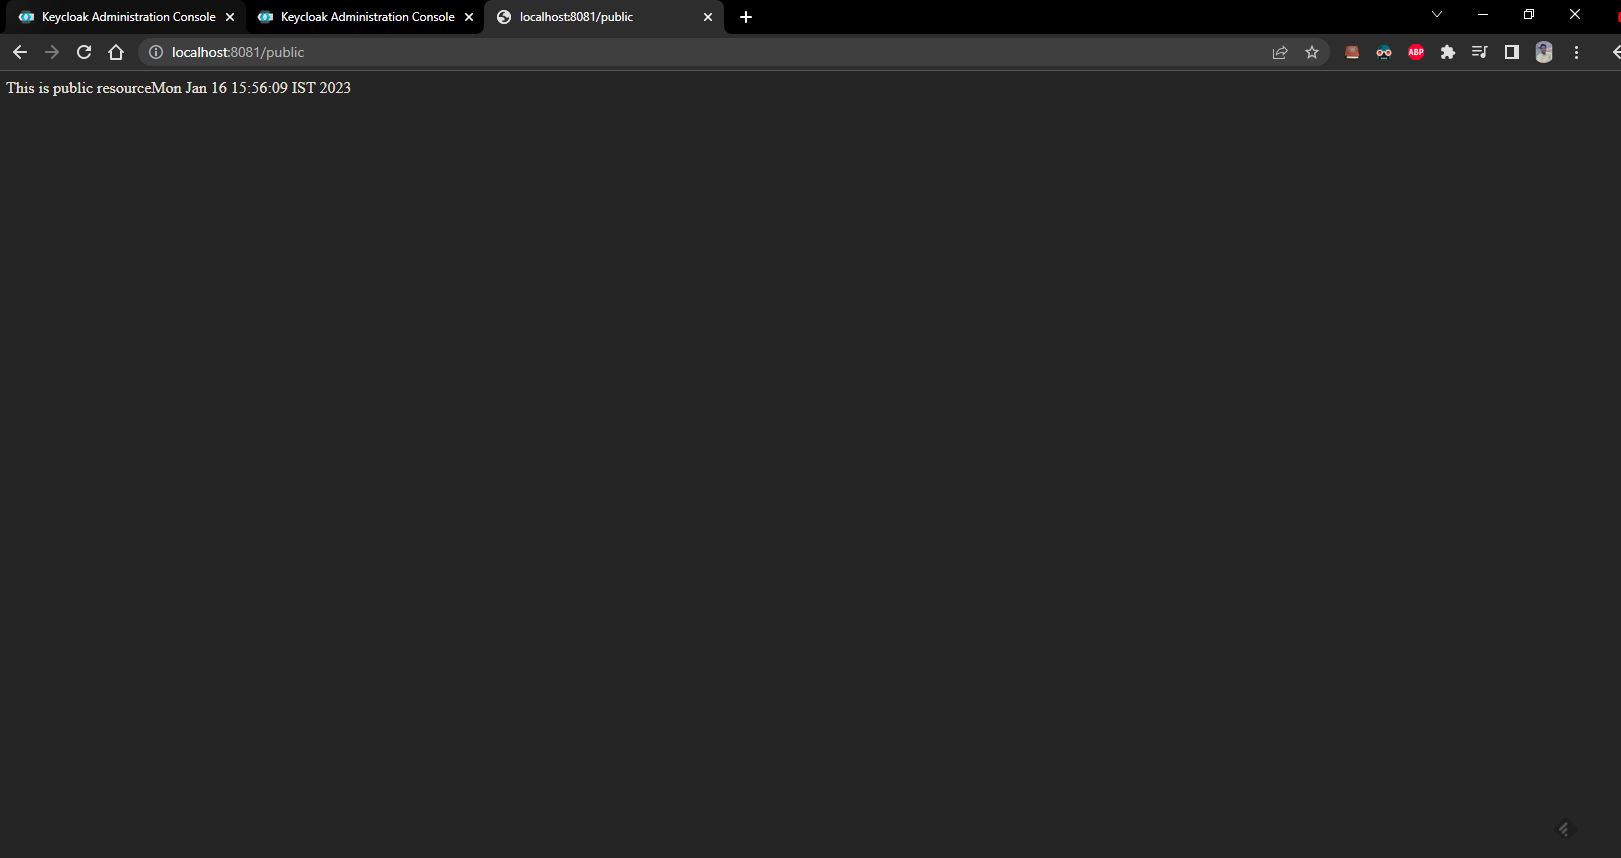
and you will be able to see your private url page.
No comments:
Post a Comment