Workbox is a javascript liberary for making your web application work as PWA. i.e. JavaScript Libraries for adding offline support to web apps
In general practise to make web application as PWA by writing service worker javascript and menifest.json file by hand. Workbox libraray come handy with the given option in which we can do following thing automatically
‘- Precaching [Precaching Static Files Caching]
‘- Runtime caching
‘- Strategies
‘- Request routing
‘- Background sync
‘- Helpful debugging
‘- Google Analytics integration with our applications.
‘- Auto versioning of the JAVA Script files.
For doing this we have many option provided by WorkBox
1- using CDN for workbox-sw.js i.e. importScripts(‘https://storage.googleapis.com/workbox-cdn/releases/3.5.0/workbox-sw.js’); This will give all the methods used for making our applications offline PWA.
2- using bundler i.e. CLI (workbox-cli :- is a command-line tool that lets you configure, generate, and modify service worker files), Gulp, Webpack, NPM etc. i.e. We can also integrate workbox with build tool like Gulp, NPM, CLI, windows packages and Webpack.
The general strategies is to have following format
<——————————-workbox-cli Node.Js module————————–>
Source —————————— config —————————- Build
src/service.worker.js workbox-cli-config.js build/service.worker.js
As shown above our workbox cli will create our production version of service-worker.js in build Folder by taking the configuration of parameter from workbox-cli-config.js and source files from src folder.
We will follow belwo given url to setup the simple running workbox example
https://codelabs.developers.google.com/codelabs/workbox-lab/#0
In above example we will use the workbox-sw.js library and the workbox-cli Node.js module to build an offline-capable Progressive Web App (PWA).
From above we will be able to understand
‘- Writing a service worker using the workbox-sw.js library
‘- Adding routes (routing) to your service worker using workbox-sw.js
‘- Using the predefined caching (precaching) strategies and runtime-caching provided in workbox-sw.js
‘- Augmenting the workbox-sw.js caching strategies with custom logic
‘- Generating a production-grade service worker with workbox-cli
Now lets create our own PWA example with workbox that will cover below given of Workbox. We are going to use the workbox-cli Node.js NPM package for using workbox and will try to use the following aspect
Step 1:- Create a base project that we need to convert into PWA.
We are using materialize.min.js and its css and icons in the project [https://materializecss.com/] for responsive and look&Feel behaviour.
Note:- You can download the base application from belwo given locations:-
https://github.com/shdhumale/complete-pwa-using-Serviceworker
Now lets work on below aspect one by one
Introduction of workbox to convert this application into PWA.
A:- Create a manifest.json file using online sites like https://app-manifest.firebaseapp.com/ or https://tomitm.github.io/appmanifest/. This will help us to allow the user to add the page as an icon on the screen like an Native applications.
menifest.json
{
"name": "Siddhu PWA Application",
"short_name": "SiddhuPWA",
"start_url": "/index.html",
"display": "standalone",
"background_color": "#FFE9D2",
"theme_color": "#FFE1C4",
"orientation": "portrait-primary",
"icons": [
{
"src": "/img/icons/icon-72x72.png",
"type": "image/png",
"sizes": "72x72"
},
{
"src": "/img/icons/icon-96x96.png",
"type": "image/png",
"sizes": "96x96"
},
{
"src": "/img/icons/icon-128x128.png",
"type": "image/png",
"sizes": "128x128"
},
{
"src": "/img/icons/icon-144x144.png",
"type": "image/png",
"sizes": "144x144"
},
{
"src": "/img/icons/icon-152x152.png",
"type": "image/png",
"sizes": "152x152"
},
{
"src": "/img/icons/icon-192x192.png",
"type": "image/png",
"sizes": "192x192"
},
{
"src": "/img/icons/icon-384x384.png",
"type": "image/png",
"sizes": "384x384"
},
{
"src": "/img/icons/icon-512x512.png",
"type": "image/png",
"sizes": "512x512"
}
]
}
Add a simple servic worker java script sw.js and integrate it with our project from app.js
if('serviceWorker' in navigator){
navigator.serviceWorker.register('/sw.js')
.then(reg => console.log('service worker registered'))
.catch(err => console.log('service worker not registered', err));
}
which we added in all html file like home, about, contact etc.
In this sw.js we will currently cache the static items such as *.js, index.html, images etc.
We will need to work with lifecycle method of sw.js
1- Install
// install event
self.addEventListener('install', evt => {
console.log('service worker is installed');
});
This is called when the service worker is installed or loaded first time on the browser. This is called only once unless and untill the new sw is modified. On first time on load we will get this log in console “service worker installed” in second time we will only get “service worker registered” log indicating install in called only once. It is basically used to perform all the static file when the sw is installed.
2- Activate// activate event
self.addEventListener('activate', evt => {
console.log('service worker is activated');
});
As some interval of time this method is called by the browser everytime when ever their is changes in the sw.js. After this event the sw is ready to fetch the request generated from the scope which it is capable of exmaining. So in general sw.js is kept in the ./ directory so that it can have the access from all the files and vice versa.
When ever the sw.js is changed in application tab of chrome it will ask to click skipWaiting so that we can close all the previous instance of sw.js and activate the new one. Once we click on that option or even if we check the update on reload in application it will reload the sw.js automatically.
3- Fetch
// fetch eventself.addEventListener('fetch', evt => {
console.log('fetch event fired', evt);
});
Once this method is implemented we get the option of Installing the application as icon on the screen. like we have in native app. In fetch method generally we use to implement different strategies like networkfirst, cahcefirst etc.
For showing the icon its image and name will be taken from the manifest.json.
Run the application i,e in live server as i am using VSCode or you can also use OKServer chrome extension to run the application and check if you are able to add the icon of your created application on the screen.
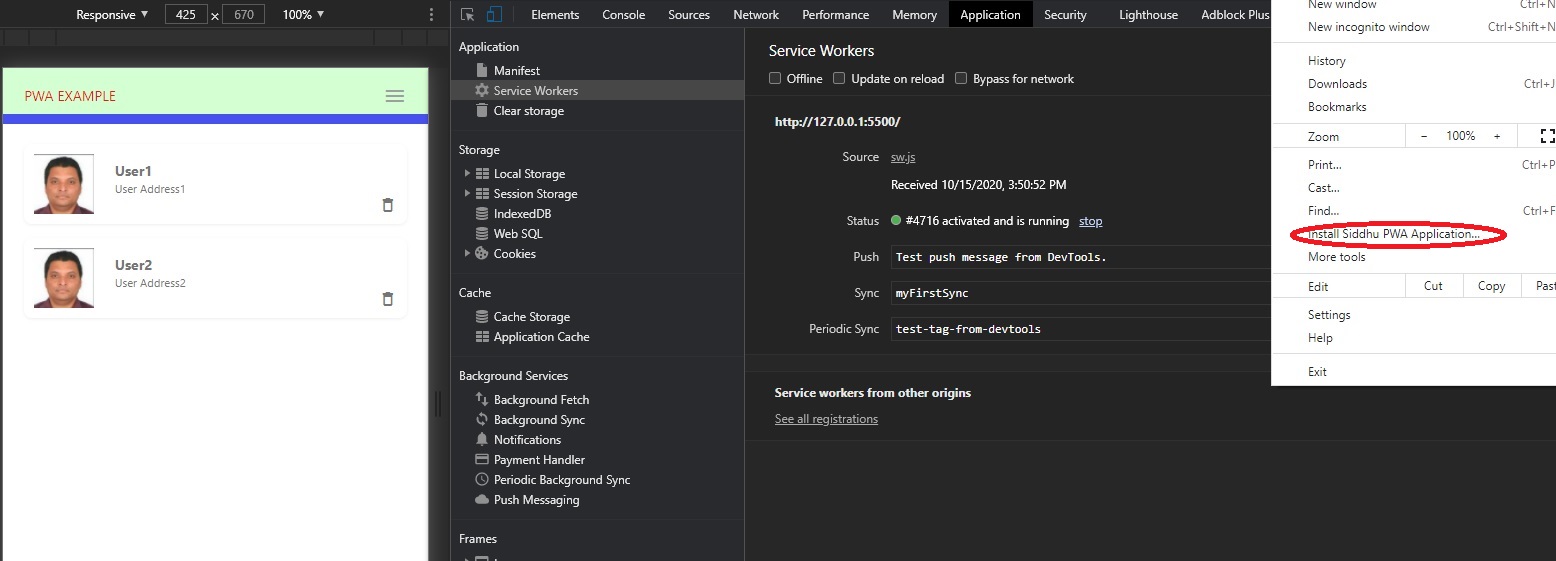
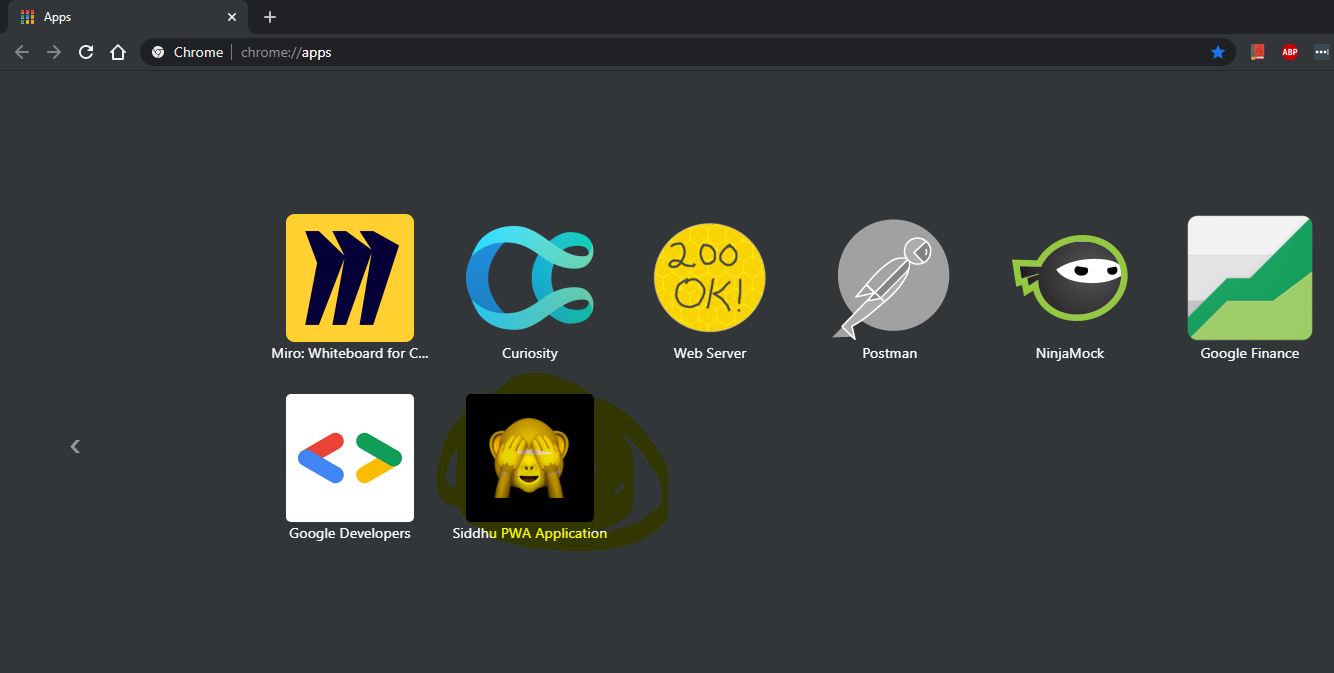
when we click on the icon our application open like this

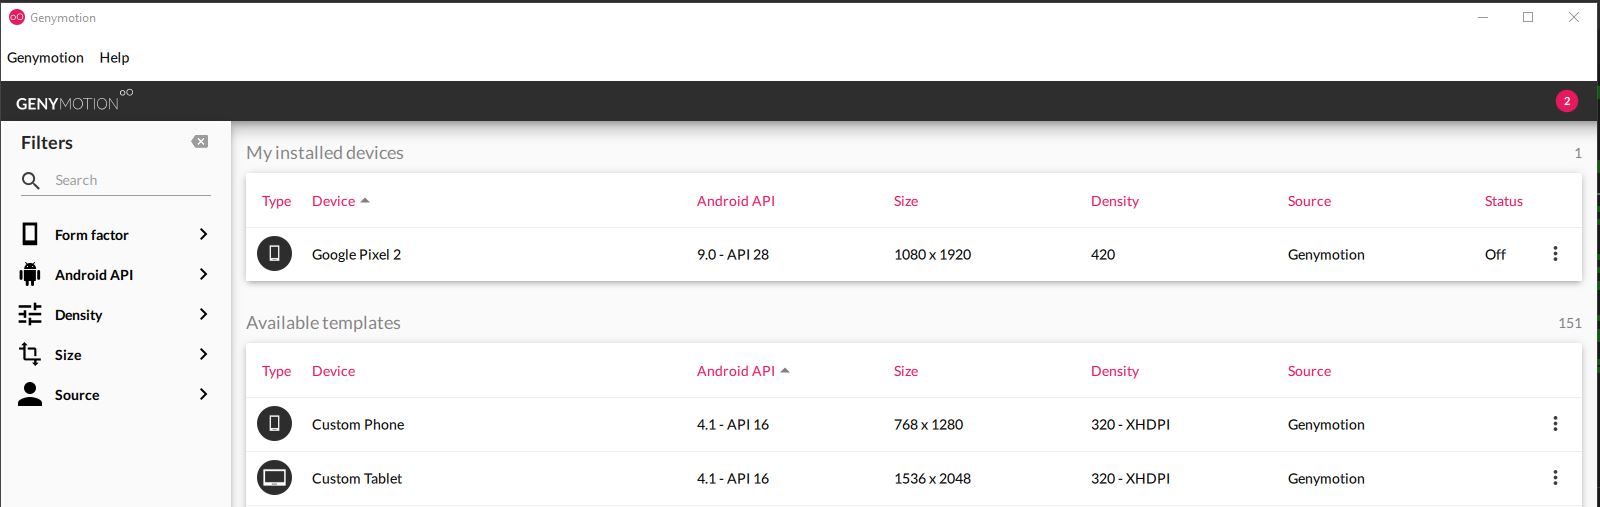
Now let simulating your application on Android you can use AndroidStudio and create a virtual box using AVD for your mobile. You can also use the GennyMotion and access the Localhost site can be access with ip 10.0.2.0 in Andriod AVD or genny motion.


When you load the url browser will prompt the user to install the Web App
Now lets try to play with some of the basic functionality of PWA
1- Static
Static cache can be done using following code in install method.// install event
self.addEventListener('install', evt => {
evt.waitUntil(
caches.open(staticCacheName).then((cache) => {
console.log('caching basic static assets');
cache.addAll(assets);
})
);
});
2- Offline access
this can be done using following line of code in fetch method. Which says that first search in cache and if the file is not found in the cache then look into the network.
// fetch eventself.addEventListener('fetch', evt => {
evt.respondWith(
caches.match(evt.request).then(cacheRes => {
return cacheRes || fetch(evt.request);
})
);
});
3- Versioning and Deleting the old cache from the browser.
Now as we always first look into the cache if we change the any file that files i.e index.html will not be able to get the data on the screen. Becuase our call will not go to internet but will take the data from the cache. To over come htis we need to make the versioning of the cache and need to delete the old cache this is done in activate method
// activate eventself.addEventListener('activate', evt => {
evt.waitUntil(
caches.keys().then(keys => {
return Promise.all(keys
.filter(key => key !== staticCacheName)
.map(key => caches.delete(key))
);
})
);
});
3- Dynamic Cache
But still when we click on the about and contact link in offline mode we will not be able to cache files. As in static cache we did not store the dynamic pages files. i.e. it is bad practise to store all the file in the cache of the application. Best option is to store minimum bare file that are needed to show the screen. Then as the user run on applicaiton we will store that files in cache as per the user click. This is called Dynamic cache. To do this we need to update Activate and Fetch method
In Activate method we have to implement the same logic to delete the old dynamic cache and restore the new dynamic cache if changes.
// activate eventself.addEventListener('activate', evt => {
evt.waitUntil(
caches.keys().then(keys => {
return Promise.all(keys
.filter(key => key !== staticCacheName && key !== dynamicCacheName)
.map(key => caches.delete(key))
);
})
);
});
In fetch we if the requested resource is in cache .. if it is then we server it from cache .. else we make a call using fetch(evt.request) which is a promise. When we get the response we create or update the dynamic cache using caches.open(dynamicCacheName) and put all new values in the dynamic cache.
// fetch eventself.addEventListener('fetch', evt => {
evt.respondWith(
caches.match(evt.request).then(cacheRes => {
return cacheRes || fetch(evt.request).then(fetchRes => {
return caches.open(dynamicCacheName).then(cache => {
cache.put(evt.request.url, fetchRes.clone());
return fetchRes;
})
});
})
);
});
Make sure to check the Application tab cache storage. Initital it will be like this
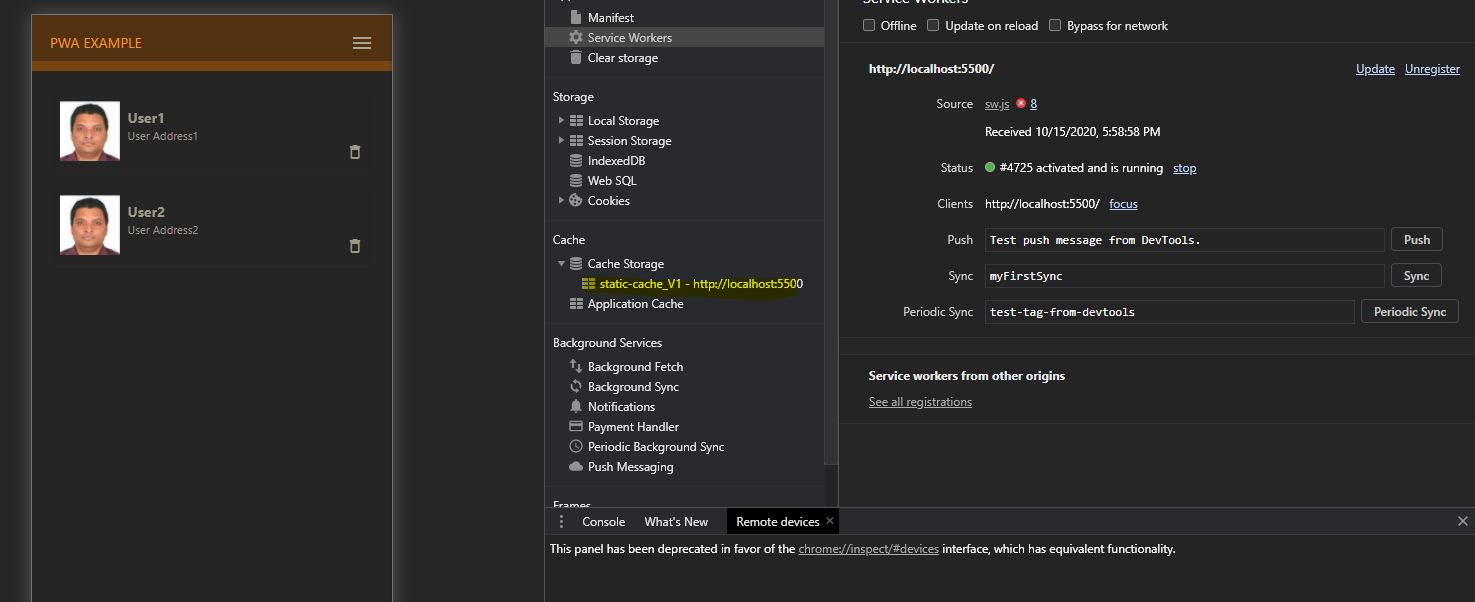
Now move to anther pages like contact of about page and see the dynamice chache is created

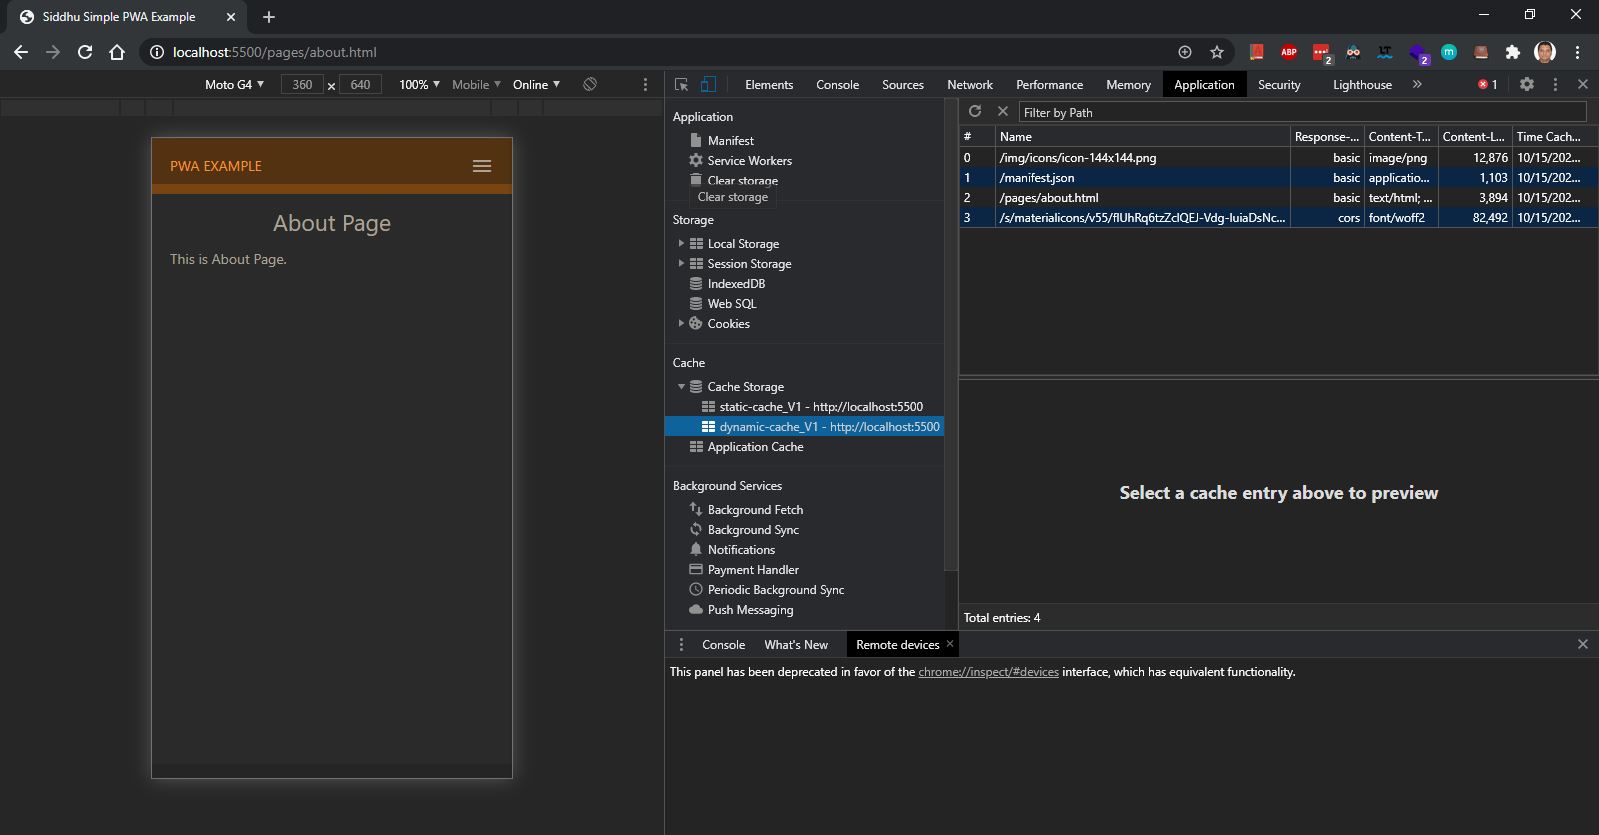
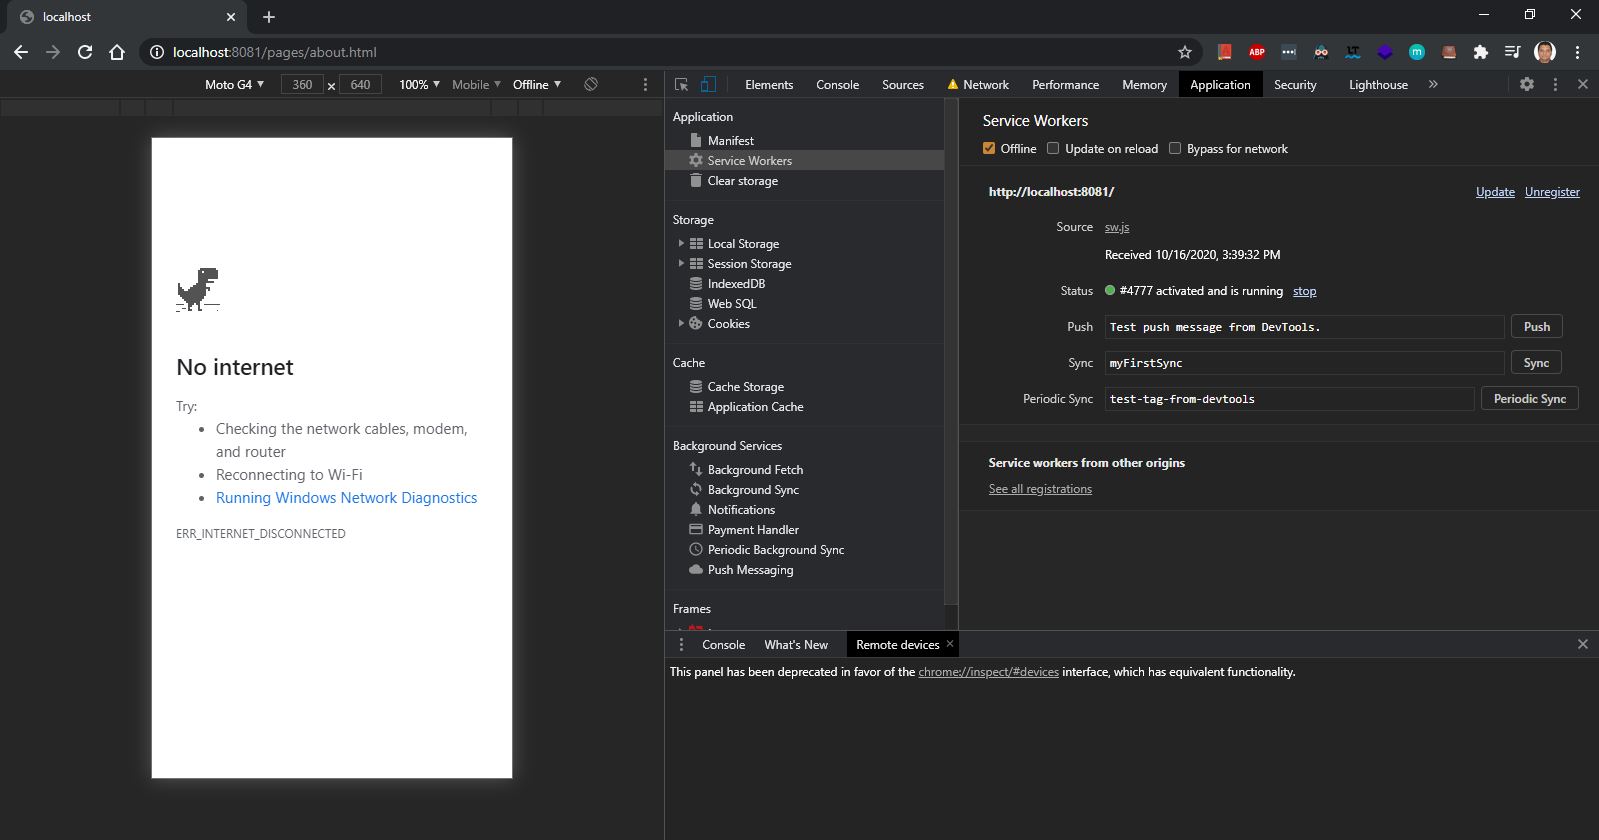
Now go to offline and check if you can access the about page which is dynamically cached now.
2- Fallback strategy i.e. when we access a page that is not availbale or getting 404 error we will show our page to the end user.
Now lets say even though added dynamic cache but let say user did not visit to the page when he was online and now in offline when to that option in that case he will get the internet offline screen. We dont want the user to look such screen. For that we have created fallout.html and added it as an static cache in the sw.js.
Now make sure to change the version of the cache and refresh the cache so our code in activate and fetch will delete the old cache and will create a new.
// fetch eventself.addEventListener('fetch', evt => {
evt.respondWith(
caches.match(evt.request).then(cacheRes => {
return cacheRes || fetch(evt.request).then(fetchRes => {
return caches.open(dynamicCacheName).then(cache => {
cache.put(evt.request.url, fetchRes.clone());
return fetchRes;
})
});
}).catch(() => caches.match('/pages/fallback.html'))
);
});

It is always better to give the exact file extension if possible to give fallback strategy. i.e. if user is offline and try to access the site .. for all the things i.e. images, assests, pages it will query the server and will show the fallout pages..better we can stop this by adding only *.html as we dont want the user to show this fallout pages for images not loading…this can be done
// fetch eventself.addEventListener('fetch', evt => {
evt.respondWith(
caches.match(evt.request).then(cacheRes => {
return cacheRes || fetch(evt.request).then(fetchRes => {
return caches.open(dynamicCacheName).then(cache => {
cache.put(evt.request.url, fetchRes.clone());
return fetchRes;
})
});
}).catch(() => {
if(evt.request.url.indexOf('.html') > -1){
return caches.match('/pages/fallback.html');
}
})
);
});
Now above all we had done using writing the sw.js file by hand. It is not a good practise to do the same. For this purpose we have workbox java script library.
You can download this Simple PWA application from the below git hub link.
https://github.com/shdhumale/complete-pwa-using-Serviceworker.git
Now lets come to our work box concept
Consider we have our simple above project with out PWA. i.e. no sw.js and manifest.json file etc.
First we will have simple web application made up of html, css and Java script.
You can download the same from below location.
https://github.com/shdhumale/siddhu-simple-web-application-html-css-js.git
First we will Install workbox using below command. We are using Node as an base technologies.
npm install –global workbox-cli@^3.0.0
or for latest version use
npm i -g workbox-cli
Now we will convert this project into PWA using workbox.
We will create our project as Node project. To setup its base we will run
npm inint -y
this will create a package.json
PS C:\Visual_Source_Code_Java_WorkSpace\complete-pwa-using-workbox-notification-fallout> npm init -y
Wrote to C:\Visual_Source_Code_Java_WorkSpace\complete-pwa-using-workbox-notification-fallout\package.json:
{
"name": "complete-pwa-using-workbox-notification-fallout",
"version": "1.0.0",
"description": "This project demo you complete pwa using workbox with notification and fallout strategies",
"main": "index.js",
"scripts": {
"test": "echo \"Error: no test specified\" && exit 1"
},
"repository": {
"type": "git",
"url": "git+https://github.com/shdhumale/complete-pwa-using-workbox-notification-fallout.git"
},
"keywords": [],
"author": "",
"license": "ISC",
"bugs": {
"url": "https://github.com/shdhumale/complete-pwa-using-workbox-notification-fallout/issues"
},
"homepage": "https://github.com/shdhumale/complete-pwa-using-workbox-notification-fallout#readme"
}
change following line in package.json under script tag
“start”: “node server.js”
Additional also add following line in the scripts of package.json
“copy”: “copyfiles -u 1 src///* src/*/ src/* build”
The above command like will copy all the files from our src directory and its sub directory to build directory
“build”: “npm run copy && workbox injectManifest workbox-config.js”,
The above command will execute first above copy command and then execute workbox injectManifest workbox-config.js
So your final scripts in package.json will look like this
"scripts": {
"test": "echo \"Error: no test specified\" && exit 1",
"copy": "copyfiles -u 1 src///* src/*/ src/* build",
"build": "npm run copy && workbox injectManifest workbox-config.js",
"start": "node server.js"
}
Now add below given lines your package.json we are using these dependencies to our project
"dependencies": {
"express": "^4.16.3"
},
"devDependencies": {
"copyfiles": "^1.2.0",
"workbox-cli": "^5.1.4"
}
As our project is express Node base create a server.js
server.js:-
const express = require(‘express’);
const app = express();
// static files directory
app.use(express.static(__dirname + ‘/build’));
const server = app.listen(8081, () => {
const host = server.address().address;
const port = server.address().port;
console.log(‘App listening at http://%s:%s’, host, port);
});
You can also use the command from workbox-cli to create the base workbox-config.js and sw.js. Workbox cli command with different option you can check the options by executing this command on prompt
Examples:
$ workbox wizard
$ workbox wizard –injectManifest
$ workbox generateSW –watch
$ workbox injectManifest configs/workbox-dev-config.js
$ workbox copyLibraries build/
‘- workbox wizard
‘- workbox wizard –injectManifest
‘- workbox generateSW –watch
‘- workbox injectManifest configs/workbox-dev-config.js
‘- workbox copyLibraries build/
(Please refer to the documentation for the use of all the above command)
Generally we use workbox wizard command which prompt user to give answer of some question depending on the project which we want to make PWA. Once it is completed it will create workbox-config.js for you in the project. Further we use this created file workbox-config.js to creat our base sw.js using command “workbox generateSW” but in our project we are using command “workbox injectManifest workbox-config.js” to create production ready sw.js
For simplicity we are adding this files manually in our project named as workbox-config.js this file will act as a configuration files which will be used by the workbox along with our serviceworker.js file from Src folder to create autogenerated serviceworker.js in build folder.
workbox-config.js:-
module.exports = {
"globDirectory": "build/",
"globPatterns": [
"*/.css",
"index.html",
"js/.js", "img/.jpg",
"img/icons/*.png",
"pages/offline.html",
"pages/404.html",
"pages/about.html",
"pages/contact.html",
"pages/fallback.html"
],
"swSrc": "src/sw.js",
"swDest": "build/sw.js",
"globIgnores": [
"../workbox-config.js"
]
};
Add app.js file having below code in js folder and add the same in all our html files.
if ('serviceWorker' in navigator) {
window.addEventListener('load', () => {
navigator.serviceWorker.register('/sw.js')
.then(registration => {
console.log(Service Worker registered! Scope: ${registration.scope});
})
.catch(err => {
console.log(Service Worker registration failed: ${err});
});
});
}
Additional for we are adding our service worker java script file sw.js in source folder. Plesae note we will never update sw.js created in build by workbox api we will always modify the sw.js in src folder. Add following line of code in it.
if (workbox) {
console.log(Workbox is loaded);
1 | workbox.precaching.precacheAndRoute([]); |
} else {
console.log(Workbox didn't load);
}
Above package will allow us to use the workbox-cli method to our project and then run below comands
Run following below given commands sequence wise
npm install
Optional :- [Now run belwo command to check if we are getting the sw.js in build folder properly .. any way we are adding this command in our package.json ” “build”: “npm run copy && workbox injectManifest workbox-config.js”,”
workbox wizard –injectManifest]
npm run build
npm run start
now check you will be able to see the newly created sw.js by workbox.
Now let check each aspect of workbox
1- Precaching [Precaching Static Files Caching]:-
code workbox.precaching.precacheAndRoute([]); writte in the src/sw.js precacheAndRoute method sets up an implicit cache-first handler. This is why the home page loaded while you were offline even though you had not written a fetch handler for those files!


when we go offline and click on

2- Offline page to show or 404 page not found:
Lets not implement to show the user our defined html if the user is offline or got 404 page.
for that add below line in src/sw.js
const articleHandler = workbox.strategies.networkFirst({
cacheName: 'html-cache',
plugins: [
new workbox.expiration.Plugin({
maxEntries: 50,
})
]
});
1 2 3 4 5 6 7 8 9 10 | workbox.routing.registerRoute(/(.*)\.html/, args => { return articleHandler.handle(args).then(response => { if (!response) { return caches.match('pages/offline.html'); } else if (response.status === 404) { return caches.match('pages/404.html'); } return response; });}); |
npm run build
npm run start
Open the url and you will get the home page now go offline and hit the menu and go to contat page you will get below page


in above code we are using registering routing that says if the request contains *.html then this handler will come into picture and start working. Routing can be used also for runtime caching
3- Runtime caching
If you are using runtime url i.e. for fonts. Lets say if we lose network then we will not be able to see these icones. So we can cache it at run
workbox.routing.registerRoute(
new RegExp('https://fonts.(?:googleapis|gstatic).com/(.*)'),
workbox.strategies.cacheFirst({
cacheName: 'google-fonts',
plugins: [
new workbox.expiration.Plugin({
maxEntries: 30,
}),
new workbox.cacheableResponse.Plugin({
statuses: [0, 200]
}),
],
}),
);
4- Strategies and also implementing different strategies.
There are many strategies provided by the workbox. You can go in deatils in below link
In our project we had already used networkFirst and cacheFirst
https://developers.google.com/web/tools/workbox/modules/workbox-strategies
‘- cacheFirst :- Offline web apps will rely heavily on the cache, but for assets that are non-critical and can be gradually cached, a cache first is the best option.If there is a Response in the cache, the Request will be fulfilled using the cached response and the network will not be used at all. If there isn’t a cached response, the Request will be fulfilled by a network request and the response will be cached so that the next request is served directly from the cache.i.e. use for static images etc. Bydefault precacheAndRoute[]used this strategies
‘- staleWhileRevalidate :- The stale-while-revalidate pattern allows you to respond to the request as quickly as possible with a cached response if available, falling back to the network request if it’s not cached. The network request is then used to update the cache. ie.e. Avatar images.
‘- networkFirst :- For requests that are updating frequently, the network first strategy is the ideal solution. By default, it will try to fetch the latest response from the network. If the request is successful, it’ll put the response in the cache. If the network fails to return a response, the cached response will be used.i.e.Sometimes content must always be kept up to date (e.g., news articles, stock figures, etc.).
‘- network only:- If you require specific requests to be fulfilled from the network, the network only is the strategy to use.
‘- cache only : -The cache only strategy ensures that responses are obtained from a cache. This is less common in workbox, but can be useful if you have your own precaching step.
Now lets introduce the Notification in our application.
Please refer to the below post for detail information
http://siddharathadhumale.blogspot.com/2020/10/performing-notifications-operation-in.html
install below given npm package web-push and body-parser using below command
npm i web-push express body-parser
Create your public and private key using following commands
.\node_modules.bin\web-push generate-vapid-keys
Modify your js/app.js as given below
app.js :-
const publicVapidKey = ;
if ('serviceWorker' in navigator) {
/* navigator.serviceWorker.register('/sw.js')
.then(reg => console.log('service worker registered'))
.catch(err => console.log('service worker not registered', err)); */
send().catch(err => console.log('service worker not registered', err));
}
// Register Push, Send Push
async function send() {
try {
// Register Service Worker
console.log("Registering service worker…");
const register = await navigator.serviceWorker.register("/sw.js", {
scope: "/"
});
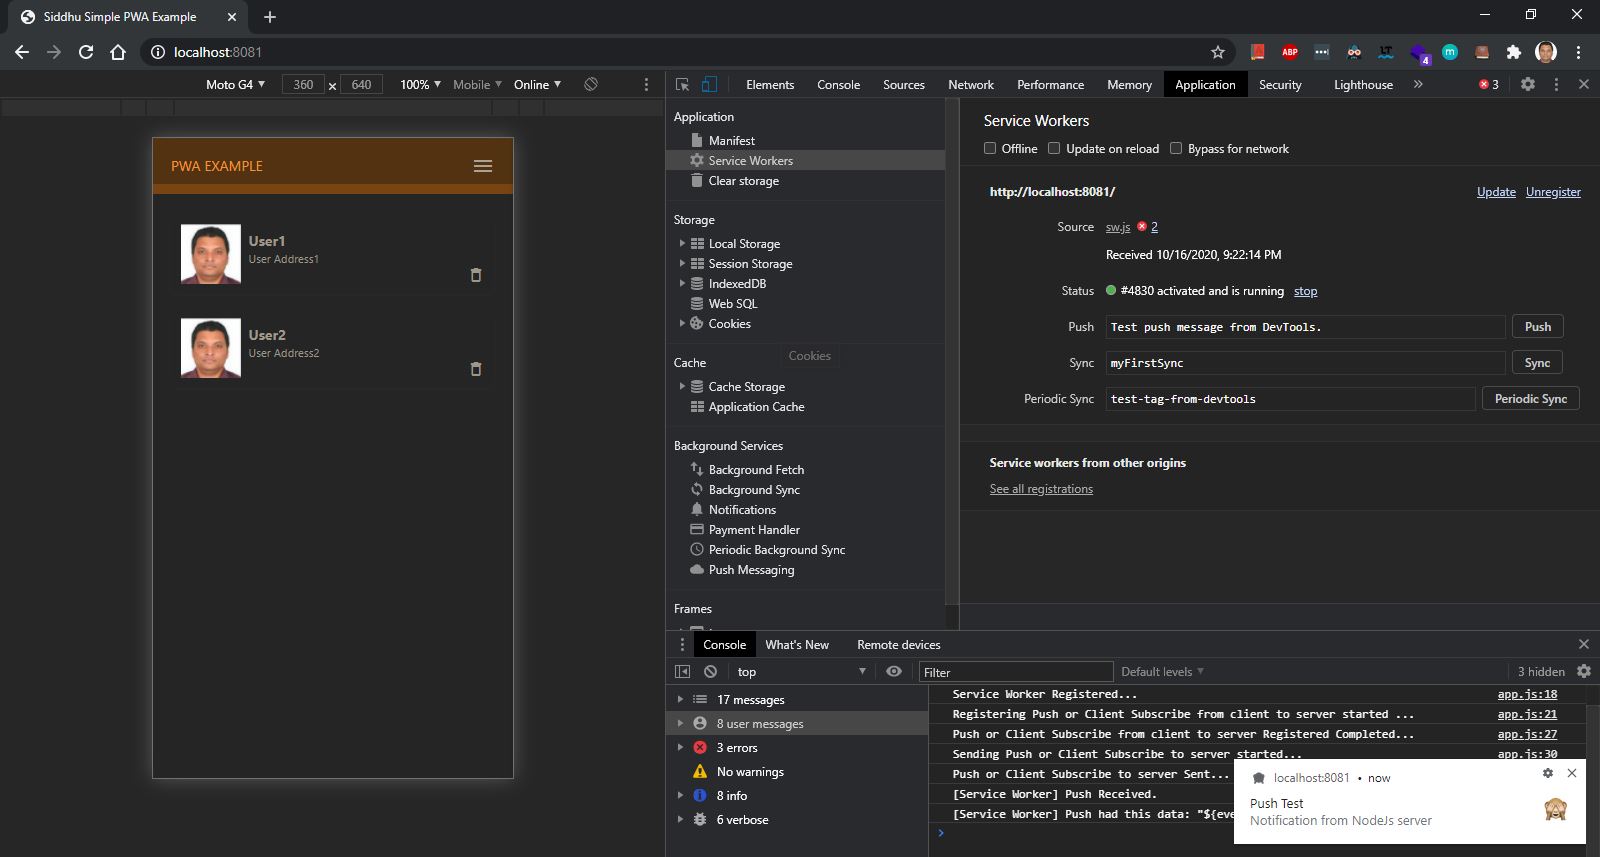
console.log("Service Worker Registered…");
1 2 3 4 5 6 7 8 9 10 11 12 13 14 15 16 17 18 | // Register Push:- Here client register/subscribe itself for getting push notification from the server.console.log("Registering Push or Client Subscribe from client to server started ...");//During registration of the push from the client we use the subscribe object of pushManager method of register as shown belowconst subscription = await register.pushManager.subscribe({ userVisibleOnly: true, applicationServerKey: urlBase64ToUint8Array(publicVapidKey)});console.log("Push or Client Subscribe from client to server Registered Completed...");// Send Push Notification:- Send subscribe notification to the server.console.log("Sending Push or Client Subscribe to server started...");await fetch("/subscribe", { method: "POST", body: JSON.stringify(subscription), headers: { "content-type": "application/json" }}); |
} catch (e) {
console.log(‘SW registration failed’);
}
console.log(“Push or Client Subscribe to server Sent…”);
}
//When ever you send the publickey always use urlBase64ToUint8Array you can copy this function from https://github.com/web-push-libs/web-push;
function urlBase64ToUint8Array(base64String) {
const padding = "=".repeat((4 - base64String.length % 4) % 4);
const base64 = (base64String + padding)
.replace(/-/g, "+")
.replace(/_/g, "/")
const rawData = window.atob(base64);
const outputArray = new Uint8Array(rawData.length);
for (let i = 0; i < rawData.length; ++i) {
outputArray[i] = rawData.charCodeAt(i);
}
return outputArray;
}
now execute this command and enable the notification in browser
npm run build
npm run start
You can download the whole code from below location.
https://github.com/shdhumale/complete-pwa-using-workbox-notification-fallout.git

No comments:
Post a Comment