Generally in any web application we have an HTML form that contains all the component that is required to be displayed to the user with a purpose of getting some information and capturing the same after validation on screen to send it to the back end system using form submission. ReactJS is a view part of Front end application. In reactJs also we use the form and as usual we do show the user some info and after validation submit the form. But in traditional fashion we have to write huge code with large test case for form submission and validation. React come with 3rd party library called as Formik created by Jared Palmer. You can visit the site https://jaredpalmer.com/formik/
So the question here is why we should use this library when we already have HTML form and submit functionality on button along with validation. I agree but if the same thing can be done with already tested library with less code and easy way ... then why to take hard path ....
Three main reason to use formik is
1- It mangae the state of the data in form.
2- It manage the submission action
3- It elivate and ease the validation process.
So lets start with the implementation first step to install formik in react application. Use below command
npm install formik --save
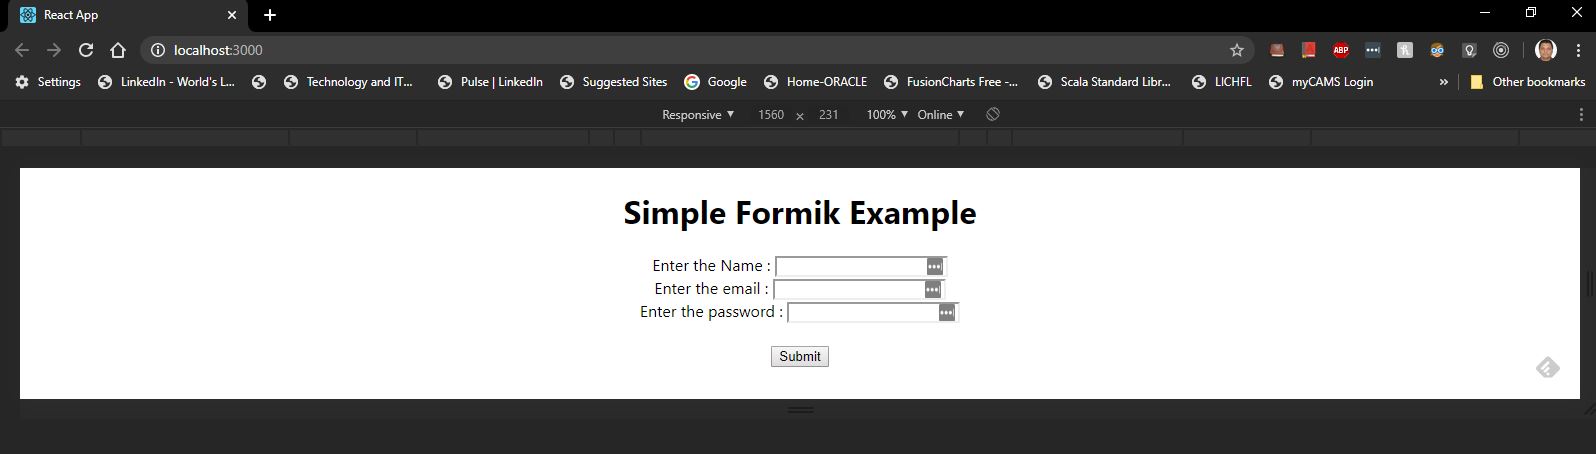
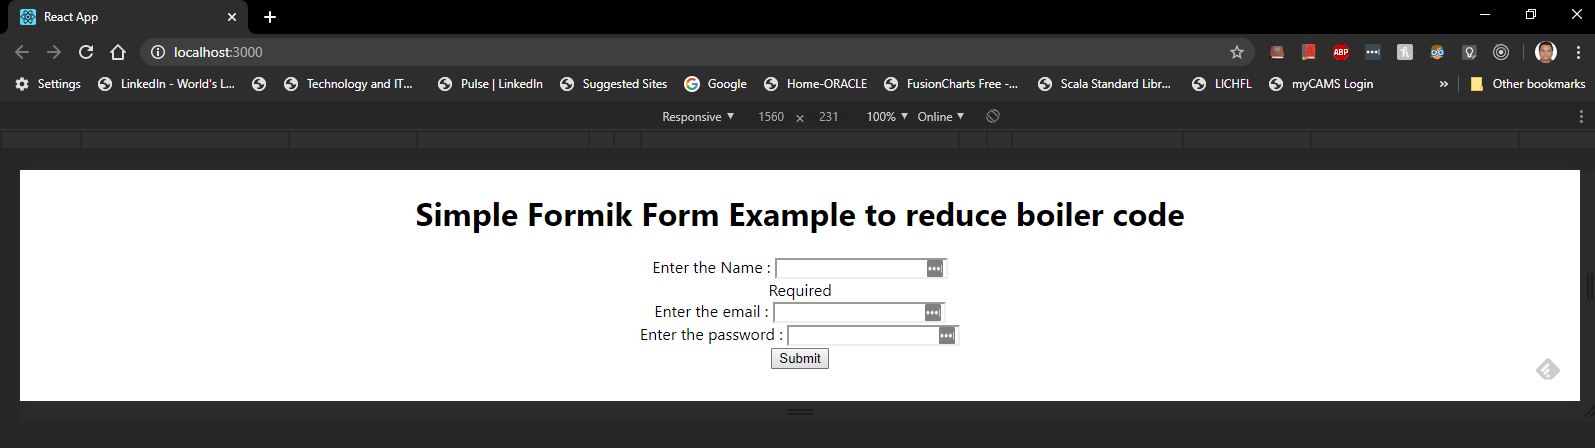
Lets say we have one normal html form having two textfield as name and email id. Now in general ReactJS we need to maintain their state using state object in class or using useState hook in function. Additional if we want to implement onchange or onBlur event handler we need to all method on that specific text field component. With using Formik it keeps track of your form's state along with few reusable methods and event handlers (handleChange, handleBlur, and handleSubmit) to your form via props. handleChange and handleBlur use a name or id attribute to figure out which field to update.
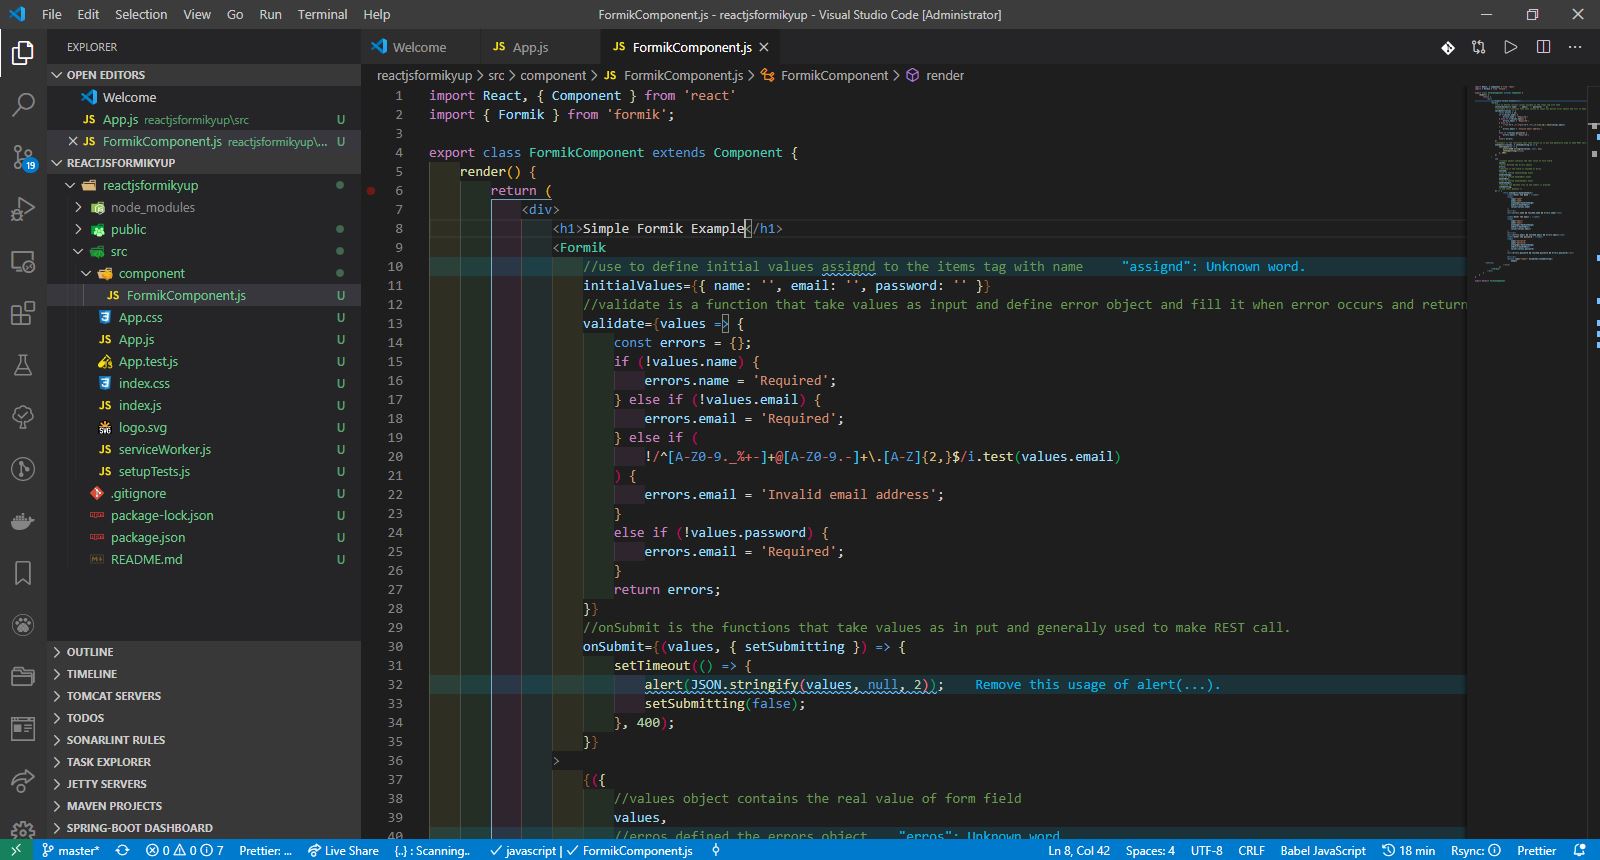
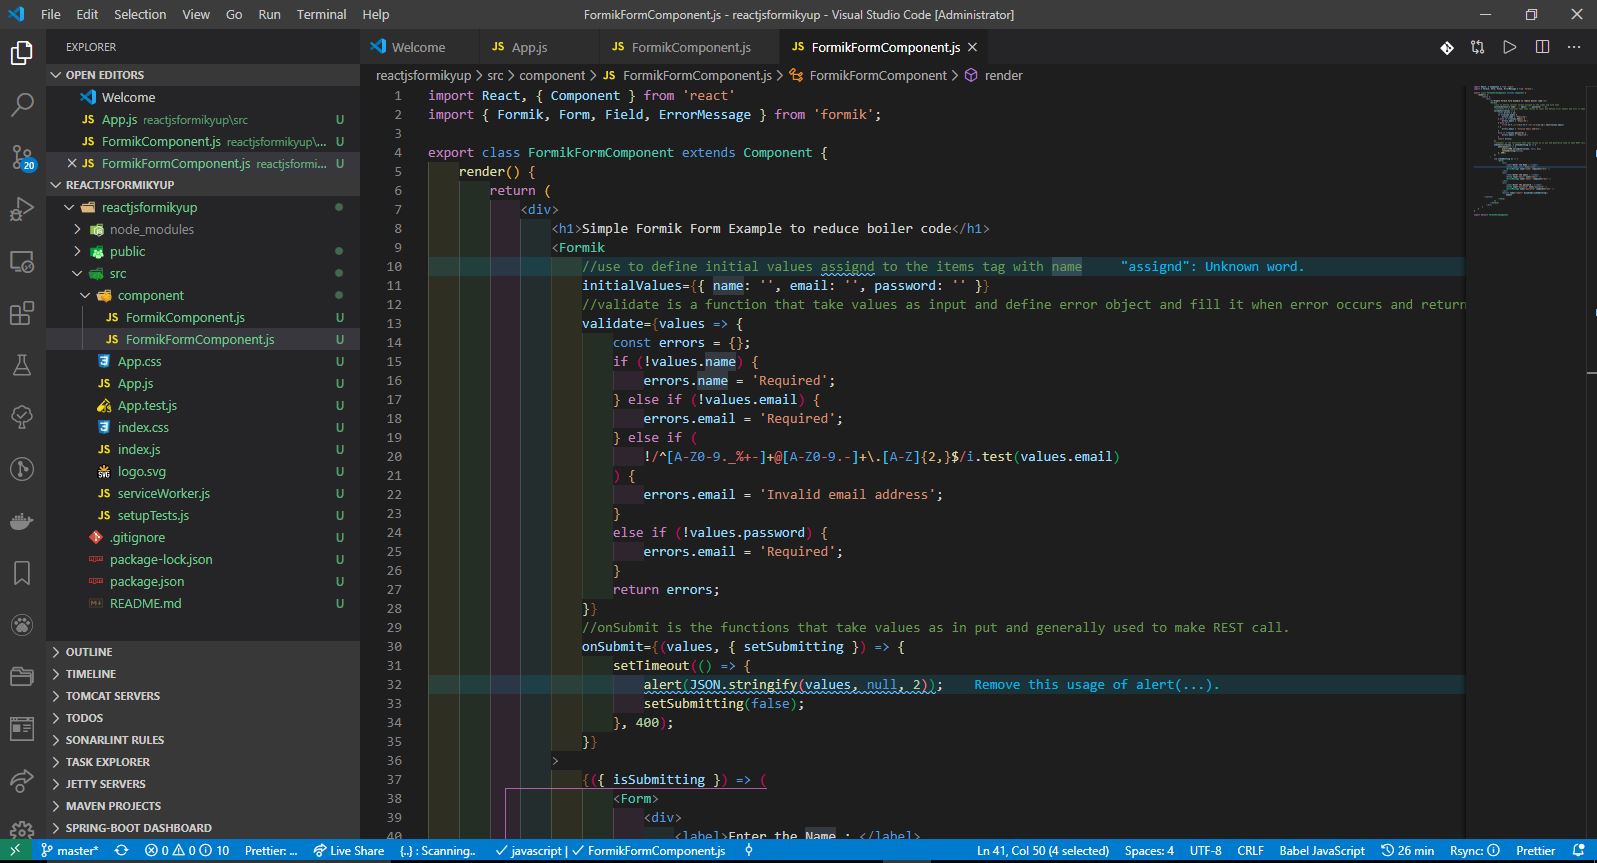
As show below first we need to import Formik from formik to use it. Then we need to bring our whole form inside the formik tag and in formik tag we can define initialValue, validate and onSubmit this represent the above three aspect i.e. manage the state of the data in form , elevate and ease the validation process. and manage the submission action.
One more thing we need to add our html form inside formic using function i.e. {(event handlers) =>(html form)}
All the event handler for formik is mapped with the html methods.
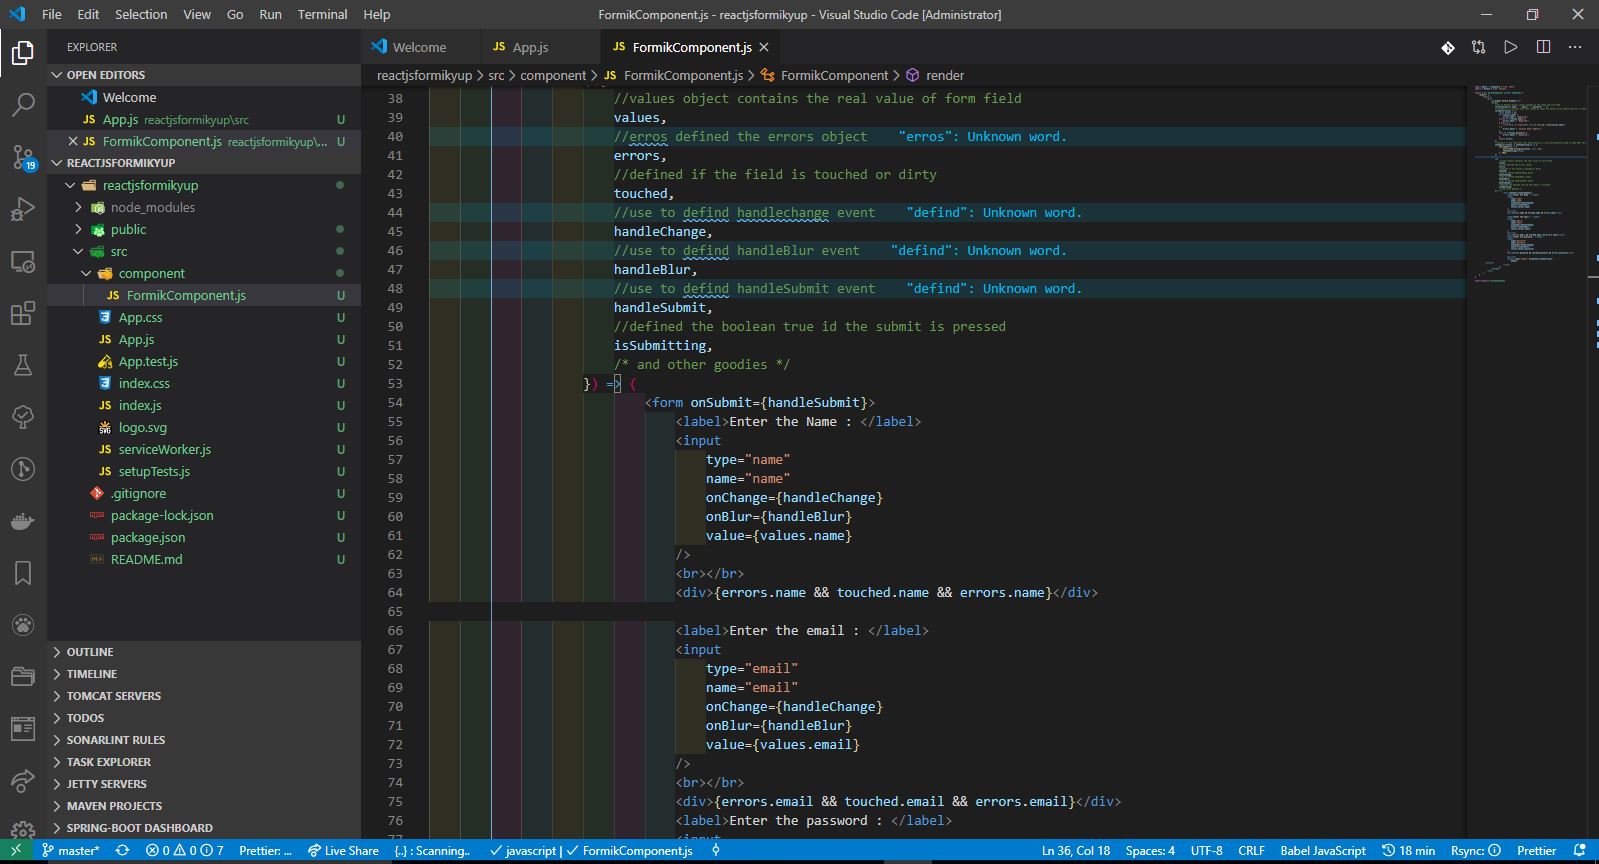
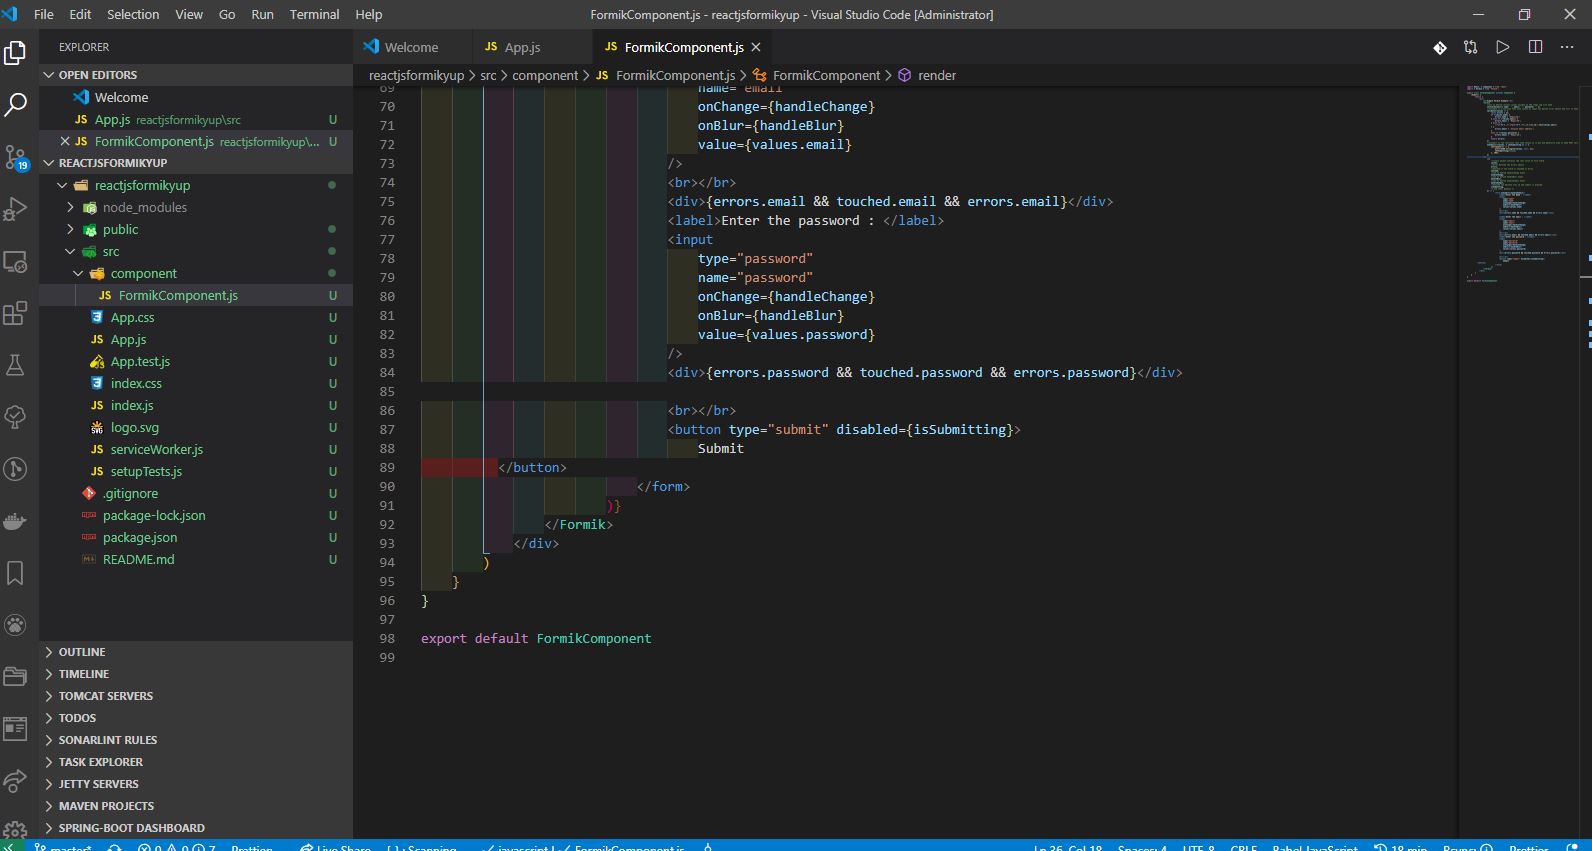
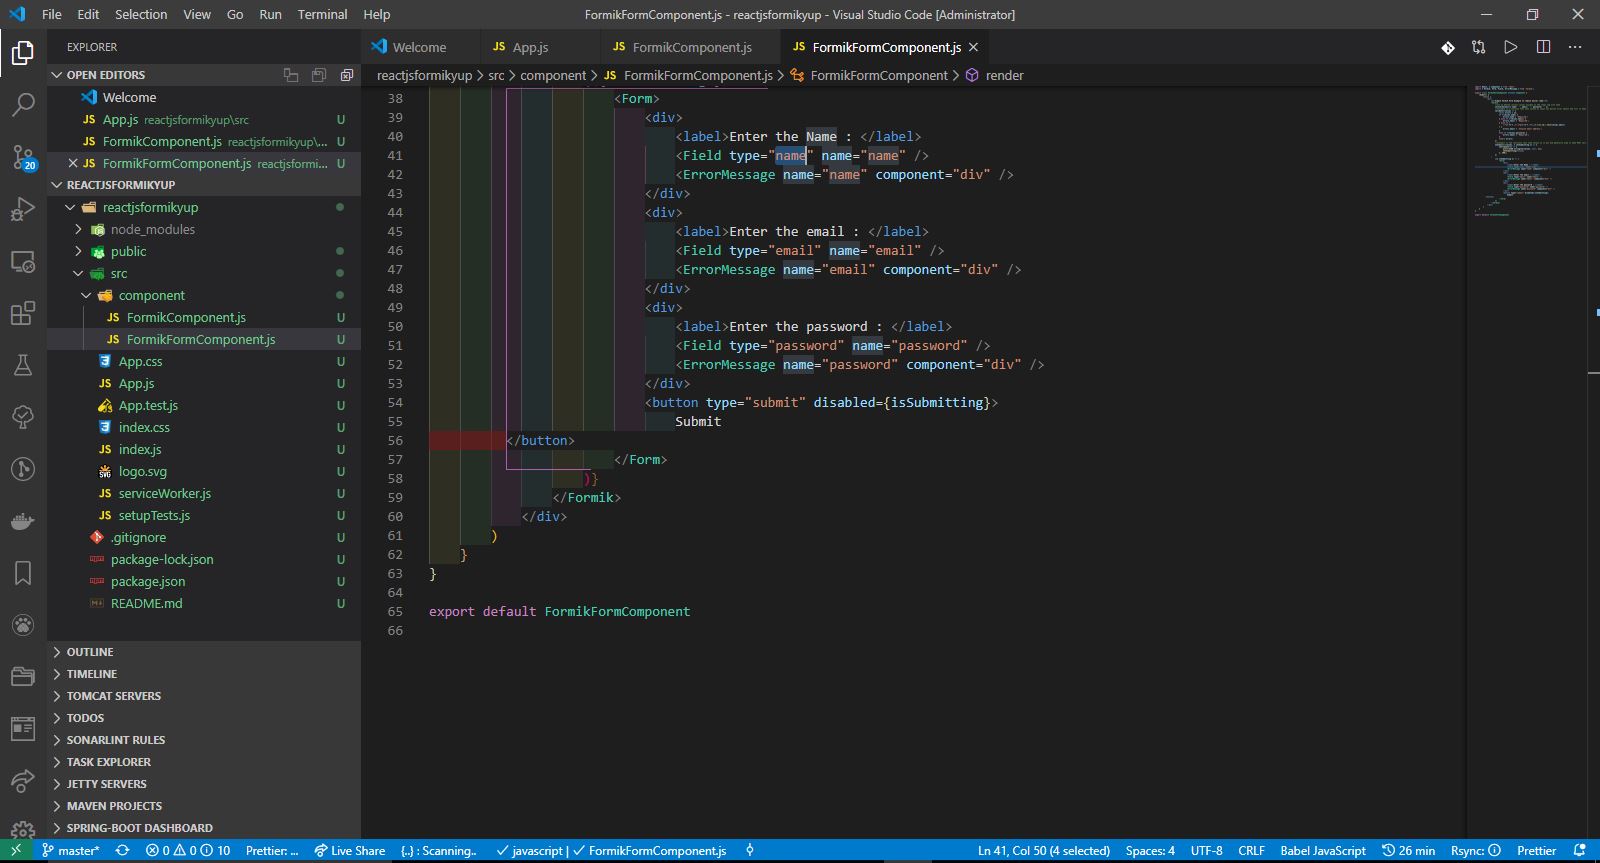
In addition Formik also give us some additional functionality that can reduce our boilerplate. i.e. we explicitly write code for events such as onChange -> handleChange, onBlur -> handleBlur, and so on. Formik comes with a few extra components to do the same i.e. <Form />, <Field />, and <ErrorMessage />. They use React context to hook into the parent <Formik /> state/methods.
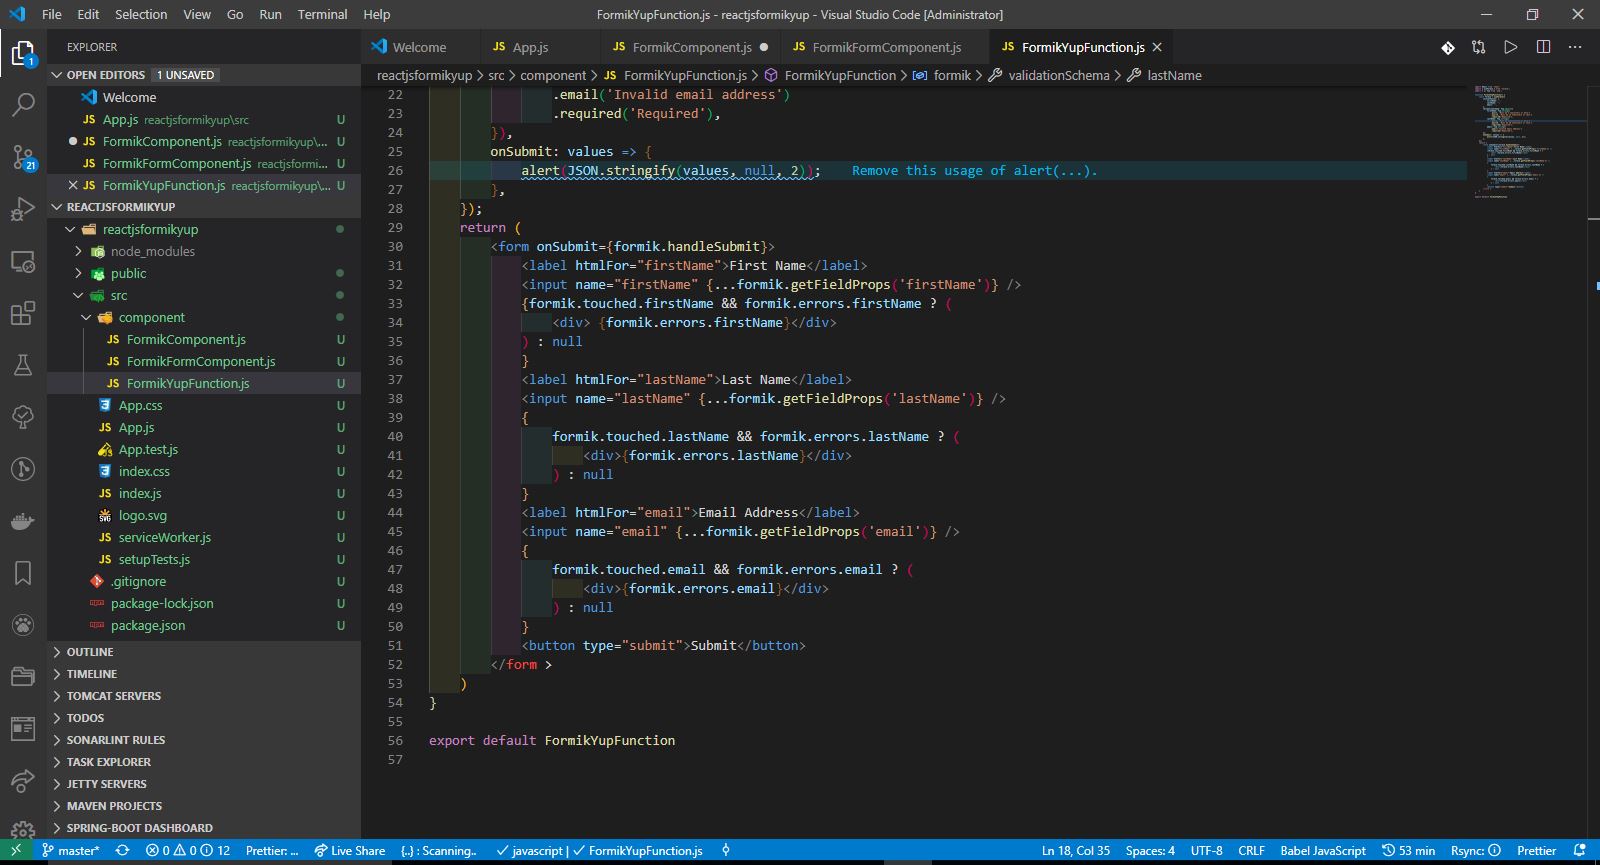
Now in above both the example you have seen that form internal component state, submission and validation are done using formik library. But still validation is done using the old fashion. Developer has to write the code and test it properly. How if we get he ready made library the do the already tested validation for us and in yes .. for this we are using yup package. So lets first install it using command
npm install yup --save
Lets this time use the useFormik as hook in functional component to introduce formik in the form rather than Formik as an component/render-prop in class that we had done in above two examples.


Note: Get the running code from Git
https://github.com/shdhumale/reactjsformikyup
So the question here is why we should use this library when we already have HTML form and submit functionality on button along with validation. I agree but if the same thing can be done with already tested library with less code and easy way ... then why to take hard path ....
Three main reason to use formik is
1- It mangae the state of the data in form.
2- It manage the submission action
3- It elivate and ease the validation process.
So lets start with the implementation first step to install formik in react application. Use below command
npm install formik --save
Lets say we have one normal html form having two textfield as name and email id. Now in general ReactJS we need to maintain their state using state object in class or using useState hook in function. Additional if we want to implement onchange or onBlur event handler we need to all method on that specific text field component. With using Formik it keeps track of your form's state along with few reusable methods and event handlers (handleChange, handleBlur, and handleSubmit) to your form via props. handleChange and handleBlur use a name or id attribute to figure out which field to update.
As show below first we need to import Formik from formik to use it. Then we need to bring our whole form inside the formik tag and in formik tag we can define initialValue, validate and onSubmit this represent the above three aspect i.e. manage the state of the data in form , elevate and ease the validation process. and manage the submission action.
One more thing we need to add our html form inside formic using function i.e. {(event handlers) =>(html form)}
All the event handler for formik is mapped with the html methods.
In addition Formik also give us some additional functionality that can reduce our boilerplate. i.e. we explicitly write code for events such as onChange -> handleChange, onBlur -> handleBlur, and so on. Formik comes with a few extra components to do the same i.e. <Form />, <Field />, and <ErrorMessage />. They use React context to hook into the parent <Formik /> state/methods.
Now in above both the example you have seen that form internal component state, submission and validation are done using formik library. But still validation is done using the old fashion. Developer has to write the code and test it properly. How if we get he ready made library the do the already tested validation for us and in yes .. for this we are using yup package. So lets first install it using command
npm install yup --save
Lets this time use the useFormik as hook in functional component to introduce formik in the form rather than Formik as an component/render-prop in class that we had done in above two examples.
Note: Get the running code from Git
https://github.com/shdhumale/reactjsformikyup


1 comment:
Good information. Will surely try this 👍🏻
Post a Comment