1) Install STS from the below given site. Chose your OS dependend IDE version.
https://spring.io/tools/sts/all
2) Create a simple Maven JAVA project with following details
org.springframework.social
spring-social
1.1.4.RELEASE
>
3) Modify your pom.xml as given below
<!--project xmlns="http://maven.apache.org/POM/4.0.0" xmlns:xsi="http://www.w3.org/2001/XMLSchema-instance"
xsi:schemaLocation="http://maven.apache.org/POM/4.0.0 http://maven.apache.org/xsd/maven-4.0.0.xsd">
<!--modelVersion>4.0.0<!--/modelVersion>
xsi:schemaLocation="http://maven.apache.org/POM/4.0.0 http://maven.apache.org/xsd/maven-4.0.0.xsd">
<!--modelVersion>4.0.0<!--/modelVersion>
<!--groupId>org.springframework.social<!--/groupId>
<!--artifactId>spring-social-linkedin<!--/artifactId>
<!--version>1.0.0.RELEASE<!--/version>
<!--packaging>jar<!--/packaging>
<!--artifactId>spring-social-linkedin<!--/artifactId>
<!--version>1.0.0.RELEASE<!--/version>
<!--packaging>jar<!--/packaging>
<!--name>spring-social-linkedin<!--/name>
<!--url>http://maven.apache.org<!--/url>
<!--url>http://maven.apache.org<!--/url>
<!--parent>
<!--groupId>org.springframework.boot<!--/groupId>
<!--artifactId>spring-boot-starter-parent<!--/artifactId>
<!--version>1.4.2.RELEASE<!--/version>
<!--/parent>
<!--groupId>org.springframework.boot<!--/groupId>
<!--artifactId>spring-boot-starter-parent<!--/artifactId>
<!--version>1.4.2.RELEASE<!--/version>
<!--/parent>
<!--dependencies>
<!--dependency>
<!--groupId>org.springframework.boot<!--/groupId>
<!--artifactId>spring-boot-starter-thymeleaf<!--/artifactId>
<!--/dependency>
<!--dependency>
<!--groupId>org.springframework.social<!--/groupId>
<!--artifactId>spring-social-linkedin<!--/artifactId>
<!--/dependency>
<!--/dependencies>
<!--dependency>
<!--groupId>org.springframework.boot<!--/groupId>
<!--artifactId>spring-boot-starter-thymeleaf<!--/artifactId>
<!--/dependency>
<!--dependency>
<!--groupId>org.springframework.social<!--/groupId>
<!--artifactId>spring-social-linkedin<!--/artifactId>
<!--/dependency>
<!--/dependencies>
<!--properties>
<!--java.version>1.8<!--/java.version>
<!--/properties>
<!--java.version>1.8<!--/java.version>
<!--/properties>
<!--build>
<!--plugins>
<!--plugin>
<!--groupId>org.springframework.boot<!--/groupId>
<!--artifactId>spring-boot-maven-plugin<!--/artifactId>
<!--/plugin>
<!--/plugins>
<!--/build>
<!--plugins>
<!--plugin>
<!--groupId>org.springframework.boot<!--/groupId>
<!--artifactId>spring-boot-maven-plugin<!--/artifactId>
<!--/plugin>
<!--/plugins>
<!--/build>
<!--/project>
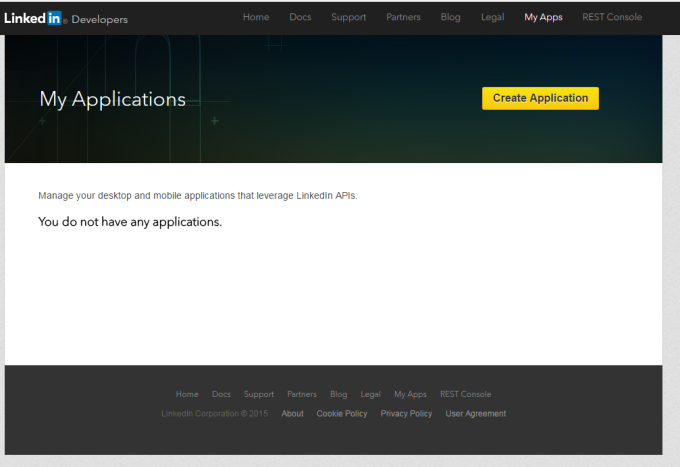
4) Register or create your Twitter application as given below
https://www.linkedin.com/developer/
https://www.linkedin.com/developer/
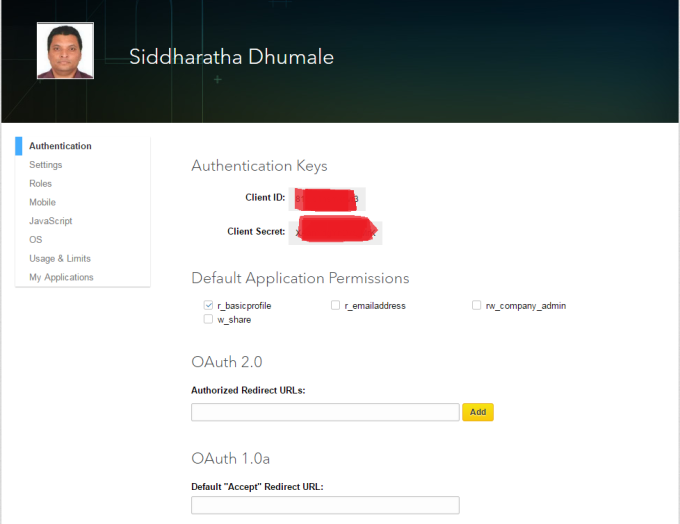
from here we will get two things Client ID and Client Secret. This is used to call the Linked API.
6) Make sure your application project folder structure look like the same. You can all download the zip from this site
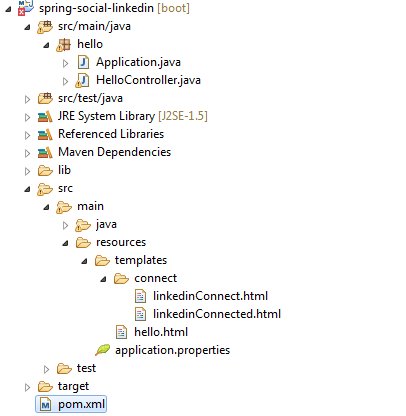
Make sure that you remove {{}} brackets from application.properties as shown in the below figure

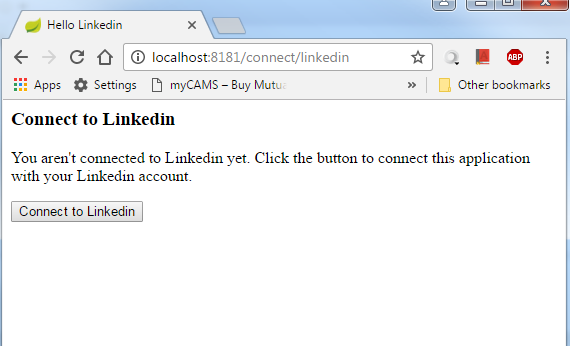
7) Build your Maven project and run the application
If you get below error
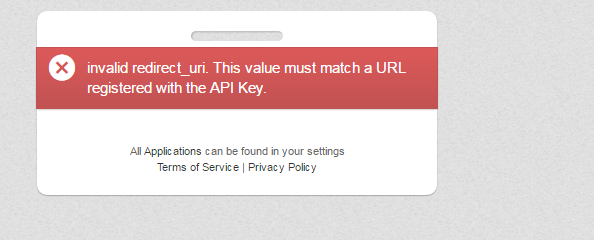
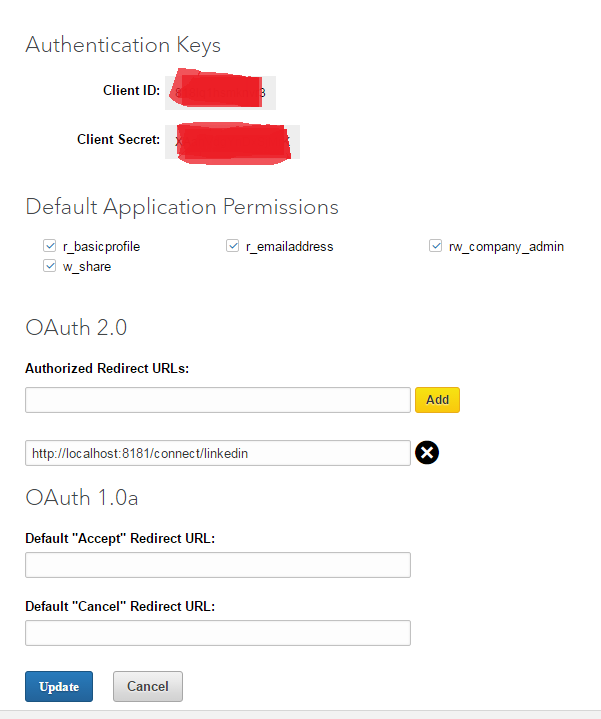
Make sure the make following changes
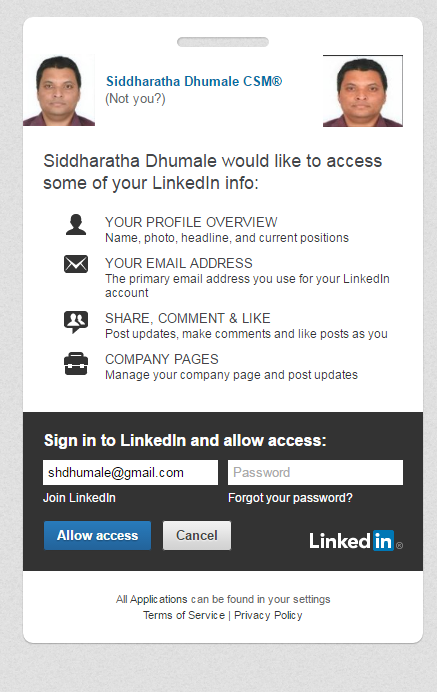
Rerun the application and click on connect you will get his screen add password and click allow access
package hello;
import org.springframework.boot.SpringApplication;
import org.springframework.boot.autoconfigure.SpringBootApplication;
import org.springframework.boot.autoconfigure.SpringBootApplication;
@SpringBootApplication
public class Application {
public class Application {
public static void main(String[] args) {
SpringApplication.run(Application.class, args);
}
SpringApplication.run(Application.class, args);
}
}
package hello;
import javax.inject.Inject;
import org.springframework.social.connect.UserProfile;
import org.springframework.social.linkedin.api.LinkedIn;
import org.springframework.social.linkedin.api.LinkedInProfile;
import org.springframework.stereotype.Controller;
import org.springframework.ui.Model;
import org.springframework.web.bind.annotation.RequestMapping;
import org.springframework.web.bind.annotation.RequestMethod;
@Controller
@RequestMapping("/")
public class HelloController {
@RequestMapping("/")
public class HelloController {
private LinkedIn linkedin;
UserProfile userProfile;
@Inject
public HelloController(LinkedIn linkedin) {
this.linkedin = linkedin;
}
public HelloController(LinkedIn linkedin) {
this.linkedin = linkedin;
}
@RequestMapping(method=RequestMethod.GET)
public String helloLinkedIn(Model model) {
try {
if (!linkedin.isAuthorized()) {
return "redirect:/connect/linkedin";
public String helloLinkedIn(Model model) {
try {
if (!linkedin.isAuthorized()) {
return "redirect:/connect/linkedin";
}}catch (NullPointerException e){
return "redirect:/connect/linkedin";
}
return "redirect:/connect/linkedin";
}
LinkedInProfile profile = linkedin.profileOperations().getUserProfile();
String profileId = linkedin.profileOperations().getProfileId();
System.out.println(profileId);
return "hello";
}
System.out.println(profileId);
return "hello";
}
}
No comments:
Post a Comment