Friday, October 19, 2018

Setting OpenDJ ldap

Step 1- Down load required package from https://github.com/OpenIdentityPlatform/OpenDJ/
or https://github.com/OpenIdentityPlatform/OpenDJ/releases
Step 2:- Run the download msi file and installed in perticular folder i.e. C:\OpenDJ
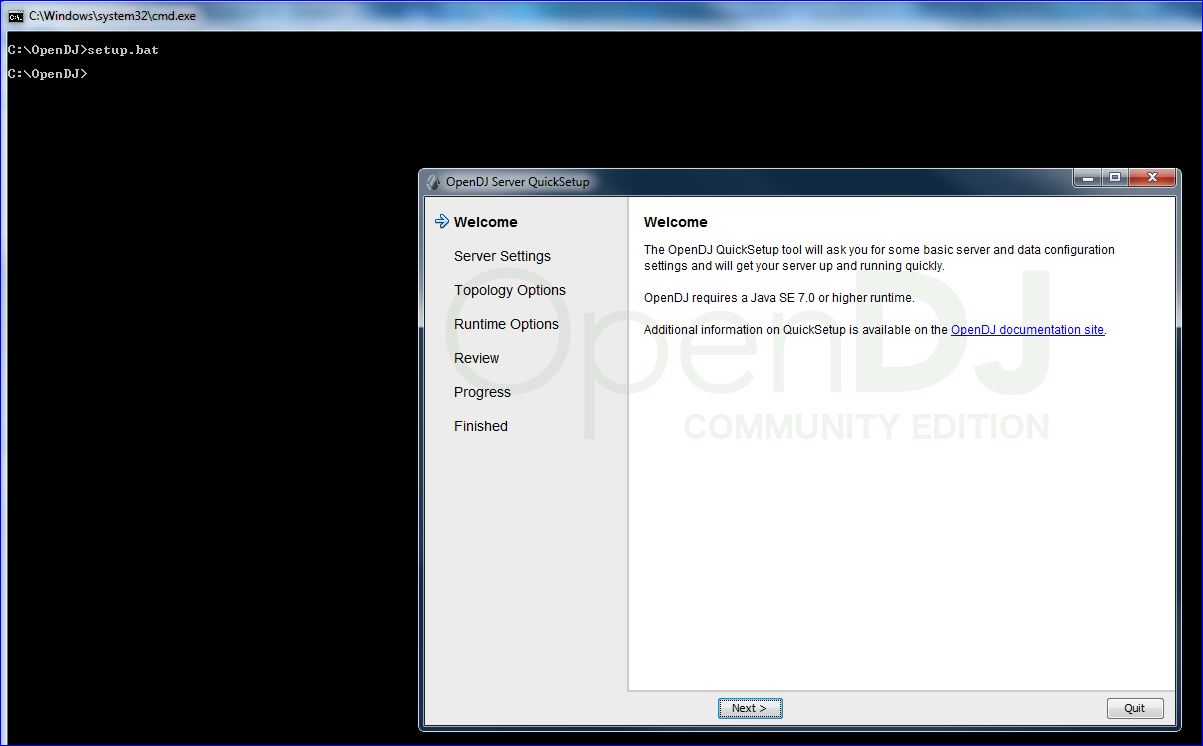
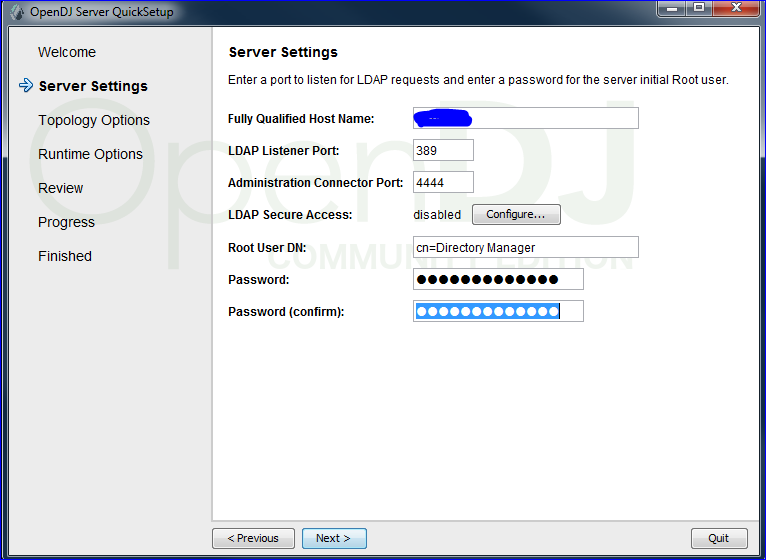
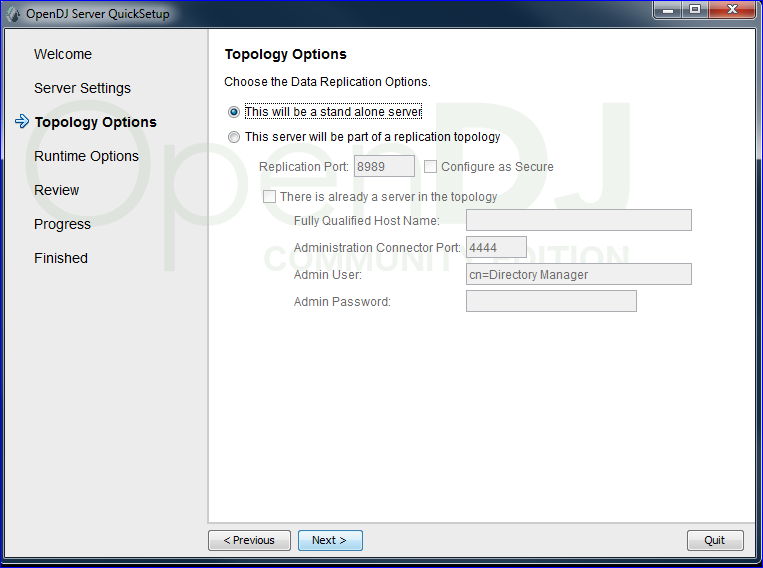
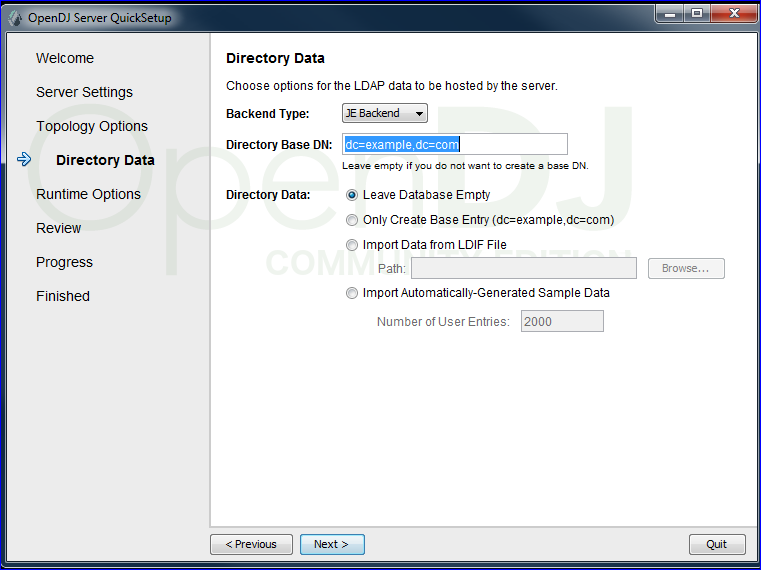
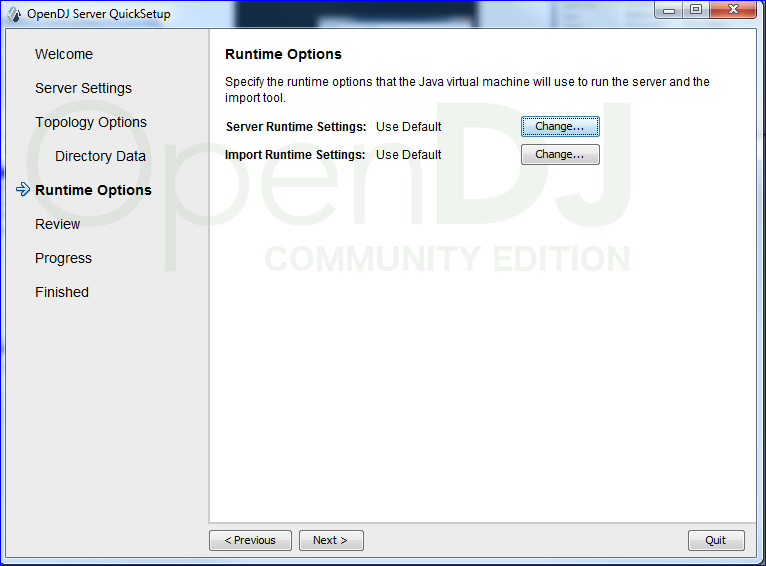
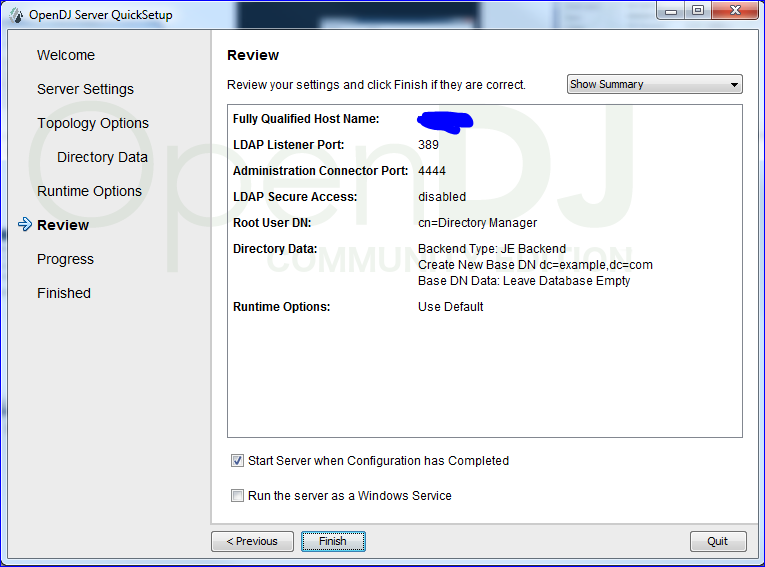
Step 3:- Run setup.bat from C:\OpenDJ and follow the step provided in it.
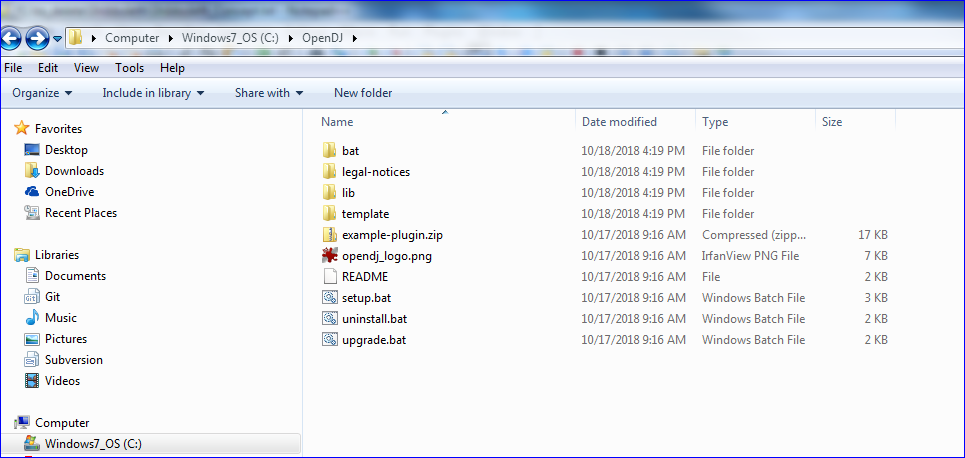
Image1Image2Image3Image4Image5Image6Image7
If we want to open the control panel of OpenDJ click on Launch Control panel
Once it is set up we can use this command to start and stop the LDAP server
C:\OpenDJ\bin\start-ds.bat
C:\OpenDJ\bin\stop-ds.bat
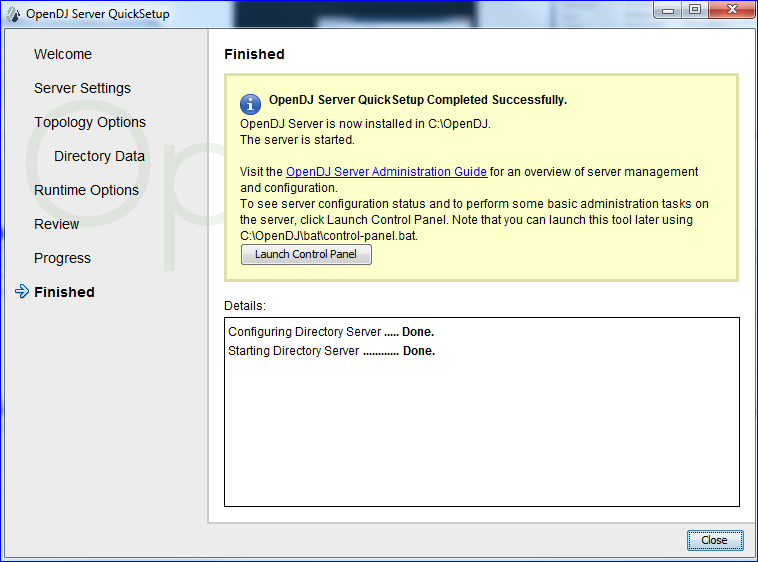
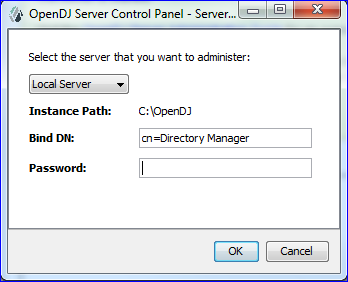
Image8Image9
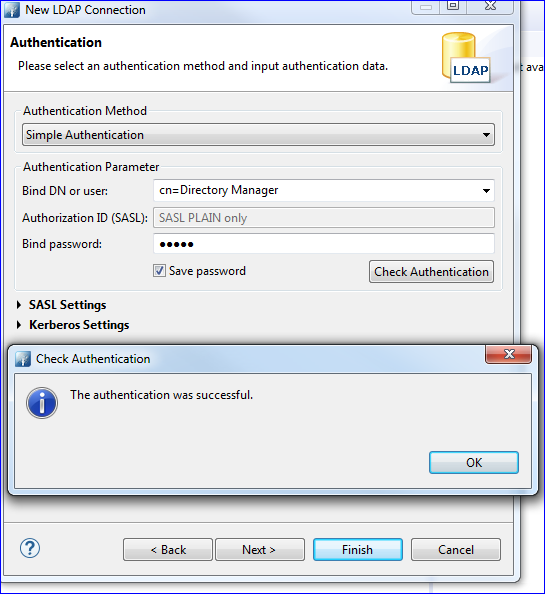
Step 4:- To confirm the LDAP installation make sure to install
https://directory.apache.org/studio/
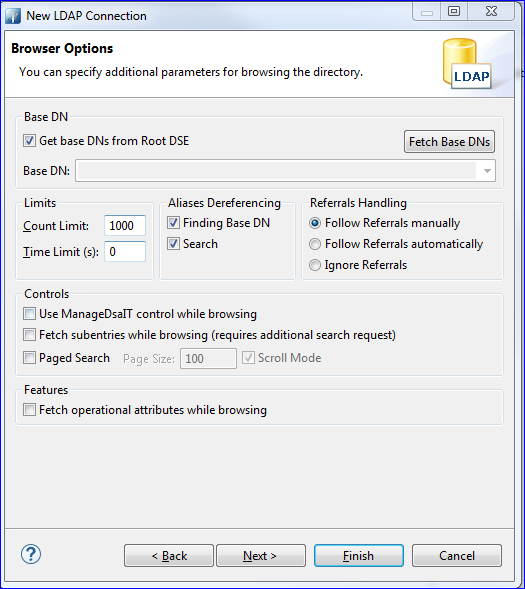
and connect using option
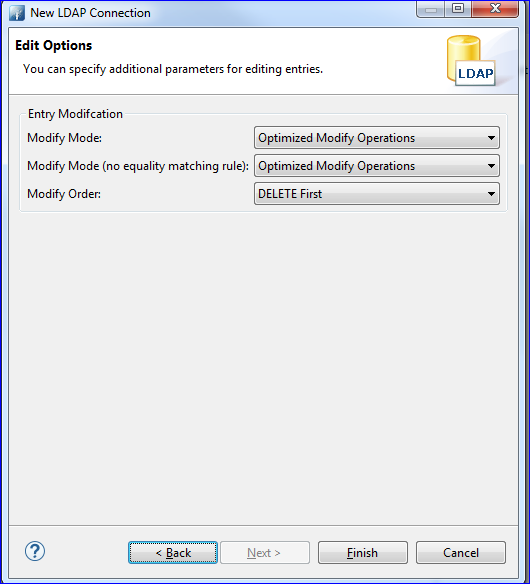
LDAP--> New Connection
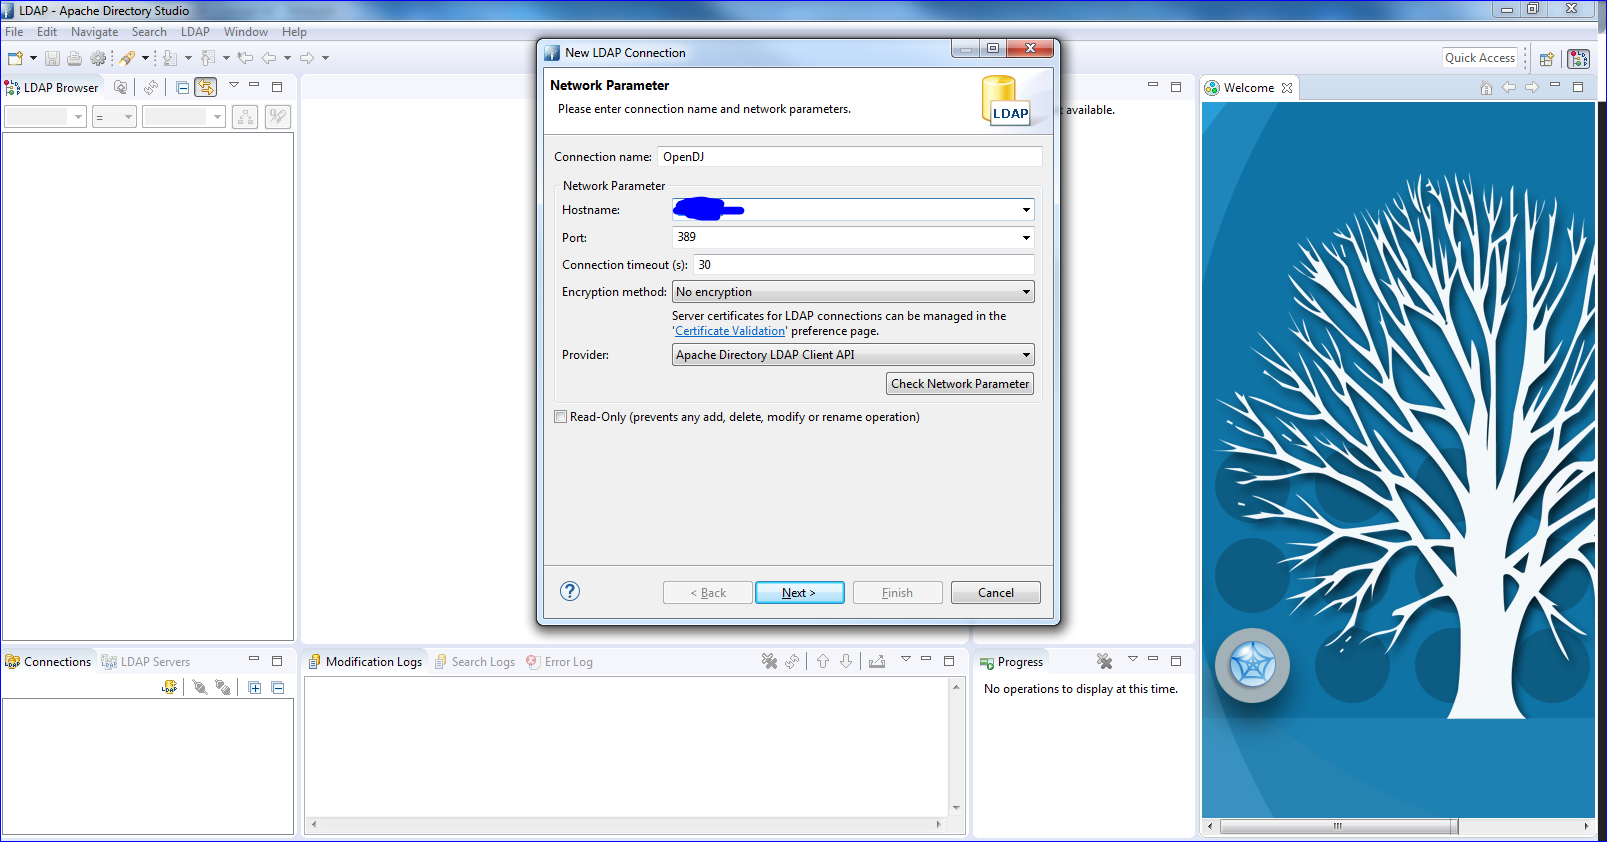
Image10Image11Image12Image13

Monday, October 15, 2018

Spring Transaction example


Many times we need to implements programitically Transaction to adhere to ACID=Atomicity, consistance, Isolation and Durability.
JAVA comes with JTA=Java transection API where in we are using explicitly begin and end key word to start and end the DB trasactions.
If we are using Spring Frame work it provide inbuild Transaction SPI with spring-tx.*.*.jar. We just need to add this jar in our class path and can use their api to achieve ACID for our application.
below is the code
1-POM.xml
<!--project xmlns="http://maven.apache.org/POM/4.0.0"
xmlns:xsi="http://www.w3.org/2001/XMLSchema-instance"
xsi:schemaLocation="http://maven.apache.org/POM/4.0.0 http://maven.apache.org/xsd/maven-4.0.0.xsd">
<!--modelVersion>4.0.0<!--/modelVersion>
<!--groupId>org.springframework.samples<!--/groupId>
<!--artifactId>SpringJDBCTransactionManagement<!--/artifactId>
<!--version>0.0.1-SNAPSHOT<!--/version>
<!--properties>
<!--!-- Generic properties -->
<!--java.version>1.7<!--/java.version>
<!--project.build.sourceEncoding>UTF-8<!--/project.build.sourceEncoding>
<!--project.reporting.outputEncoding>UTF-8<!--/project.reporting.outputEncoding>
<!--!-- Spring -->
<!--spring-framework.version>4.0.2.RELEASE<!--/spring-framework.version>
<!--!-- Logging -->
<!--logback.version>1.0.13<!--/logback.version>
<!--slf4j.version>1.7.5<!--/slf4j.version>
<!--!-- Test -->
<!--junit.version>4.11<!--/junit.version>
<!--maven.compiler.source>1.6<!--/maven.compiler.source>
<!--maven.compiler.target>1.6<!--/maven.compiler.target>

<!--/properties>
<!--dependencies>
<!--!-- Spring and Transactions -->
<!--dependency>
<!--groupId>org.springframework<!--/groupId>
<!--artifactId>spring-context<!--/artifactId>
<!--version>${spring-framework.version}<!--/version>
<!--/dependency>
<!--dependency>
<!--groupId>org.springframework<!--/groupId>
<!--artifactId>spring-tx<!--/artifactId>
<!--version>${spring-framework.version}<!--/version>
<!--/dependency>
<!--!-- Spring JDBC and MySQL Driver -->
<!--dependency>
<!--groupId>org.springframework<!--/groupId>
<!--artifactId>spring-jdbc<!--/artifactId>
<!--version>${spring-framework.version}<!--/version>
<!--/dependency>
<!--dependency>
<!--groupId>mysql<!--/groupId>
<!--artifactId>mysql-connector-java<!--/artifactId>
<!--version>5.0.5<!--/version>
<!--/dependency>
<!--!-- Logging with SLF4J & LogBack -->
<!--dependency>
<!--groupId>org.slf4j<!--/groupId>
<!--artifactId>slf4j-api<!--/artifactId>
<!--version>${slf4j.version}<!--/version>
<!--scope>compile<!--/scope>
<!--/dependency>
<!--dependency>
<!--groupId>ch.qos.logback<!--/groupId>
<!--artifactId>logback-classic<!--/artifactId>
<!--version>${logback.version}<!--/version>
<!--scope>runtime<!--/scope>
<!--/dependency>
<!--!-- Test Artifacts -->
<!--dependency>
<!--groupId>org.springframework<!--/groupId>
<!--artifactId>spring-test<!--/artifactId>
<!--version>${spring-framework.version}<!--/version>
<!--scope>test<!--/scope>
<!--/dependency>
<!--dependency>
<!--groupId>junit<!--/groupId>
<!--artifactId>junit<!--/artifactId>
<!--version>${junit.version}<!--/version>
<!--scope>test<!--/scope>
<!--/dependency>
<!--/dependencies>
<!--/project>
Note:- IF while running the project you get an error Source option 5 is no longer supported. Use 6 or later. please add below line inside properties
<!--maven.compiler.source>1.6</maven.compiler.source>
<!--maven.compiler.target>1.6</maven.compiler.target>
2- spring.xml
<!--?xml version="1.0" encoding="UTF-8"?>
<!--beans xmlns="http://www.springframework.org/schema/beans"
xmlns:xsi="http://www.w3.org/2001/XMLSchema-instance" xmlns:context="http://www.springframework.org/schema/context"
xmlns:tx="http://www.springframework.org/schema/tx"
xsi:schemaLocation="http://www.springframework.org/schema/beans http://www.springframework.org/schema/beans/spring-beans.xsd
http://www.springframework.org/schema/context http://www.springframework.org/schema/context/spring-context-4.0.xsd
http://www.springframework.org/schema/tx http://www.springframework.org/schema/tx/spring-tx-4.0.xsd">
<!--!-- Enable Annotation based Declarative Transaction Management -->
<!--tx:annotation-driven proxy-target-class="true"
transaction-manager="transactionManager" />
<!--!-- Creating TransactionManager Bean, since JDBC we are creating of type
DataSourceTransactionManager -->
<!--bean id="transactionManager"
class="org.springframework.jdbc.datasource.DataSourceTransactionManager">
<!--property name="dataSource" ref="dataSource" />
<!--/bean>

<!--!-- MySQL DB DataSource -->
<!--bean id="dataSource"
class="org.springframework.jdbc.datasource.DriverManagerDataSource">
<!--property name="driverClassName" value="com.mysql.jdbc.Driver" />
<!--property name="url" value="jdbc:mysql://localhost:3306/vscrum" />
<!--property name="username" value="siddhu" />
<!--property name="password" value="siddhu" />
<!--/bean>
<!--bean id="siddhuDAO" class="com.siddhu.dao.SiddhuDAOImpl">
<!--property name="dataSource" ref="dataSource"><!--/property>
<!--/bean>
<!--bean id="siddhuManager" class="com.siddhu.service.SiddhuManagerImpl">
<!--property name="siddhuDAO" ref="siddhuDAO"><!--/property>
<!--/bean>
<!--/beans>
3-MainTransaction
package com.siddhu.main;
import org.springframework.context.support.ClassPathXmlApplicationContext;
import com.siddhu.model.AddressInfo;
import com.siddhu.model.CustomerInfo;
import com.siddhu.service.SiddhuManager;
import com.siddhu.service.SiddhuManagerImpl;
public class MainTransaction {
public static void main(String[] args) {
ClassPathXmlApplicationContext ctx = new ClassPathXmlApplicationContext(
"spring.xml");
SiddhuManager siddhuManager = ctx.getBean("siddhuManager",
SiddhuManagerImpl.class);
CustomerInfo cust = createCustomer();
siddhuManager.createCustomer(cust);
ctx.close();
}
private static CustomerInfo createCustomer() {
CustomerInfo customerInfo = new CustomerInfo();
customerInfo.setId(1);
customerInfo.setName("Siddhu");
AddressInfo addressInfo = new AddressInfo();
addressInfo.setId(1);
// trying to save proper value in DB.
addressInfo.setAddress("Address1");
// trying to save proper value in DB.
//addressInfo.setAddress("BIG Address 11111111111111111111111111111111111111111111111111111");
customerInfo.setAddress(addressInfo);
return customerInfo;
}
}
4- SiddhuDAO
package com.siddhu.dao;
import com.siddhu.model.CustomerInfo;
public interface SiddhuDAO {
public void create(CustomerInfo customer);
}
5- SiddhuDAOImpl
package com.siddhu.dao;
import javax.sql.DataSource;
import org.springframework.jdbc.core.JdbcTemplate;
import com.siddhu.model.CustomerInfo;
public class SiddhuDAOImpl implements SiddhuDAO {
private DataSource dataSource;
public void setDataSource(DataSource dataSource) {
this.dataSource = dataSource;
}
@Override
public void create(CustomerInfo customer) {
String queryCustomer = "insert into CustomerInfo (id, name) values (?,?)";
String queryAddress = "insert into AddressInfo (id, address) values (?,?)";
JdbcTemplate jdbcTemplate = new JdbcTemplate(dataSource);
jdbcTemplate.update(queryCustomer, new Object[] { customer.getId(),
customer.getName() });
System.out.println("Inserted into Customer Table Successfully");
jdbcTemplate.update(queryAddress, new Object[] { customer.getId(),
customer.getAddress().getAddress()});
System.out.println("Inserted into Address Table Successfully");
}
}

6- AddressInfo
package com.siddhu.model;
public class AddressInfo {
private int id;
private String address;


public int getId() {
return id;
}
public void setId(int id) {
this.id = id;
}
public String getAddress() {
return address;
}
public void setAddress(String address) {
this.address = address;
}


}
7- CustomerInfo
package com.siddhu.model;
public class CustomerInfo {
private int id;
private String name;
private AddressInfo address;

public int getId() {
return id;
}
public void setId(int id) {
this.id = id;
}
public String getName() {
return name;
}
public void setName(String name) {
this.name = name;
}
public AddressInfo getAddress() {
return address;
}
public void setAddress(AddressInfo address) {
this.address = address;
}

}
8- SiddhuManager
package com.siddhu.service;
import com.siddhu.model.CustomerInfo;
public interface SiddhuManager {

public void createCustomer(CustomerInfo custInfo);
}
9- SiddhuManagerImpl
package com.siddhu.service;
import org.springframework.transaction.annotation.Transactional;
import com.siddhu.dao.SiddhuDAO;
import com.siddhu.model.CustomerInfo;
public class SiddhuManagerImpl implements SiddhuManager {
private SiddhuDAO siddhuDAO;
public void setSiddhuDAO(SiddhuDAO siddhuDAO) {
this.siddhuDAO = siddhuDAO;
}
@Override
@Transactional
public void createCustomer(CustomerInfo custInfo) {
siddhuDAO.create(custInfo);
}
}

Now lets try to understand how the flow goes
MainTransaction is our main class. First by using Spring context we load our spring.xml and try to get the singleton bean with name siddhuManager i.e. SiddhuManager
Then we load/fill data inside our model class CustomerInfo and AddressInfo
After that we call createCustomer method of our bean class SiddhuManagerImpl.
Finally this createCustomer method call our *DAOimpl class to insert the data in two table i.e. CustomerInfo and AddressInfo.
Step 1:- First we will insert normal data and will check if the data is inserted into both the table properly.
Note: I am using MySQL as DB if you are using Oracle please make necessary changes in spring.xml

Image1
Check both the table and we will find 1 row inserted into both the table successfully
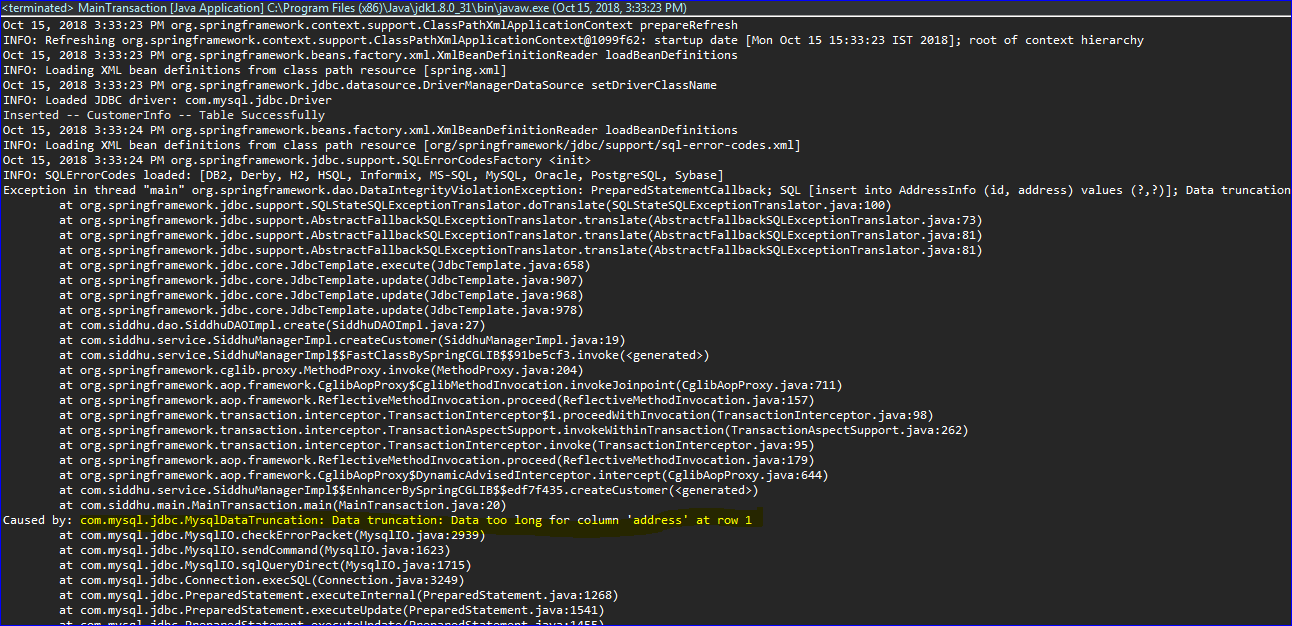
Now lets try to run the main method with large value of address i..e greater than 45 character. This will fail in inserting the data in AddressInfo table and due to implementation of Transaction it will also roll back CustomerInfo table data.
Image2
No data is inserted into AddressInfo and CustomerInfo table.
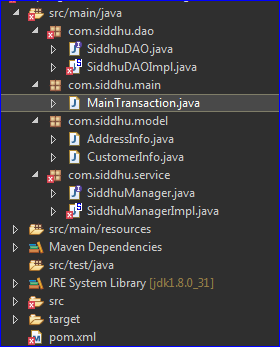
Project Structure
Image3
Note:- Through this example we will also understand how the flow work here for dependency injections
1- When we create the instance of SiddhuManagerImpl using spring it will call internally its setter method as per the property siddhuDAO to create new instace of beanid as name siddhuDAO.. which further internally called bean with id dataSource used to connect proper datasource.

Friday, September 14, 2018

How to use Apache FTP server for upload and download file

Step 1:- Down load FTP Server from below link
https://projects.apache.org/project.html?mina-ftpserver
Step 2:- You can start the using following command
C:\apache-ftpserver-1.1.1\apache-ftpserver-1.1.1\bin>ftpd.bat
Using default configuration
FtpServer started
Stopping server...
Step 3:- We are using java code to start the server at perticular port and then use below java code to do upload and download functionality

import java.io.File;
import java.io.FileInputStream;
import java.io.FileOutputStream;
import java.io.IOException;
import java.io.InputStream;
import java.io.PrintWriter;
import org.apache.commons.net.PrintCommandListener;
import org.apache.commons.net.ftp.FTP;
import org.apache.commons.net.ftp.FTPClient;
import org.apache.commons.net.ftp.FTPFile;
import org.apache.commons.net.ftp.FTPReply;
import org.apache.ftpserver.FtpServer;
import org.apache.ftpserver.FtpServerFactory;
import org.apache.ftpserver.listener.ListenerFactory;
import org.apache.ftpserver.usermanager.PropertiesUserManagerFactory;

public class FTPFunctions {

// Creating FTP Client instance
FTPClient ftp = null;

public FTPFunctions()
{

}

public void StartServer()
{
try {
FtpServerFactory serverFactory = new FtpServerFactory();
ListenerFactory factory = new ListenerFactory();
// set the port of the listener
factory.setPort(21);
// define SSL configuration
/*SslConfigurationFactory ssl = new SslConfigurationFactory();
ssl.setKeystoreFile(new File("C:\\Test\\ftpserver.jks"));
ssl.setKeystorePassword("password");*/
// set the SSL configuration for the listener
/*factory.setSslConfiguration(ssl.createSslConfiguration());
factory.setImplicitSsl(true);*/
// replace the default listener
serverFactory.addListener("default", factory.createListener());
PropertiesUserManagerFactory userManagerFactory = new PropertiesUserManagerFactory();
userManagerFactory.setFile(new File("C:\\Test\\users.properties"));
serverFactory.setUserManager(userManagerFactory.createUserManager());
// start the server
FtpServer server = serverFactory.createServer();
server.start();
} catch (Exception e) {
// TODO Auto-generated catch block
System.out.println("Exception occured ---------------------");
e.printStackTrace();
}
}

// Constructor to connect to the FTP Server
/**
* @param host
* @param port
* @param username
* @param password
* @throws Exception
*/
public FTPFunctions(String host, int port, String username, String password) throws Exception{

ftp = new FTPClient();
ftp.addProtocolCommandListener(new PrintCommandListener(new PrintWriter(System.out)));
int reply;
ftp.connect(host,port);
System.out.println("FTP URL is:"+ftp.getDefaultPort());
reply = ftp.getReplyCode();
if (!FTPReply.isPositiveCompletion(reply)) {
ftp.disconnect();
throw new Exception("Exception in connecting to FTP Server");
}
ftp.login(username, password);
ftp.setFileType(FTP.LOCAL_FILE_TYPE);
ftp.enterLocalPassiveMode();
}
// Method to upload the File on the FTP Server
public void uploadFTPFile(String localFileFullName, String fileName, String uploadDir)
throws Exception
{
try {
InputStream input = new FileInputStream(new File(localFileFullName));
this.ftp.storeFile(uploadDir + fileName, input);
}
catch(Exception e){
}
}

// Download the FTP File from the FTP Server
public void downloadFTPFile(String ftpSource, String destination) {
try (FileOutputStream fos = new FileOutputStream(destination)) {
this.ftp.retrieveFile(ftpSource, fos);
} catch (IOException e) {
e.printStackTrace();
}
}

// list the files in a specified directory on the FTP
public boolean listFTPFiles(String directory, String fileName) throws IOException {
// lists files and directories in the current working directory
boolean verificationFilename = false;
FTPFile[] files = ftp.listFiles(directory);
for (FTPFile file : files) {
String details = file.getName();
System.out.println(details);
if(details.equals(fileName))
{
System.out.println("Correct Filename");
verificationFilename=details.equals(fileName);
//assertTrue("Verification Failed: The filename is not updated at the CDN end.",details.equals(fileName));
}
}

return verificationFilename;
}

// Disconnect the connection to FTP
public void disconnect(){
if (this.ftp.isConnected()) {
try {
this.ftp.logout();
this.ftp.disconnect();
} catch (IOException f) {
// do nothing as file is already saved to server
}
}
}

// Main method to invoke the above methods
public static void main(String[] args) {
try {

FTPFunctions objFTPFunctions = new FTPFunctions();
objFTPFunctions.StartServer();
FTPFunctions ftpobj = new FTPFunctions("127.0.0.1", 21, "admin", "admin");
ftpobj.uploadFTPFile("C:\\Test\\siddhu.txt", "siddhuupload.txt", "/uploadftp/");
ftpobj.downloadFTPFile("/uploadftp/siddhuupload.txt","C:\\Test_New\\downloadftp\\siddhudownload.txt");
System.out.println("FTP File downloaded successfully");
//boolean result = ftpobj.listFTPFiles("C:\\Test_New\\downloadftp", "siddhu.txt");
//System.out.println(result);
ftpobj.disconnect();
} catch (Exception e) {
e.printStackTrace();
}
}
}
We are starting the FTP server on localhost with 21 port and user id and password as admin admin.
Make sure you take users.properties from you C:\apache-ftpserver-1.1.1\apache-ftpserver-1.1.1\res\conf folder and place it on perticular location. This files we are using for login.
By defualt password of admin is admin

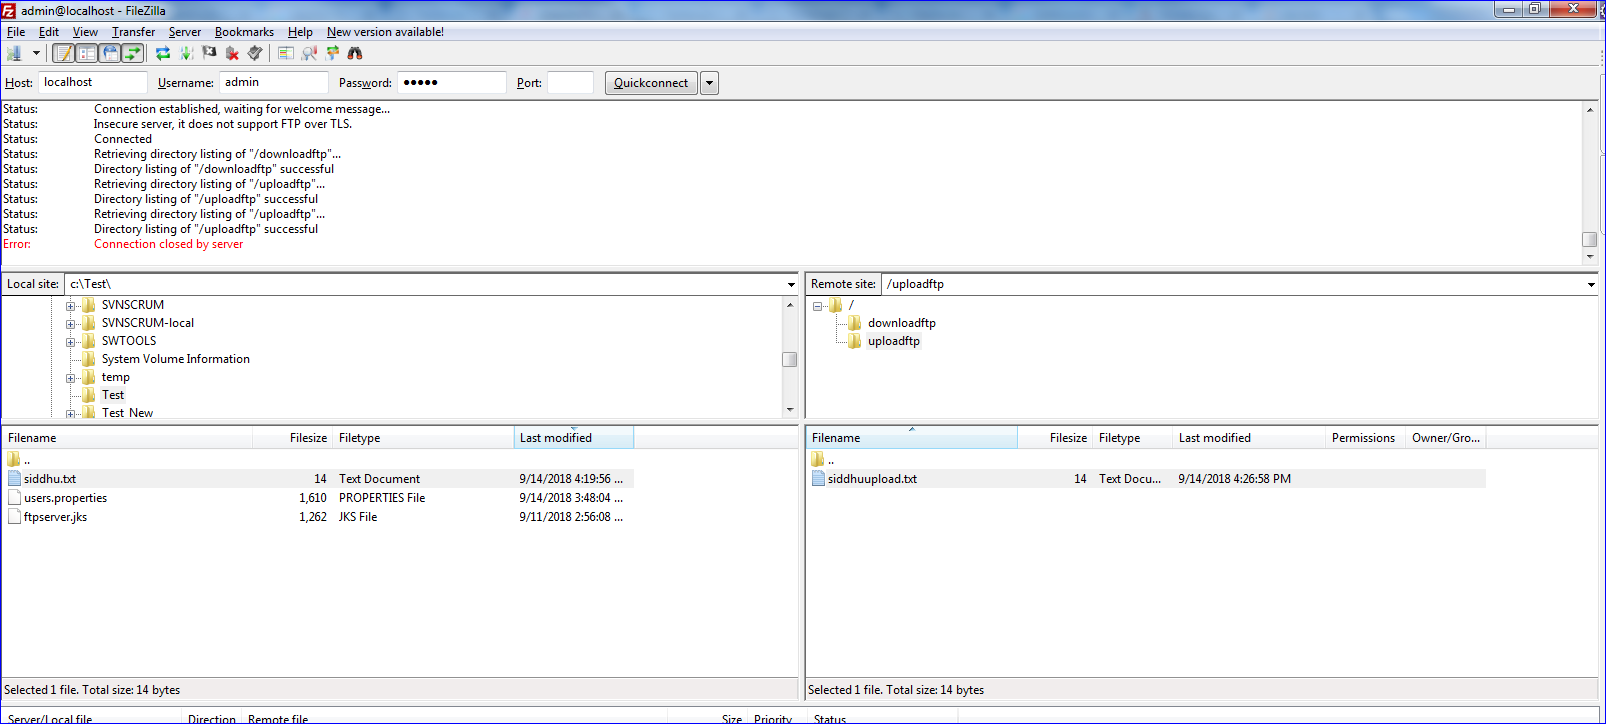
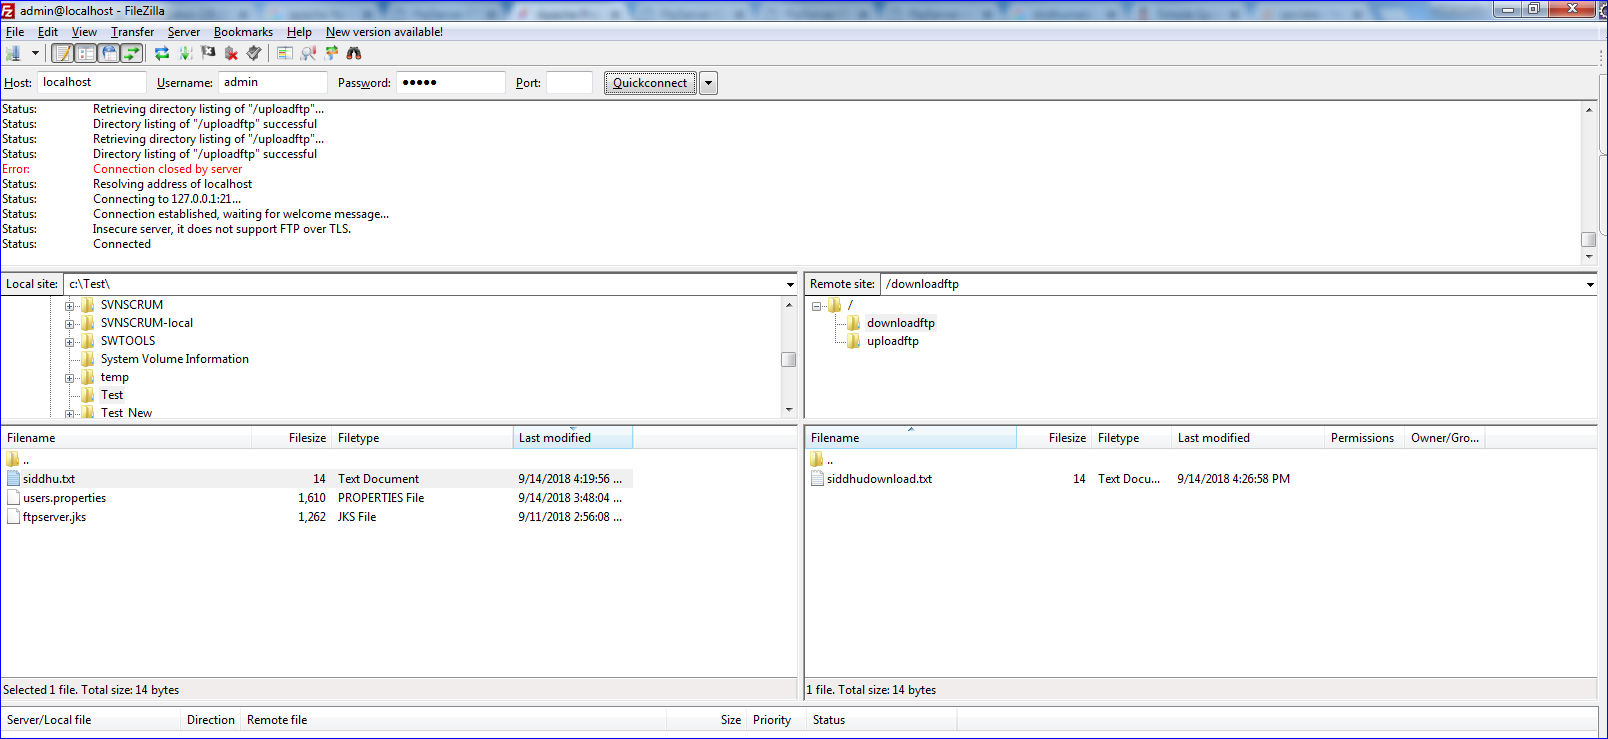
Note:First run the java program and then try to connect using FileZilla tool.

Image1Image2Image3

Also make sure that we need to map our local folder for FTP process as given below
ftpserver.user.admin.homedirectory=C:\\Test_New


Monday, August 13, 2018

Creating pipeline in Jenkin

Pipeline concept is well known in Devops. Pipeline can be define as the process of integration ll the aspect of devop(Build-Deploy-Test-Release) in sequential manner.
Jenkin has build in plugin call as "Delivery Pipeline Plugin" and "Build Pipeline view" which can be used in extensively manner for the same. Make sure Pipeline is wellknow in implementing CI,CD and CDI concept
CI:- Continueous Integration - Commit Code + Junit + Integration.
CDI :- Continueous Delivery - Commit Code + Junit + Integration + Deploy in Testing Env + Acceptance Testing.
CD :- Continueous Deployment- Commit Code + Junit + Integration + Deploy in Testing Env + Acceptance Testing + Deploy in production.
Lets take a small example how to build Jenikin Pipeline
Assume we have following fow jobs that need to be done before sending the deployment component in productions
1- Build the jobs
2- Deploy the jobs
3- Test the jobs
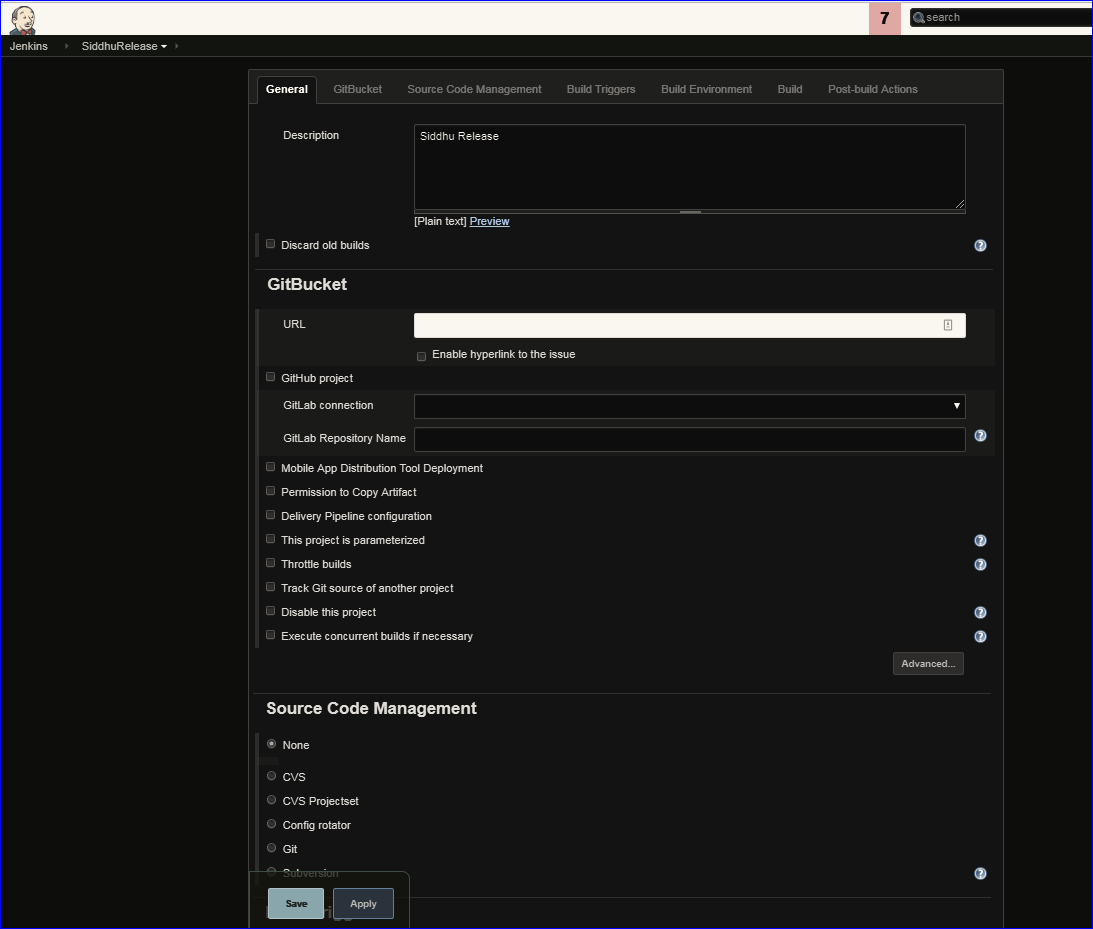
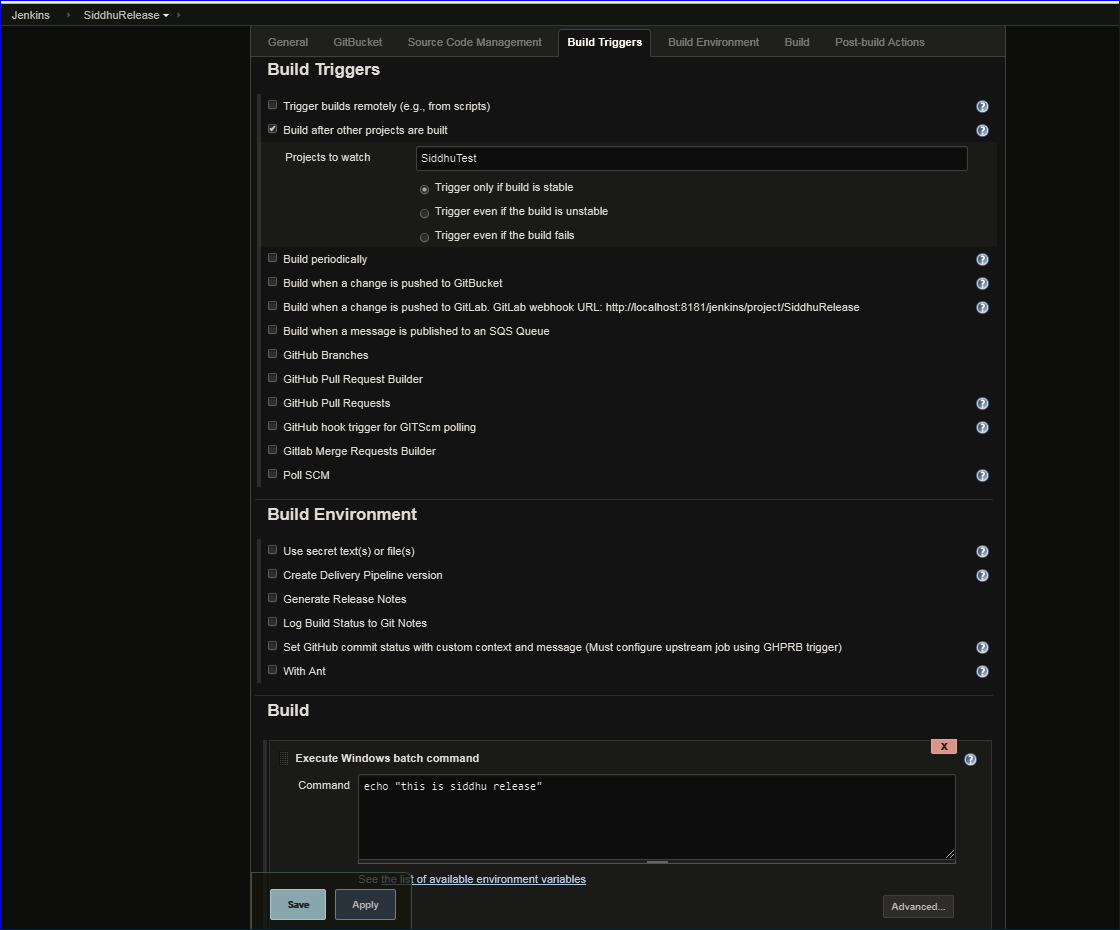
4- Release the jobs
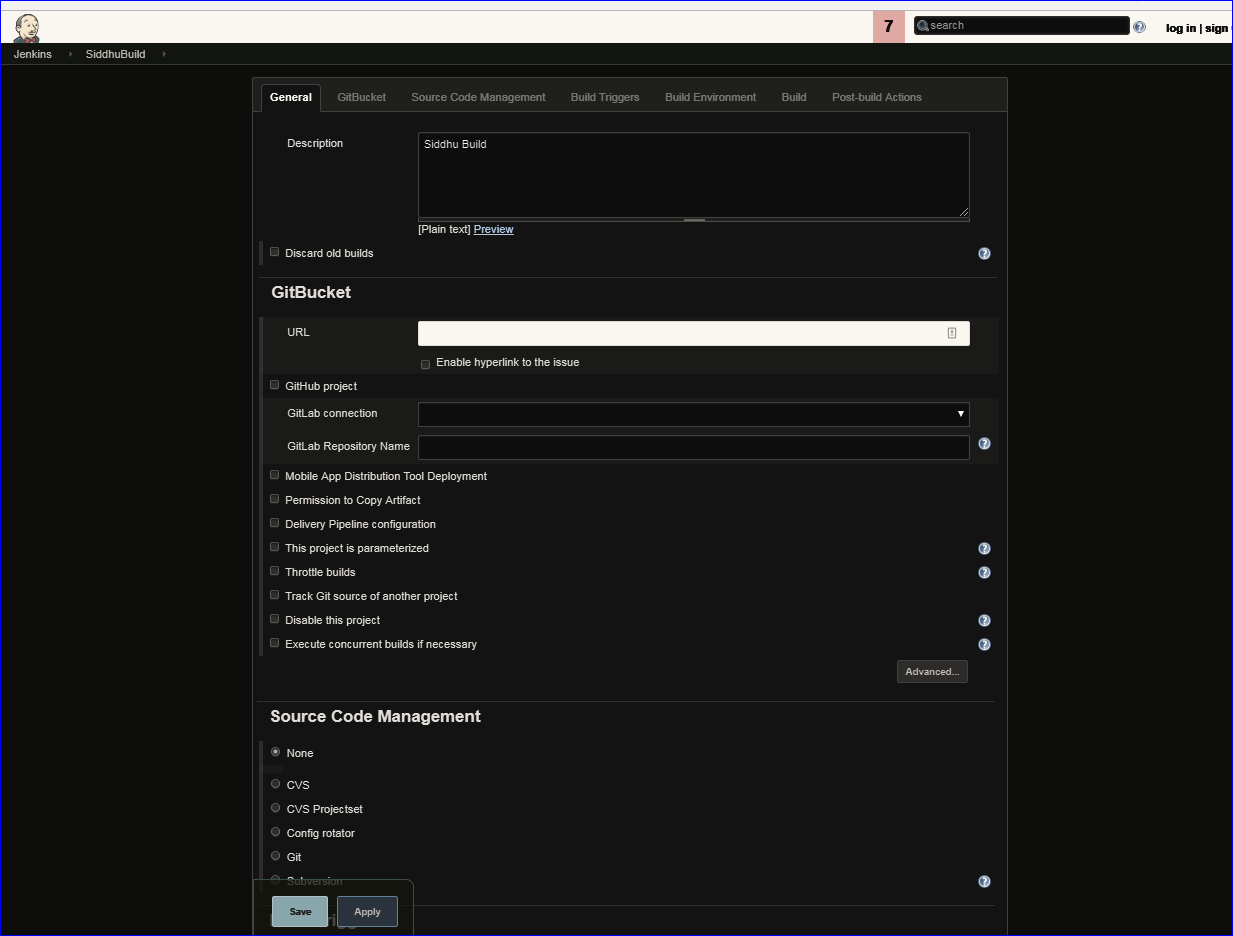
For ease of this tutorial we are not explaining what the step you need to do in all steps i.e. Build step:- if it smaven you will need maven plugin and then configuration etc, Deploy :- You need to stop the tomcat and them depoly the war etc Test :- for Junit during maven build only we can suggest to do JUnit else trigger the external automation testing like selenium etc.
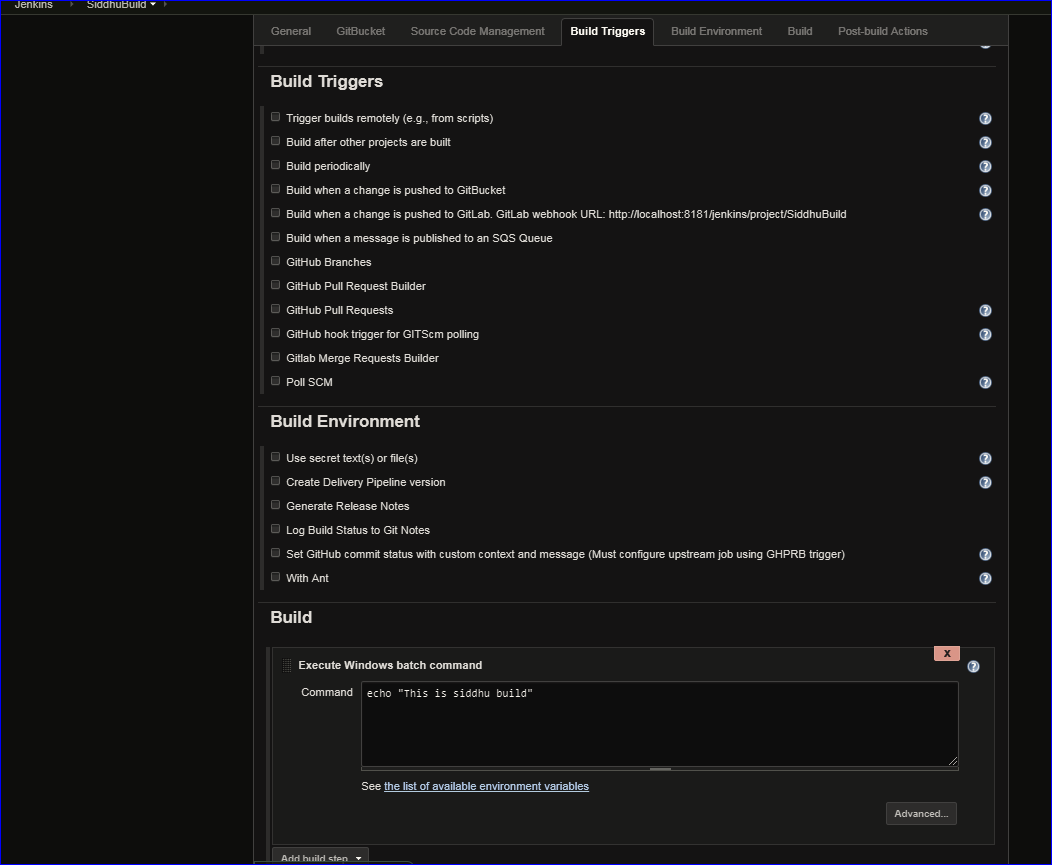
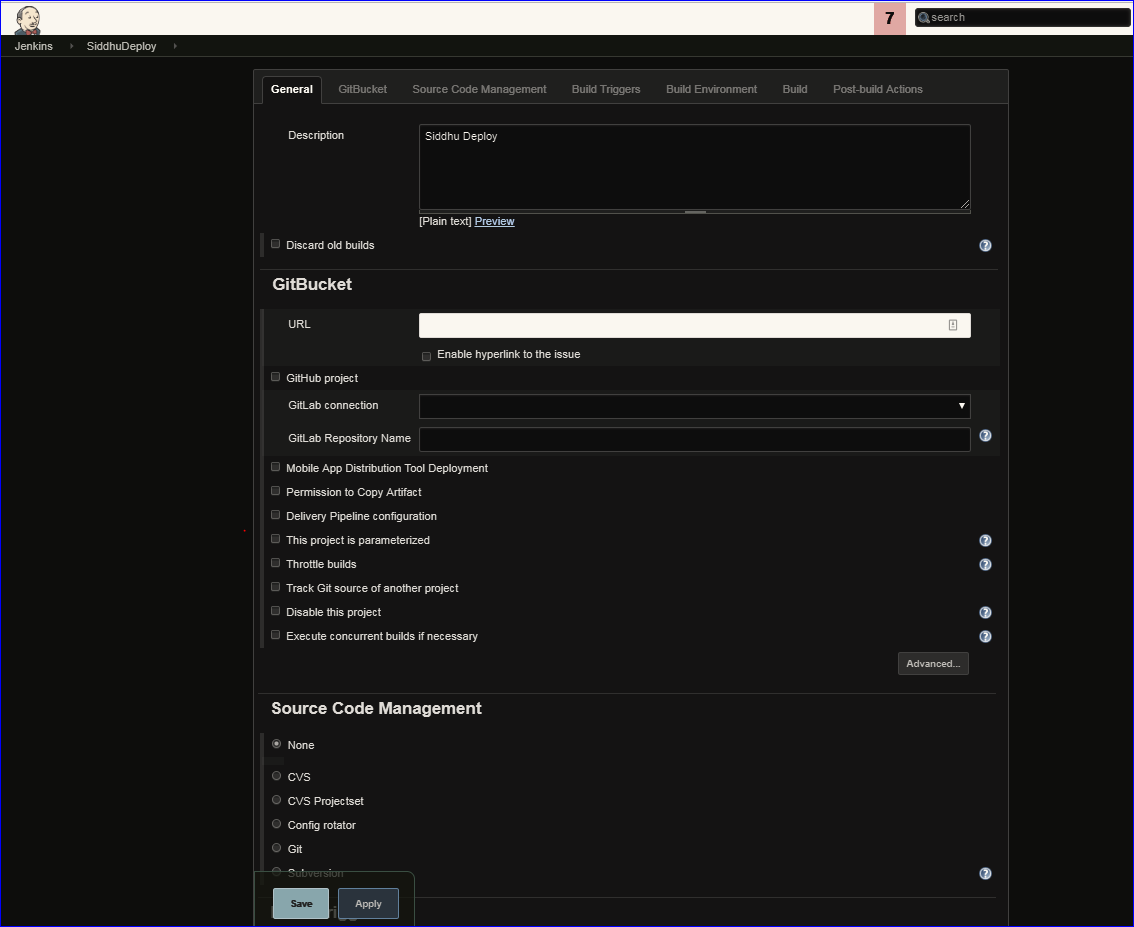
Here in our example we will keep it simple just window cmd command to execute as we are just trying to understand Jenkin Pipeline
Now lets try to create all belwo four jobs.
1- Build Job
Image1Image2
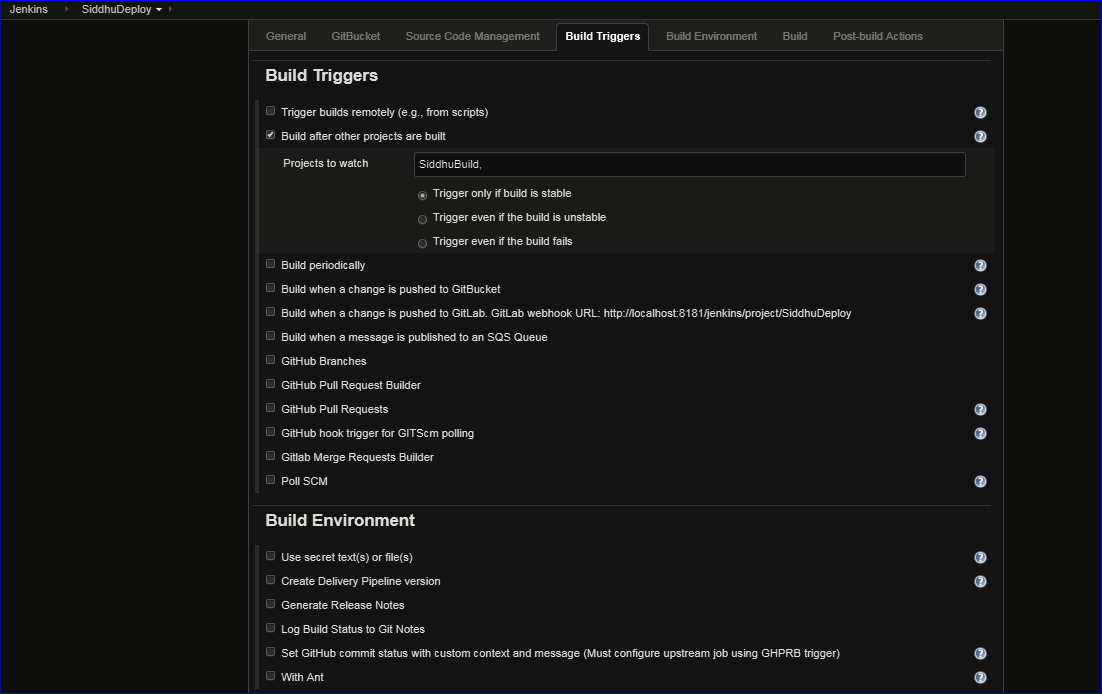
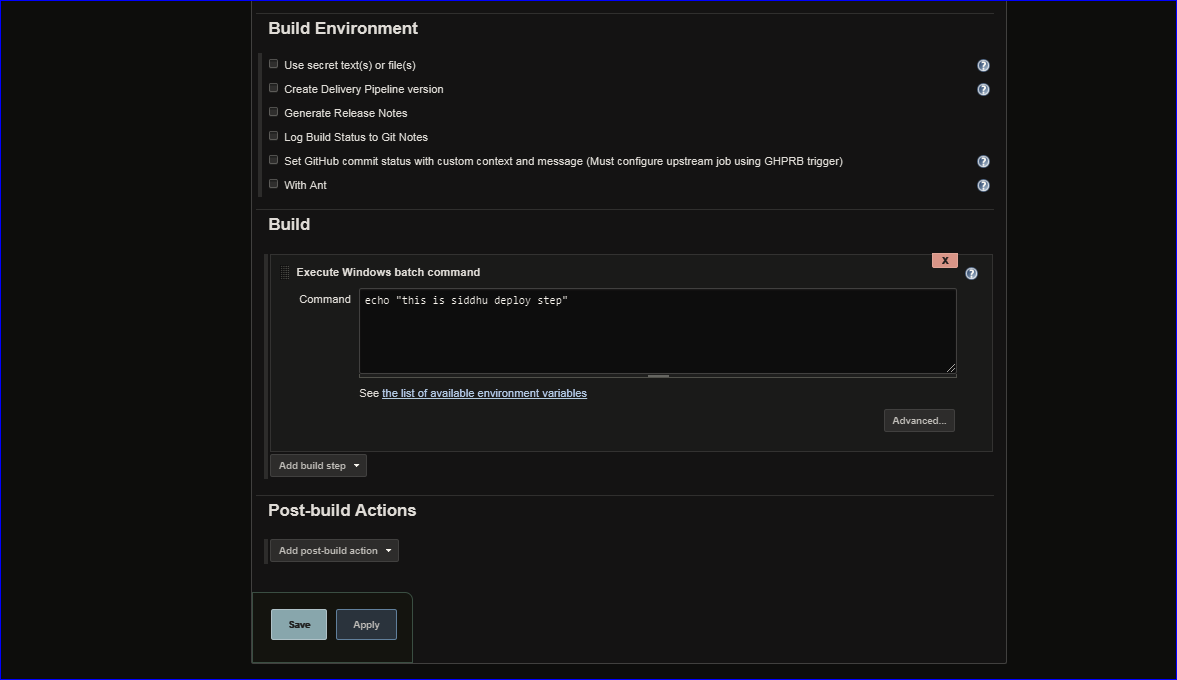
2-Deploy Job

Image3Image4Image5
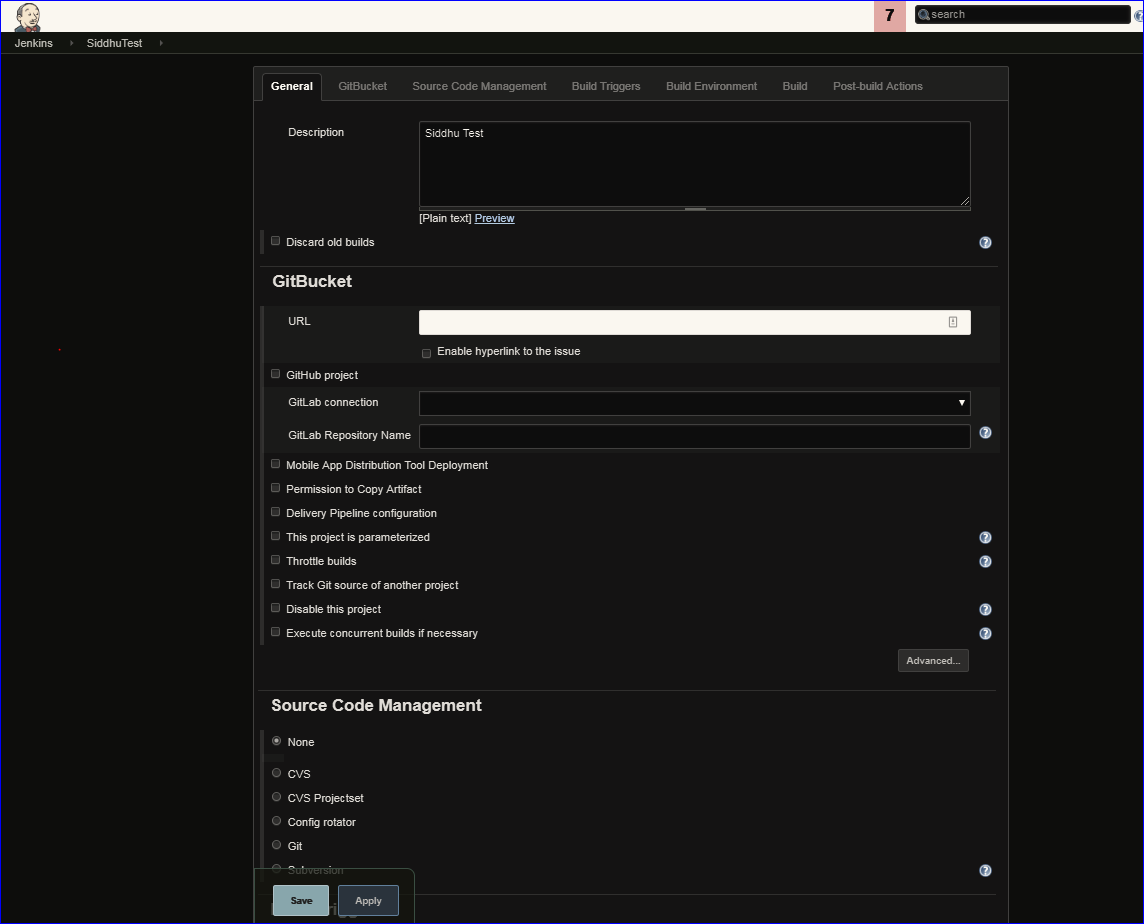
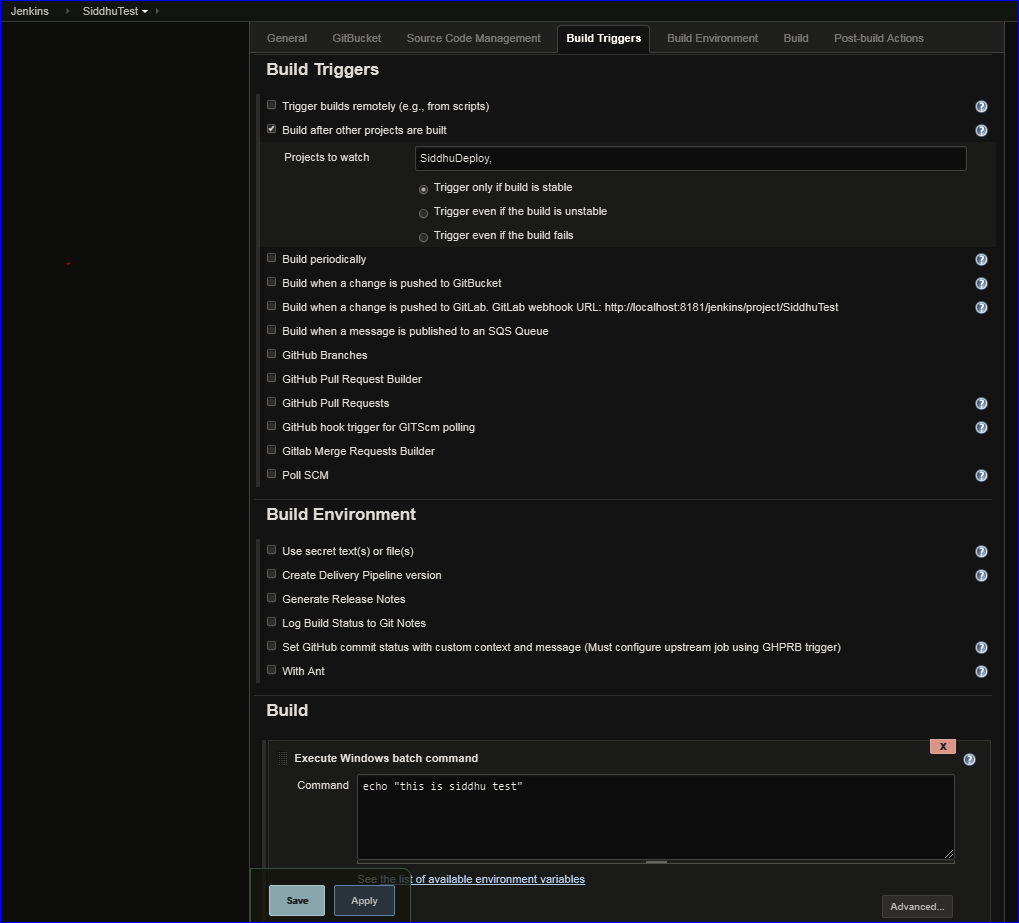
3- Test Job

Image6Image7
4- Release


Image8Image9
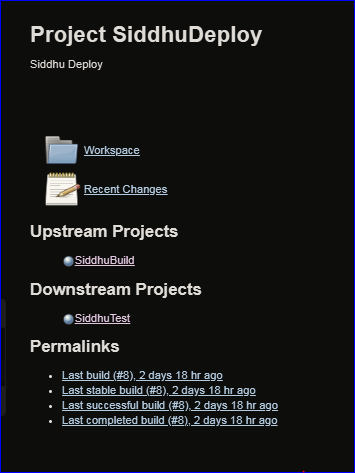
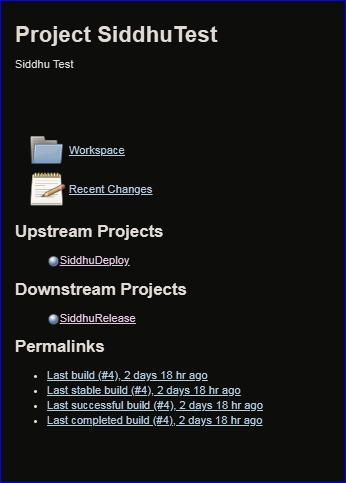
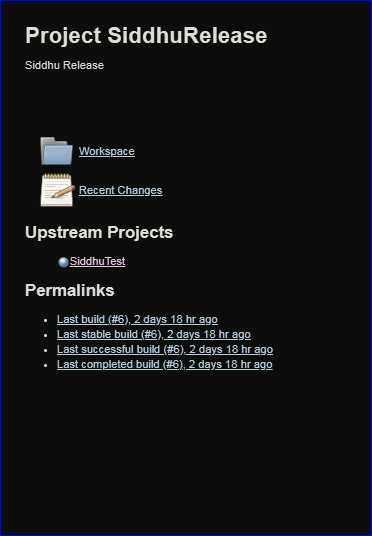
Now just check downstream and upstream proejct for our created jobs i.e. when we execute build job then on success it will auto trigger deploy and then it will auto trigger test and finally release jobs


Image10Image11Image12
Now check we have following plugin "Dilivery Pipeline Plugin"inside
Jenkin-- > Manage Jenkin -- > Manage Plugin -->Installed
If this plugin is not present then go to "Available" tab and installed the same.
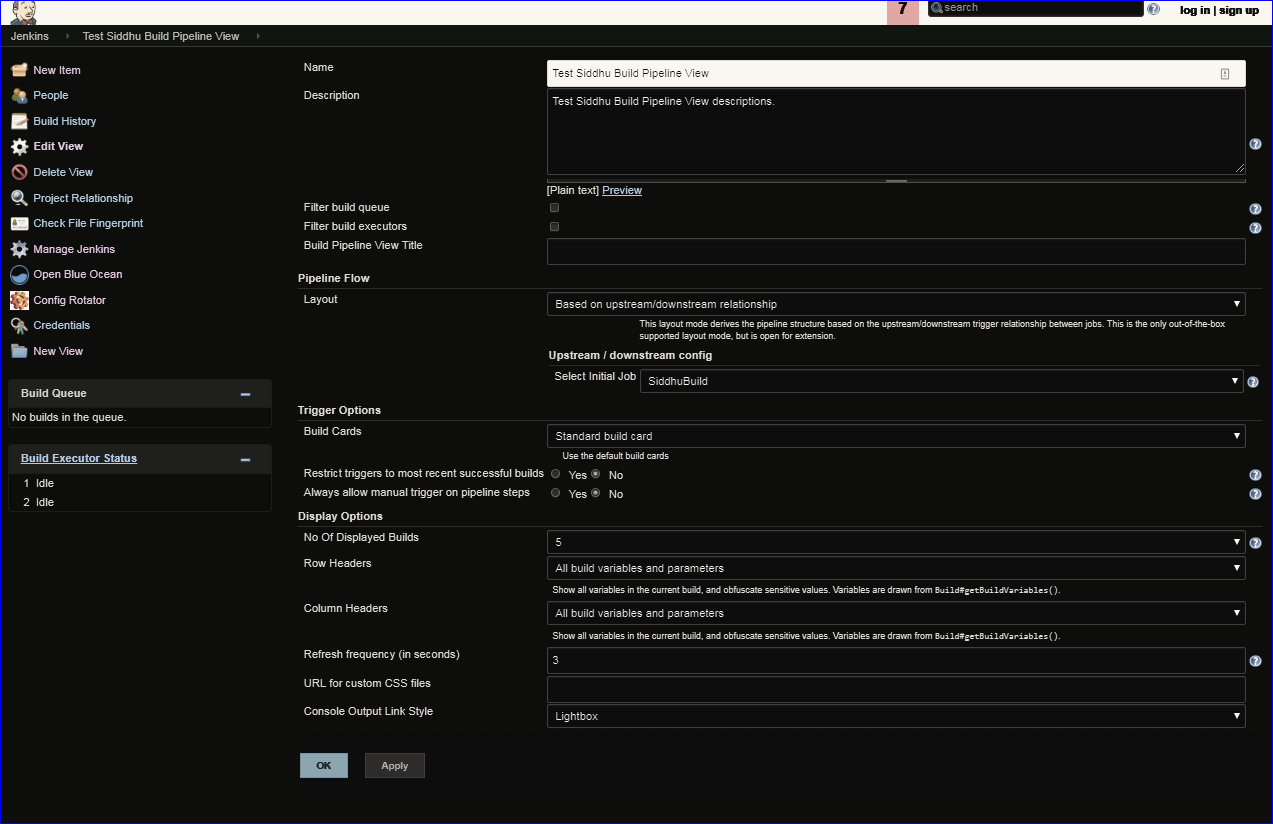
Once you installed the Plugin then create a new view as given below
Jenkin --> New View
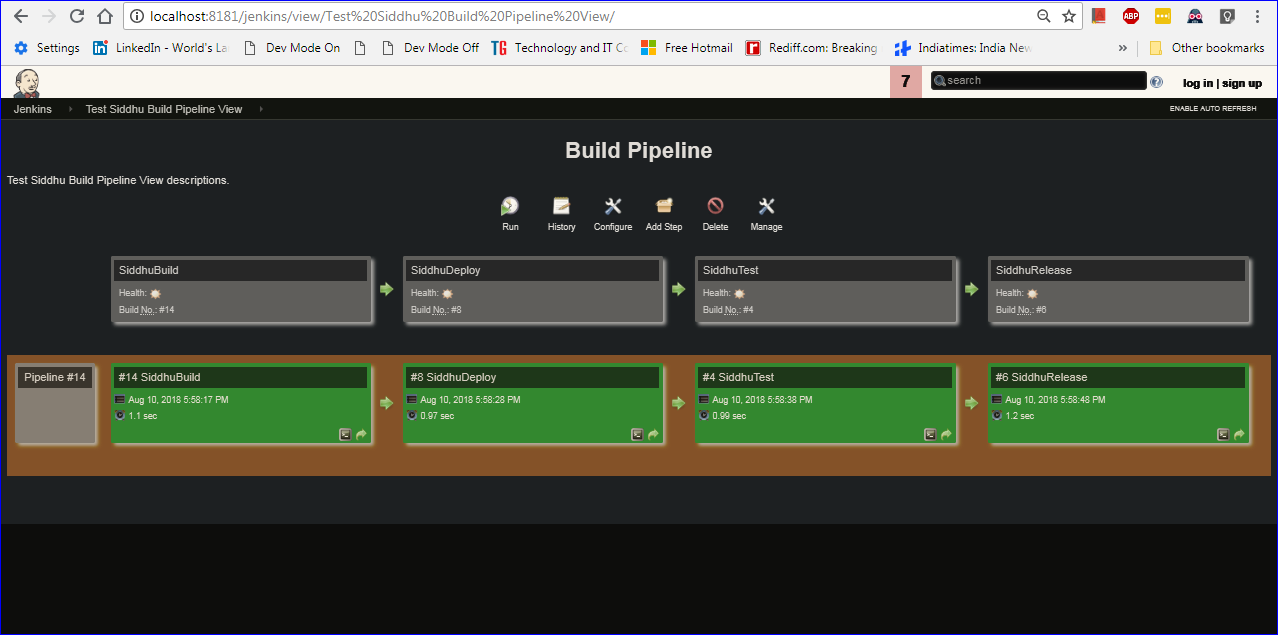
Now when you run our Build Job then open this newly created View and you will be able to see bekow screen.
Image13Image14

Monday, July 30, 2018

Spring Boot Example of Exposing REST Service


Step1:- Downlaod STS as IDE
Step 2:- Create Spring Boot Project
rigth click -> New -- > Others -->Spring Starter Project


This will create below given project structure for you


Step 3:- Create Bean file with getter and setter method


Step 4:- Create Controller class


Step 5:- As we are using Maven we need to use following pom.xml


Step 6:- Run the project using maven build and once the jar files created execute the below command

C:\workspace-sts-3.9.4.RELEASE\spring-boot-rest\target>java -jar spring-boot-rest-0.0.1-SNAPSHOT.jar

and see hit the browser with this url

http://localhost:8083/siddhu/message?name=siddhudhumale


Sunday, July 15, 2018

How can I listen for keypress event on the whole page in AngularJS 2 – 6

Add following line on @component decorator class
host: {‘(document:keypress)’: ‘handleKeyboardEvent($event)’}
and implement handleKeyboardEvent(event:KeyboardEvent)
i.e.
@Component({
selector:’app-add-component’,
templateUrl:’./add-component.component.html’,
styleUrls: [‘./add-component.component.css’],
// tslint:disable-next-line:use-host-property-decorator
host: {‘(document:keypress)’:’handleKeyboardEvent($event)’}
})
handleKeyboardEvent(event: KeyboardEvent) {
console.log(event);
if (event.keyCode===13)
{
console.log(“Enter key pressed 13”);
} else if (event.keyCode === 40)
{
} else if (event.keyCode === 38)
{
}
}

How to disable browser back button in AngularJS 2 to 6

Use location.onPopState to the same in AppComponent
import { PlatformLocation } from ‘@angular/common’;
constructor(location: PlatformLocation, private router: Router) {
location.onPopState(() => {
console.log(‘pressed back in add!!!!!’);
//this.router.navigateByUrl(‘/multicomponent’);
//history.forward();
});