Wednesday, October 19, 2016

Nodejs Installation and Configuration with Eclispe

- Download Nodeclipse from below given location
http://www.nodeclipse.org/
or You can also try belwo given URL to drag drop in your Eclipse. We had used Mars version of Eclipse.
https://marketplace.eclipse.org/content/nodeclipse
- Download latest version of Node.js from
https://nodejs.org/en/
- Window, Linux and MAc version are available
https://nodejs.org/en/download/
- Window :- https://nodejs.org/dist/v6.9.1/node-v6.9.1-x64.msi
For window Once you installed Nodejs it will create nodejs inside Program Files folder of C:\
C:\Program Files\nodejs
Make sure you had node.exe and npm.cmd inside this folder.
- Add this in your PATH to make Nodejs available on cmd prompt by adding following line your system path.
C:\Program Files\nodejs\
- Check availability of Node js using following command on command prompt
node --version
- This will display the version of installed NodeJs.
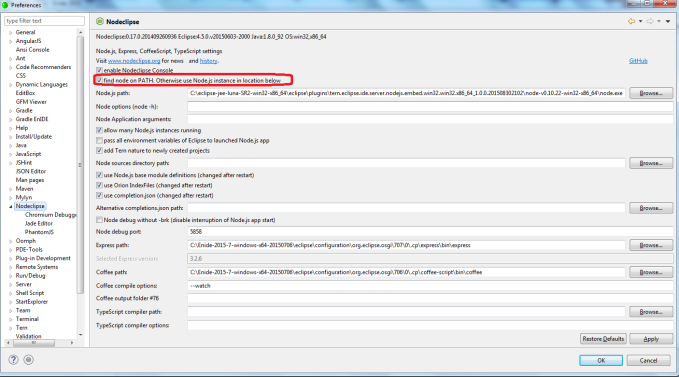
- Open your above nodeclipse and bydefault it will come with inbuild Node js. If you want to use latest Node js use configure your Eclipse using below screen.
Window --> Preference --> NodeEclipse

nodejs

Thursday, September 08, 2016

Simple explaination of Horizontal and Veritical clustring concept

Horizontally clustered environment:- Application is deployed on multiple physical machines. Each machine is ready for requests. This concept helps in protection over hardware failure, increases efficiency and best part is it provides load balancing along with process fail over. As all good thing come with overhead this style too has limitation i.e. since there are many number of physical machines installation and maintenance cost increases proportionally.

Vertical clustering:- Multiple application server instances are hosted on the same physical machine. So in this scenario we need to have high end machine configuration as all the request is taken by one single machine. Disadvantage:- If hardware fails then there may not be ready alternative.

Wednesday, September 07, 2016

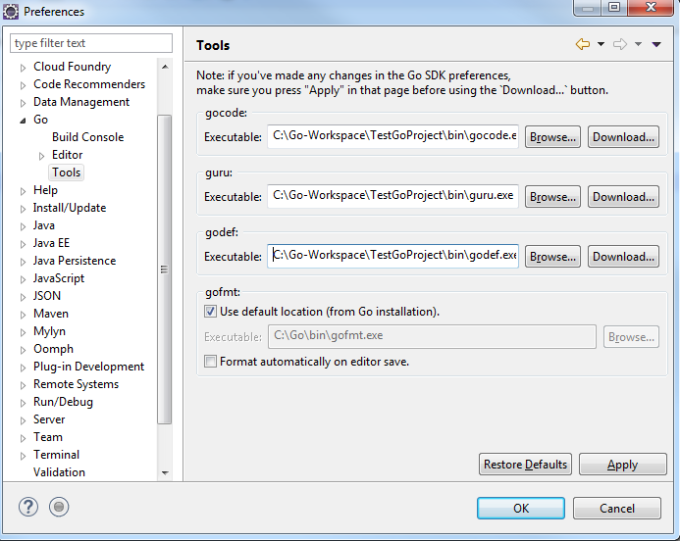
How to set gocode, guru and godef parameter in eclipse

Step 1:- Go to window -- preference and then click on GO option
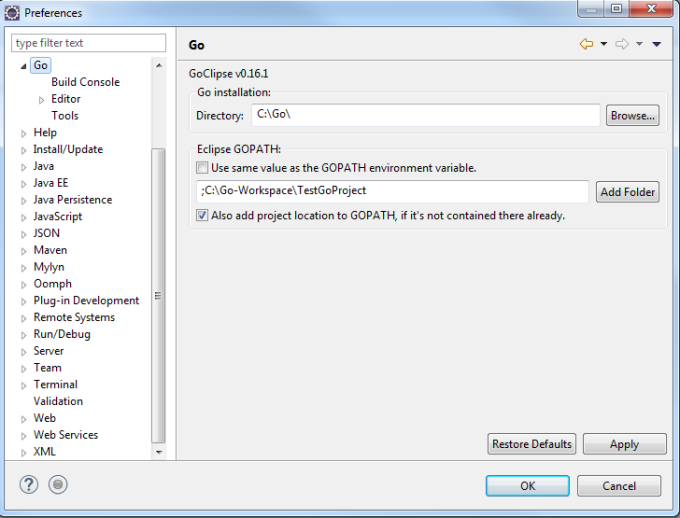
Step 2:- Make sure to set the GOPATH which is similar to our GO Eclipse project path
i.e. C:\Go-Workspace\TestGoProject
Step 3 :- Finally Click on Download button as shown in image and it will down load all the necesarry *.go for us in bin folder of Eclipse Project
image5
Step 4:- Finally click Apply and finish
image6

image7

How to install goeclipse for Go Language and execute simple hello world project in Eclipse IDE

Step 1:- Download Go from
https://golang.org/
Step 2:- Download the latest version of JAVA/J2EE Eclipse Version. We had taken Neon from Eclipse Site
https://eclipse.org/downloads/
https://www.eclipse.org/downloads/download.php?file=/oomph/epp/neon/R/eclipse-inst-win64.exe
Step 3:- Set GOROOT Variable in your system till the bin path i.e We had installed Go in C Drive so set GOROOT=C:\Go
Step 4:- Install goEclipse Plugin from belwo link. It will take time to configure Go Plugin.
https://marketplace.eclipse.org/content/goclipse
Step 5:- Create New Go Project

Step 6:- Make sure to create a package inside src folder of Created Go Project by Eclipse
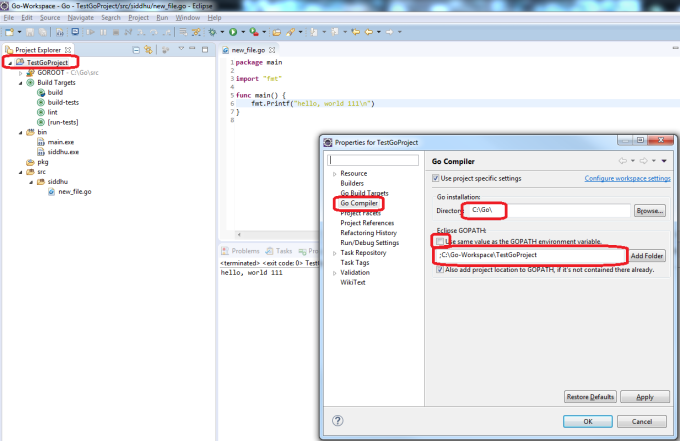
Step 7:- Click on the project and press ALT+ENTER and following below screen will be displayed
image1
Step 8:- For GO Installation set the path where bin folder of Go project is set
Step 9 :- Uncheck check box :- Use same variable as the GOPATH environment variable
Step 10:- Add your newly created Eclipse project by using add Folder button and click apply and ok.
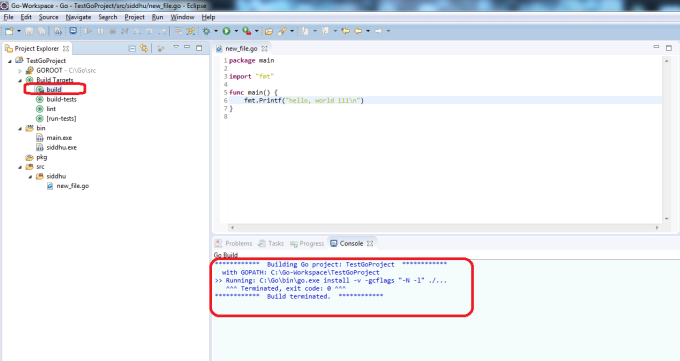
Step 10:- Finally build the application by clicking on build as shown in the below image
image2
Step 11:- After successful build we will see siddhu.exe created inside the bin folder of our Eclipse project.
i.e. siddhu name is taken from the folder name in which we keep the *.go files.
Step 12:- Two way to execute
A- Either from command prompt. Navigate till bin folder of eclispe project and execute exe as shown in belwo figure
image3
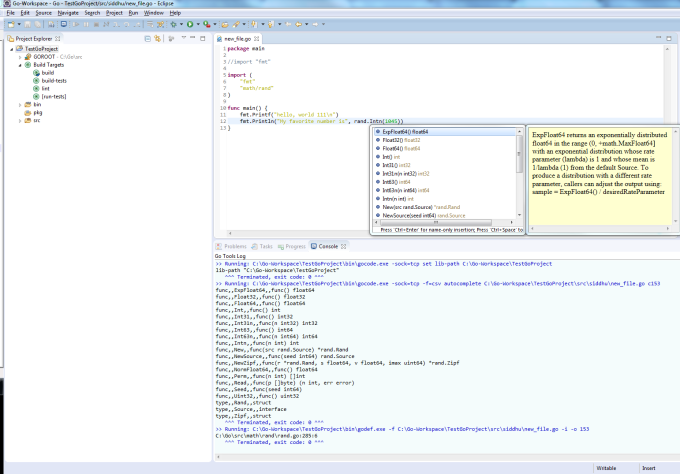
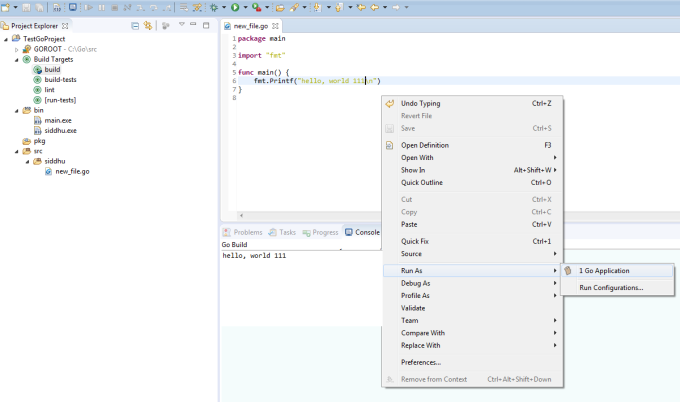
b- Execute it using Eclipse i.e. right click on file in eclipse and select Rus As->Go Application
image4

Friday, August 12, 2016

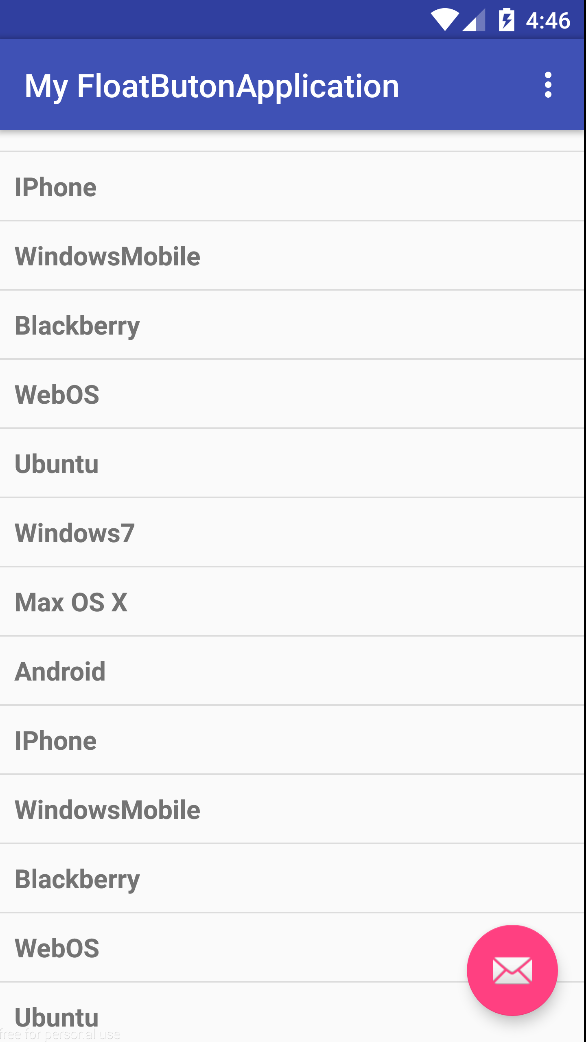
HOW TO HIDE AND SHOW FLOATING ACTION BUTTON WHILE SCROLLING THE LIST

1- Add following code to your onCreate Method:-
ArrayAdapter adapter = new ArrayAdapter(this, R.layout.activity_listview, mobileArray);
final FloatingActionButton fab = (FloatingActionButton) findViewById(R.id.fab);
Animation makeInAnimation = AnimationUtils.makeInAnimation(getBaseContext(), false);
makeInAnimation.setAnimationListener(new Animation.AnimationListener() {
@Override
public void onAnimationEnd(Animation animation) { }
@Override
public void onAnimationRepeat(Animation animation) { }
@Override
public void onAnimationStart(Animation animation) {
fab.setVisibility(View.VISIBLE);
}
});
Animation makeOutAnimation = AnimationUtils.makeOutAnimation(getBaseContext(), true);
makeOutAnimation.setAnimationListener(new Animation.AnimationListener() {
@Override
public void onAnimationEnd(Animation animation) {
fab.setVisibility(View.INVISIBLE);
}
@Override
public void onAnimationRepeat(Animation animation) { }
@Override
public void onAnimationStart(Animation animation) { }
});
// ...
if (fab.isShown()) {
fab.startAnimation(makeOutAnimation);
}
if (!fab.isShown()) {
fab.startAnimation(makeInAnimation);
}
ListView listView = (ListView) findViewById(R.id.mobile_list);
listView.setAdapter(adapter);
listView.setOnScrollListener(new AbsListView.OnScrollListener() {
@Override
public void onScrollStateChanged(AbsListView absListView, int i) {
fab.show();
}
@Override
public void onScroll(AbsListView absListView, int i, int i1, int i2) {
fab.hide();
}
});

2- Add follwing line in xml to get tag
android:id="@+id/mobile_list"
android:layout_width="match_parent"
android:layout_height="wrap_content" >

android:id="@+id/fab"
android:layout_width="wrap_content"
android:layout_height="wrap_content"
android:layout_gravity="bottom|right"
android:layout_margin="16dp"
android:src="@android:drawable/ic_dialog_email"
app:layout_anchor="@id/mobile_list"
app:layout_anchorGravity="bottom|right|end" />


3- Activity_list.xml view

    android:id="@+id/label"
    android:layout_width="fill_parent"
    android:layout_height="fill_parent"
    android:padding="10dip"
    android:textSize="16dip"
    android:textStyle="bold" >

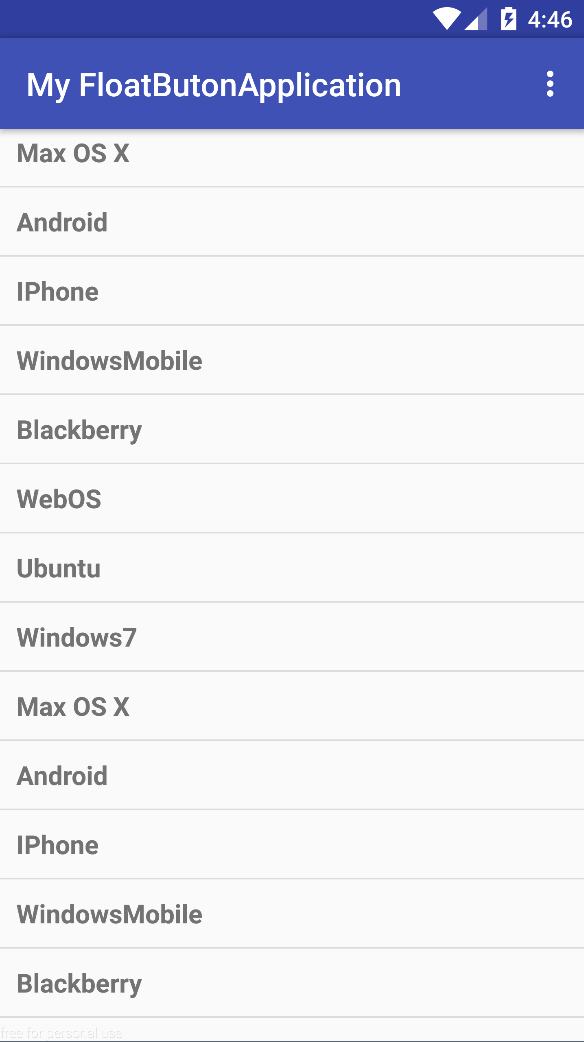
Default
Image1

OnScroll
Image2

After Scroll
Image3

Wednesday, August 10, 2016

Android Retrofit Example

Retrofit way for calling android Web service Example
http://square.github.io/retrofit/

Add following line in our Gradle
compile 'com.squareup.retrofit2:retrofit:2.1.0'
for Maven use following 
 com.squareup.retrofit2
retrofit 2.1.0 

Step :- 1:- Use following below given code for Retrofit Class implementation in your application
package siddhu.test.com.myapplication.network;
import retrofit2.Call;
import retrofit2.Retrofit;
import retrofit2.converter.gson.GsonConverterFactory;
import retrofit2.http.GET;
import retrofit2.http.Query;
import siddhu.test.com.myapplication.objects.NewsApiArticleResponse;
import siddhu.test.com.myapplication.objects.NewsApiSourcesResponse;
/**
* Created by admin on 8/5/2016.
*/
public class NewsAPI {
private static final String API_KEY = "xyz";
private static final String BASE_URL = "https://newsapi.org/v1/";
private static NewsAPIInterface newsAPIInterface;
public static NewsAPIInterface getNewsAPI() {
if (newsAPIInterface == null) {
Retrofit retrofit = new Retrofit.Builder()
.baseUrl(BASE_URL)
.addConverterFactory(GsonConverterFactory.create())
.build();
newsAPIInterface = retrofit.create(NewsAPIInterface.class);
}
return newsAPIInterface;
}
public interface NewsAPIInterface {
@GET("articles?apiKey=" + API_KEY)
Call getArticles(@Query("source") String source, @Query("sortBy") String sortBy);
@GET("sources")
Call getSources();
}
}

Step :-2:- Calling class code

Call responseCall = NewsAPI.getNewsAPI().getSources();

Step to install Git hub

install git hub desktop from net i.e. https://desktop.github.com
This will give GitHub and GitHub Shell
Find the git.exe path in newly installed packages :-
—Git Hub
C:\Users\admin\AppData\Local\GitHub\PortableGit_xxx\cmd\git.exe init
– inside folder where all source code is kept
C:\Users\admin\AppData\Local\GitHub\PortableGit_xxx\cmd\git.exe add .
C:\Users\admin\AppData\Local\GitHub\PortableGit_xxx\cmd\git.exe commit -m “first commit”
C:\Users\admin\AppData\Local\GitHub\PortableGit_xxx\cmd\git.exe remote add originhttps://github.com/shdhumale/AndroidFragment.git
C:\Users\admin\AppData\Local\GitHub\PortableGit_xxx\cmd\git.exe push -u origin master