Friday, September 13, 2019

Spring Boot Admin Server and Client

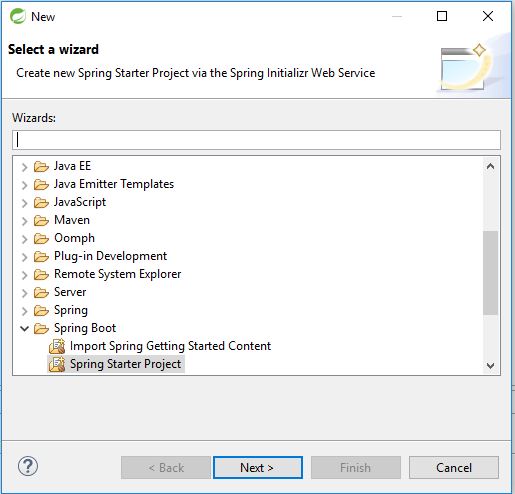
Create a spring boot application and following dependencise in pom.xml
<parent>
<groupId>org.springframework.boot</groupId>
<artifactId>spring-boot-starter-parent</artifactId>
<version>1.5.4.RELEASE</version>
<relativePath /> <!-- lookup parent from repository -->
</parent>
<dependencies>
<dependency>
<groupId>de.codecentric</groupId>
<artifactId>spring-boot-admin-server</artifactId>
<version>1.5.1</version>
</dependency>
<dependency>
<groupId>de.codecentric</groupId>
<artifactId>spring-boot-admin-server-ui</artifactId>
<version>1.5.1</version>
</dependency>
<dependency>
<groupId>org.springframework.boot</groupId>
<artifactId>spring-boot-starter-test</artifactId>
<scope>test</scope>
</dependency>
</dependencies>
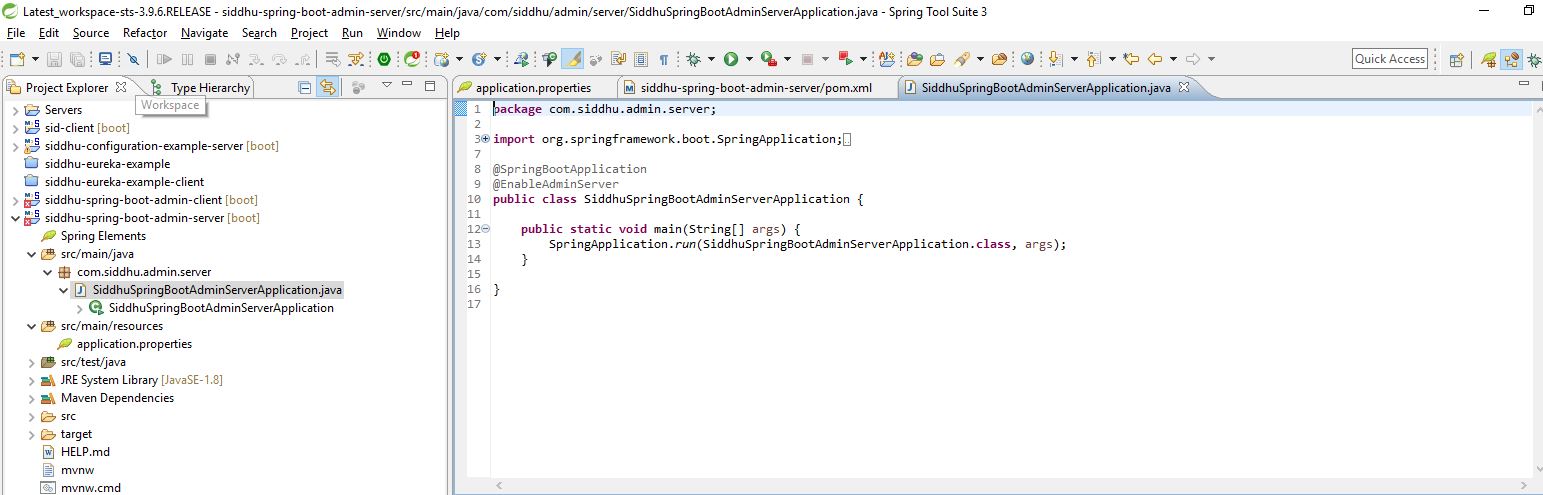
Add following @EnableAdminServer in our main Server class
@SpringBootApplication
@EnableAdminServer
public class SiddhuSpringBootAdminServerApplication {
public static void main(String[] args) {
SpringApplication.run(SiddhuSpringBootAdminServerApplication.class, args);
}
}
Add following lines in your admin configuration properties
server.port = 9090
spring.application.name = adminserver
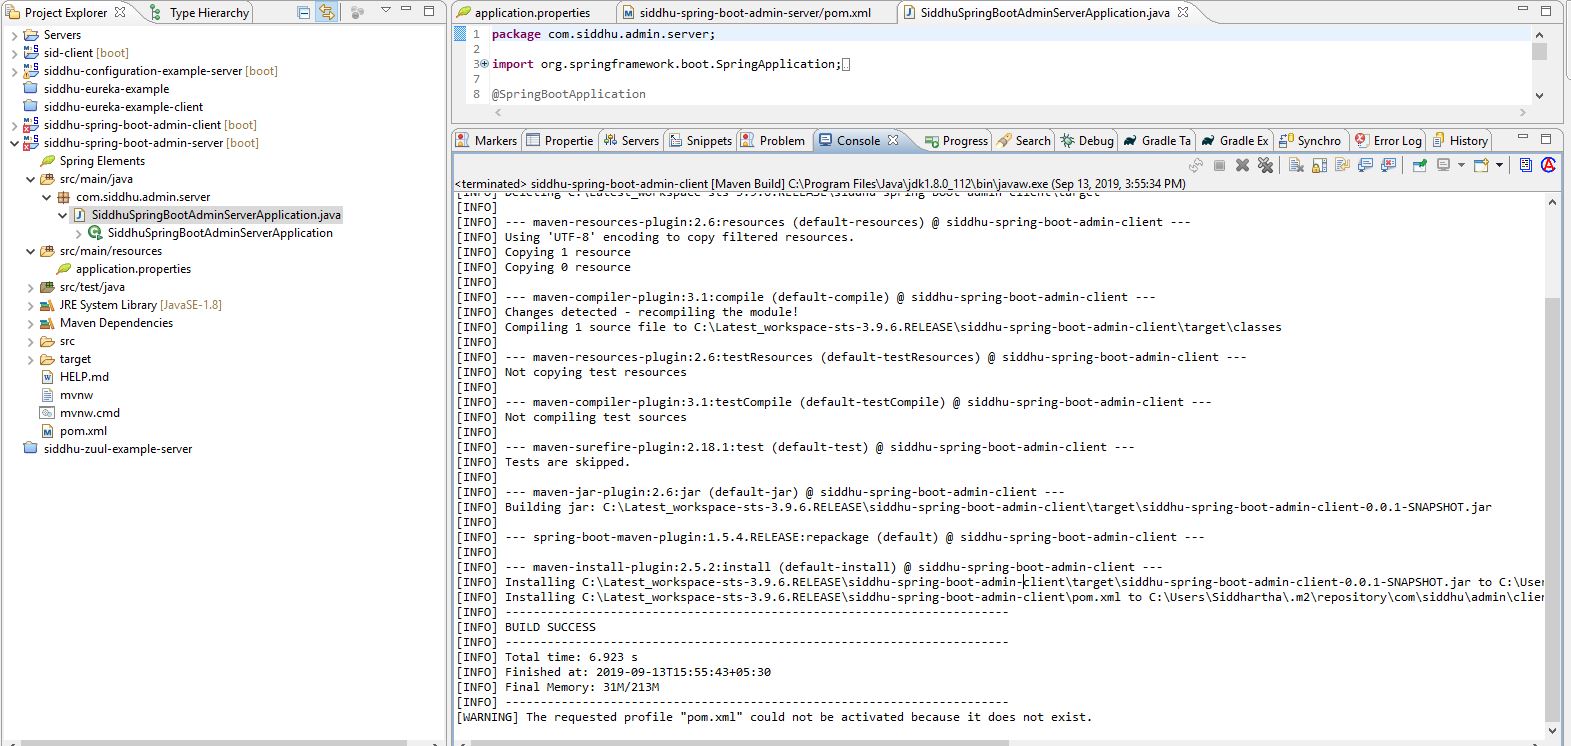
Compile the server and run the application
java -jar C:\Latest_workspace-sts-3.9.6.RELEASE\siddhu-spring-boot-admin-server\target\siddhu-spring-boot-admin-server-0.0.1-SNAPSHOT.jar
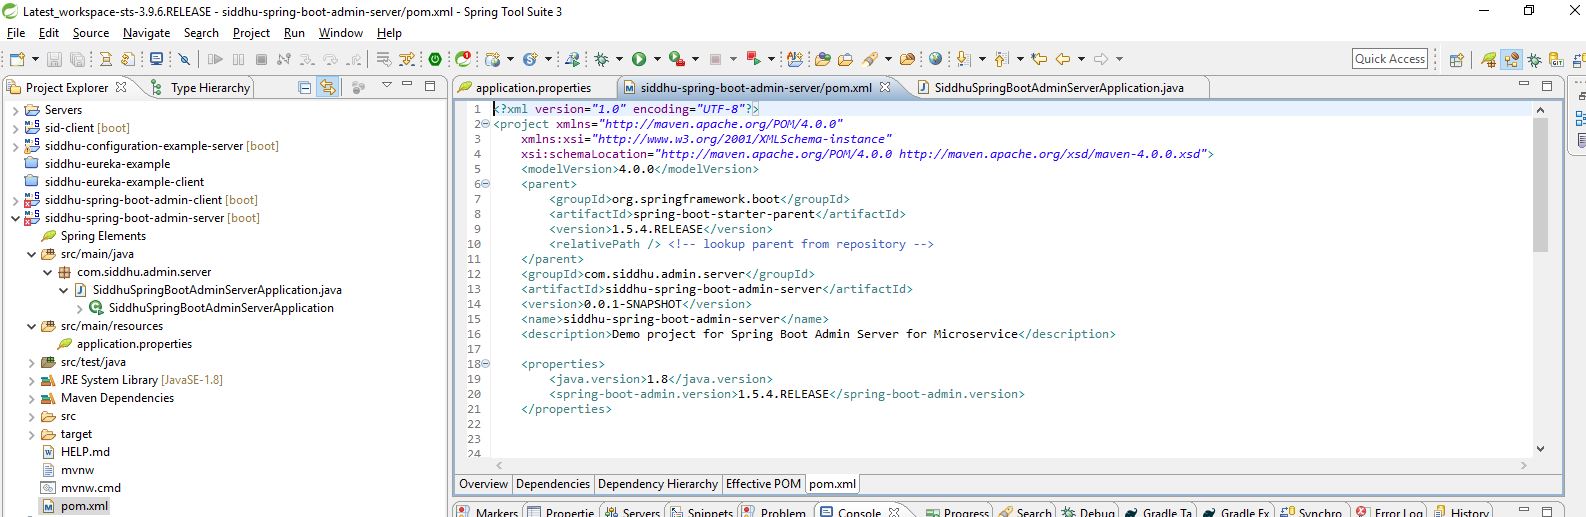
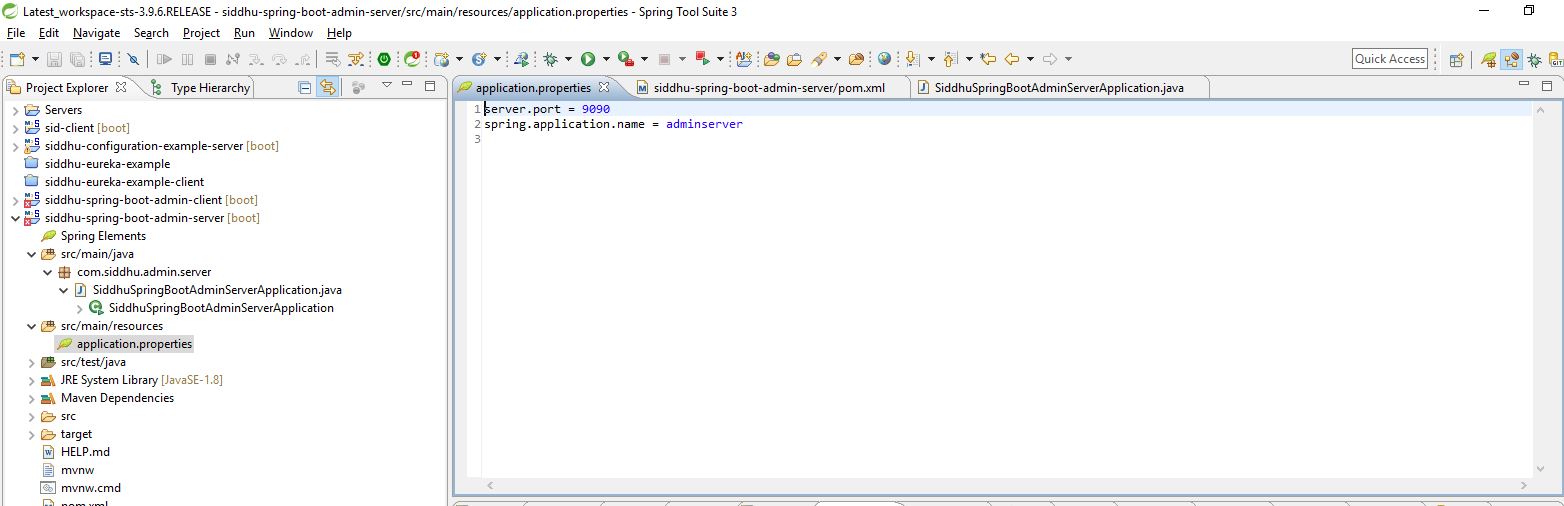
Image1Image2Image3Image4
And hit url
http://localhost:9090/#/
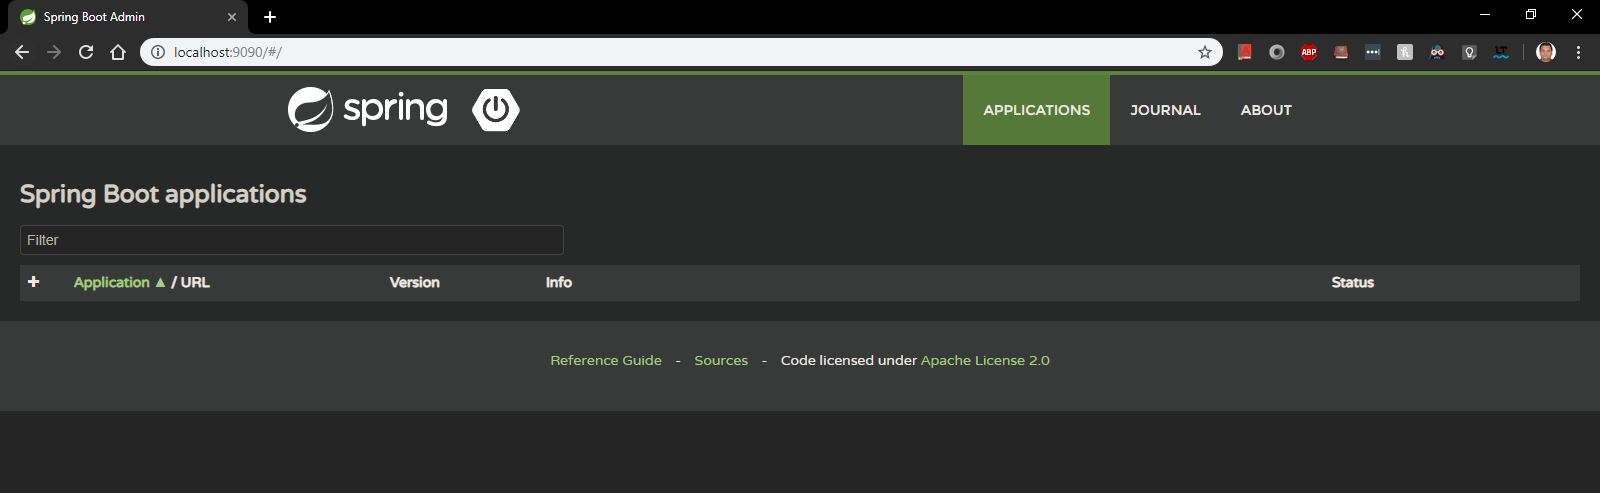
Image5
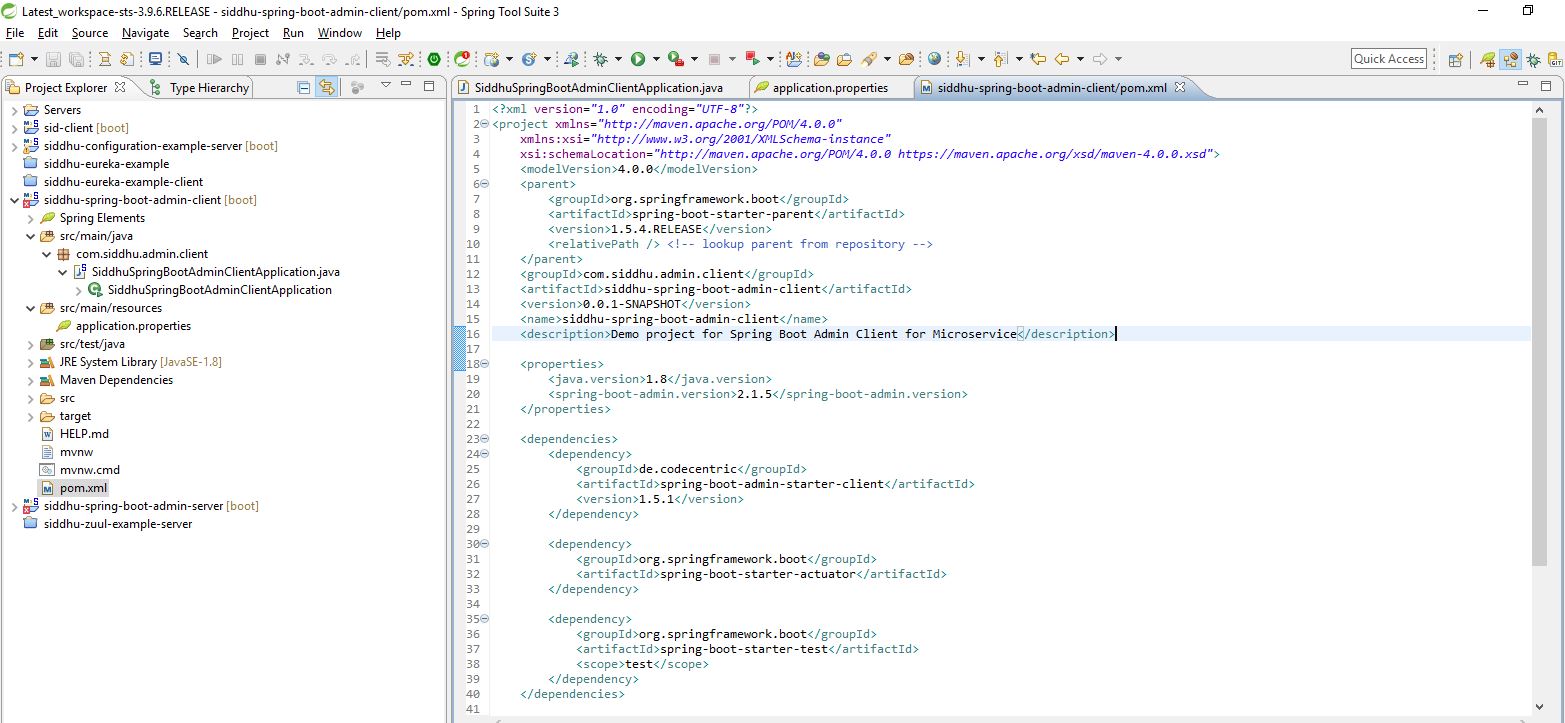
Now lets create the spring boot application admin client. Create an spring boot application and following dependencise in pom.xml
<parent>
<groupId>org.springframework.boot</groupId>
<artifactId>spring-boot-starter-parent</artifactId>
<version>1.5.4.RELEASE</version>
<relativePath /> <!-- lookup parent from repository -->
</parent>
<dependencies>
<dependency>
<groupId>de.codecentric</groupId>
<artifactId>spring-boot-admin-starter-client</artifactId>
<version>1.5.1</version>
</dependency>
<dependency>
<groupId>org.springframework.boot</groupId>
<artifactId>spring-boot-starter-actuator</artifactId>
</dependency>
<dependency>
<groupId>org.springframework.boot</groupId>
<artifactId>spring-boot-starter-test</artifactId>
<scope>test</scope>
</dependency>
</dependencies>
@SpringBootApplication
public class SiddhuSpringBootAdminClientApplication {
public static void main(String[] args) {
SpringApplication.run(SiddhuSpringBootAdminClientApplication.class, args);
}
}
Add following lines in your admin configuration properties
spring.boot.admin.url=http://localhost:9090/
Image6Image7Image8Image9

java -Dserver.port=8888 -jar C:\Latest_workspace-sts-3.9.6.RELEASE\siddhu-spring-boot-admin-client\target\siddhu-spring-boot-admin-client-0.0.1-SNAPSHOT.jar
Compile the server and run the application and hit url
http://localhost:9090/#/
Image10

Wednesday, September 11, 2019

Spring Configuration server and client

In microservice concept where in we divide our big application into small services many time it happens that when we need to update any small service which has its own properties files in that case to load this individual microservice property files on deployment we need to restart the server on which this microservice is deployed. This make the production in downtime for this service. For application where in downtime is not preferred for microservice this architecture is good fit on the same.

To achieve this need Spring Boot configuration server, and we will have Spring Boot configuration client
Spring Boot configuration server :- This will store provide the ability for the spring boot microservice to have properties files of its client to be stored centralized in it. i.e. depending on the client name we store the different properties files inside this Spring Boot configuration server and at run time when Spring Boot configuration client run it take its respective file from this server. Only the thumb rule is the name of the property files is kept as similar to client service. Lets say we have client microservice as sid-client.jar then its respective property files can be named as sid-client.properties or sid-client.yml file.
In addition to individual client properties files we can also have one common application.properties in server which will be common for all the client.

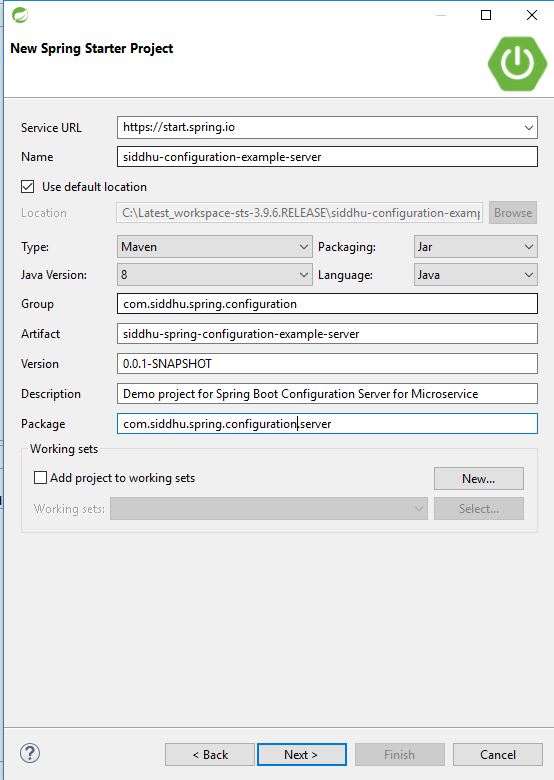
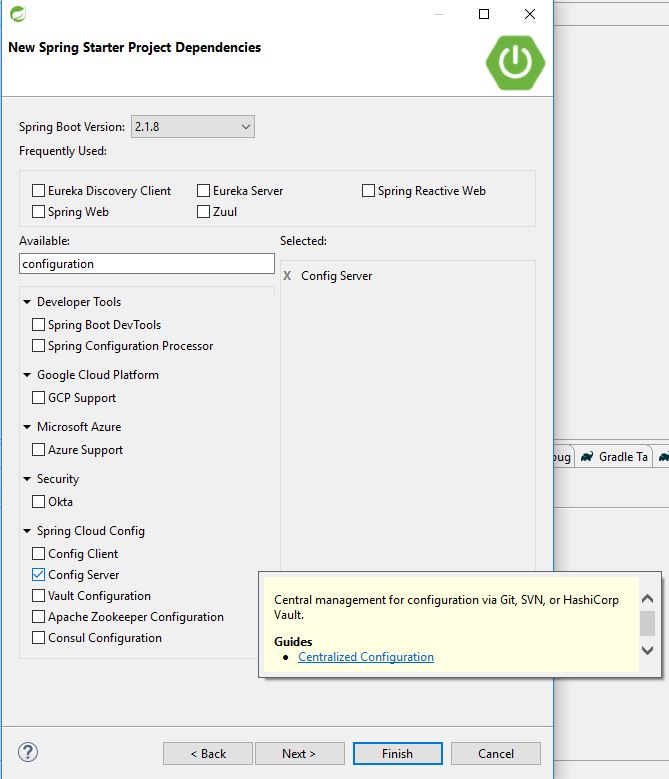
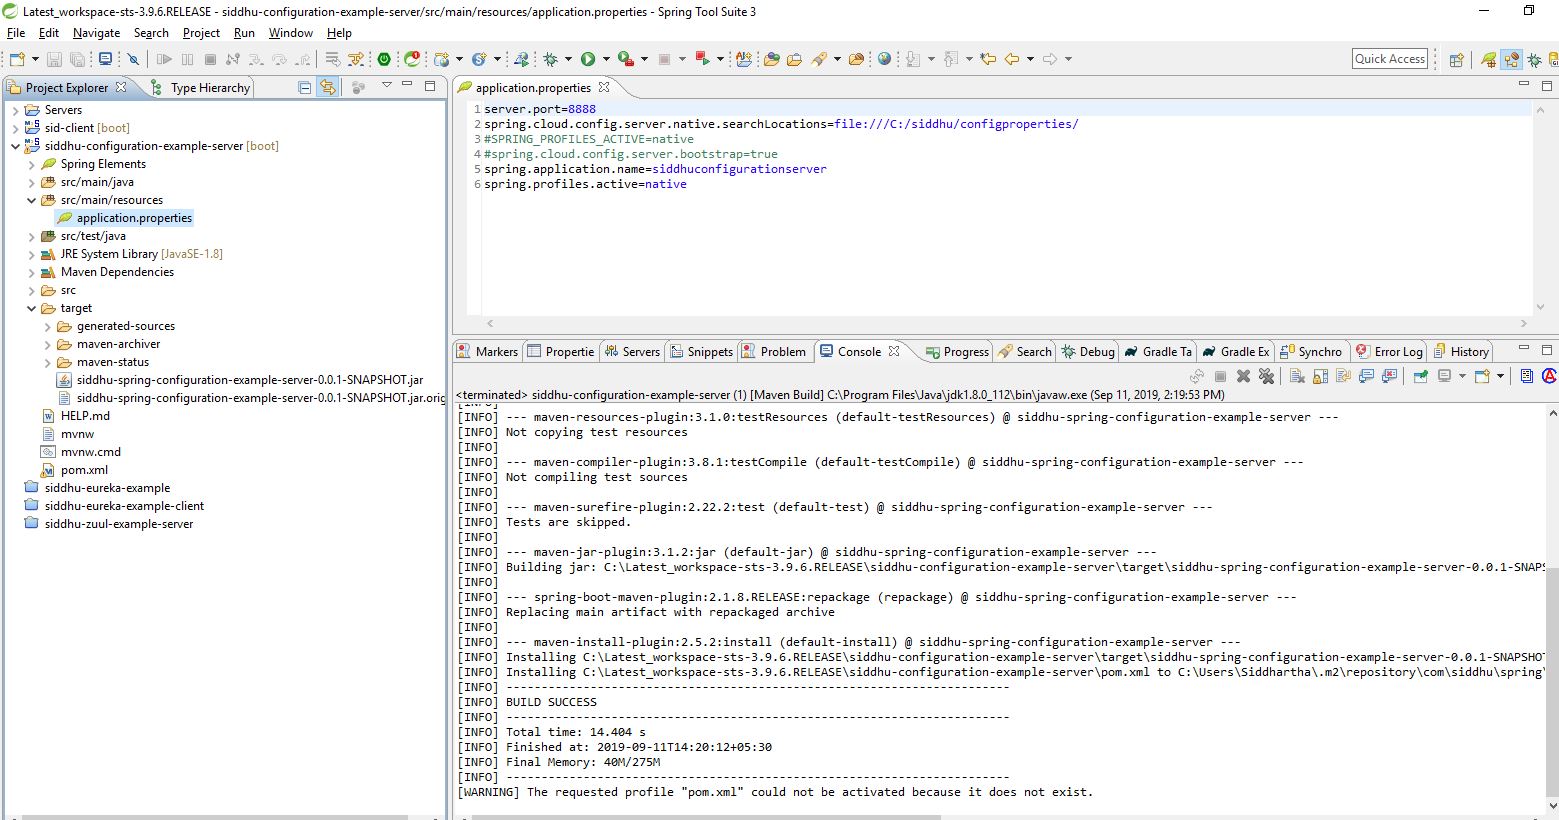
Let us build simple Spring boot configuration server as shown below
Image1

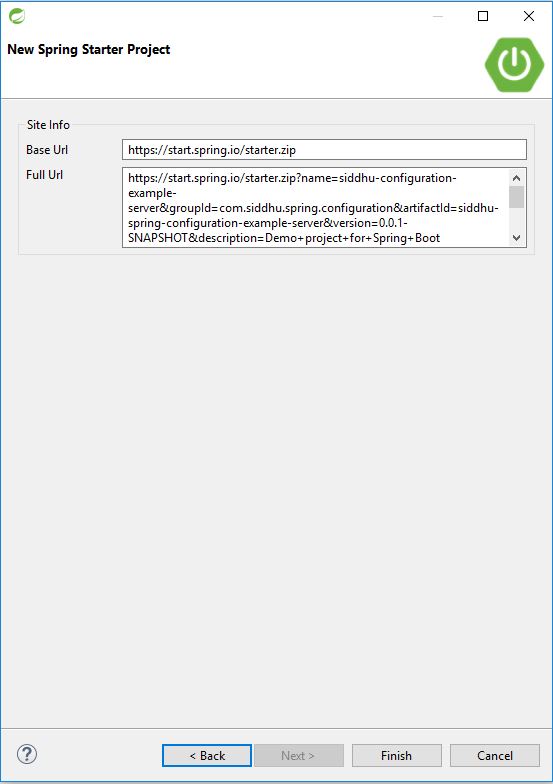
Image2Image3Image4
You will able to see belwo code in pom.xml
<dependency>
<groupId>org.springframework.cloud</groupId>
<artifactId>spring-cloud-config-server</artifactId>
</dependency>
Add following tag to your mail spring boot applications to indicate this microservice as a configuration server.
@SpringBootApplication
@Configuration
@EnableAutoConfiguration
@EnableConfigServer

Image10

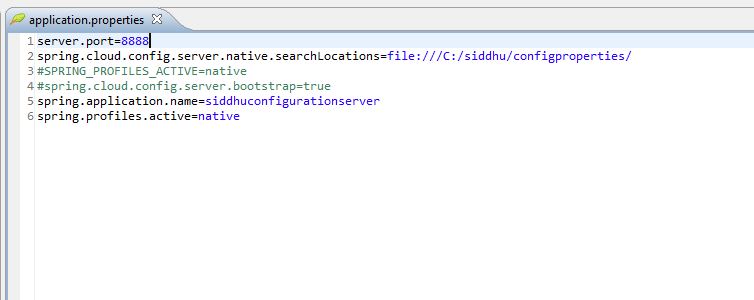
Please add follwing enteries in the properties files
Image5
#indicate the port number on which our configuration server is running
server.port=8889
#indicate the location of the properties files for the spring boot microservice client
spring.cloud.config.server.native.searchLocations=file:///C:/siddhu/configproperties/
#SPRING_PROFILES_ACTIVE=native
#spring.cloud.config.server.bootstrap=true
spring.application.name=siddhuconfigurationserver
#indicate profiles are active and it is stored in local system. We can store the configuration properties directly on GIT, SVN, Consul etc
spring.profiles.active=native
Inside C:/siddhu/configproperties/ we have created a property files names as sid-client.properties which will server our client microserver sid-client. for simple side we had just kept following text in that property file
first.message = This is first message for Sid-Client Microservice from Spring Boot Configuration server
Now compile the spring boot configuration server and run the jar file and see the browser text on hitting this url

Image6Image7Image8
Now hit the URL http://localhost:8889/sid-client/default/master and you will be see your client properties
Image9

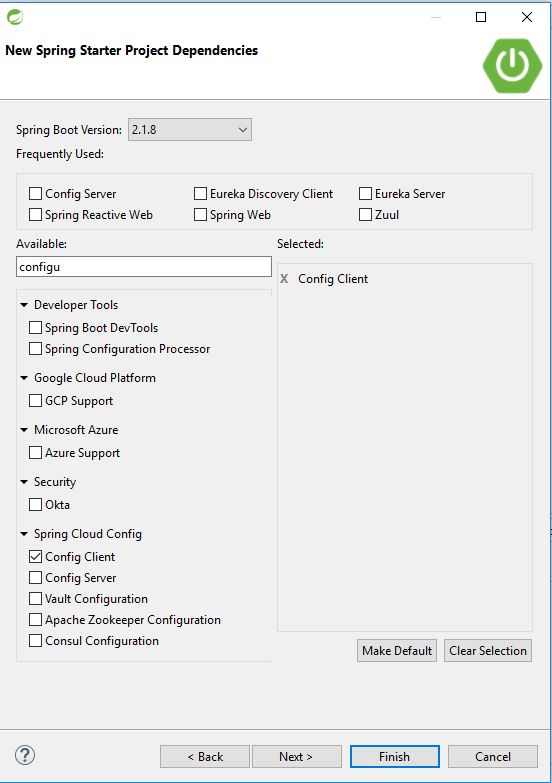
Now lets create one Spring boot simple client that will refer to our above create spring boot configuration server for fetching its respective properties values i.e. from sid-client.
Note:- We need to make sure when we create the spring boot client we should name the client as sid-client so that it can fetched its properties from server.
Image11Image12
Make sure we have following entry in our pom.xml
<dependency>
<groupId>org.springframework.cloud</groupId>
<artifactId>spring-cloud-starter-config</artifactId>
</dependency>
<dependency>
<groupId>org.springframework.boot</groupId>
<artifactId>spring-boot-starter-thymeleaf</artifactId>
</dependency>
<dependency>
<groupId>org.springframework.boot</groupId>
<artifactId>spring-boot-starter-web</artifactId>
</dependency>
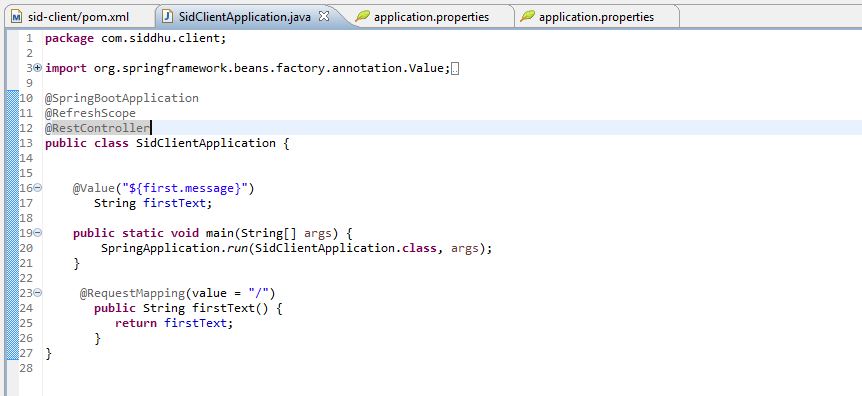
Add following annotation in our mail class
@RefreshScope
Image14
We are using Spring thymeleaf java based library to creat web application hence we will also need spring-boot-starter-web package in the xml.
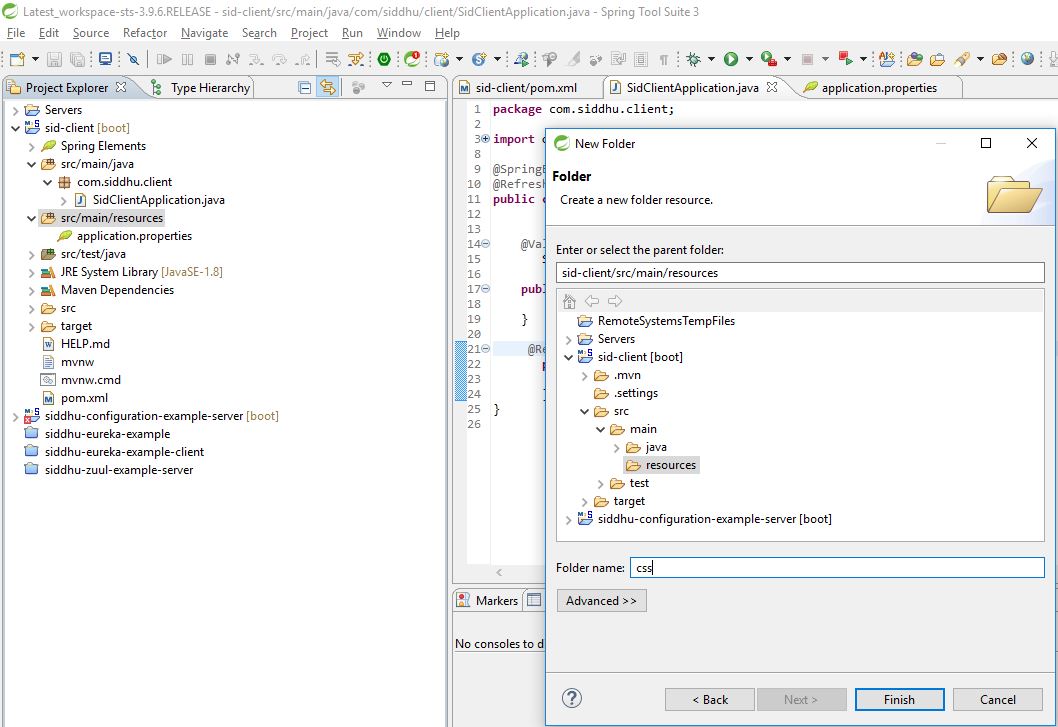
Now create static folder inside our resource folder along with CSS and templates folder as shown below
Image15Image16
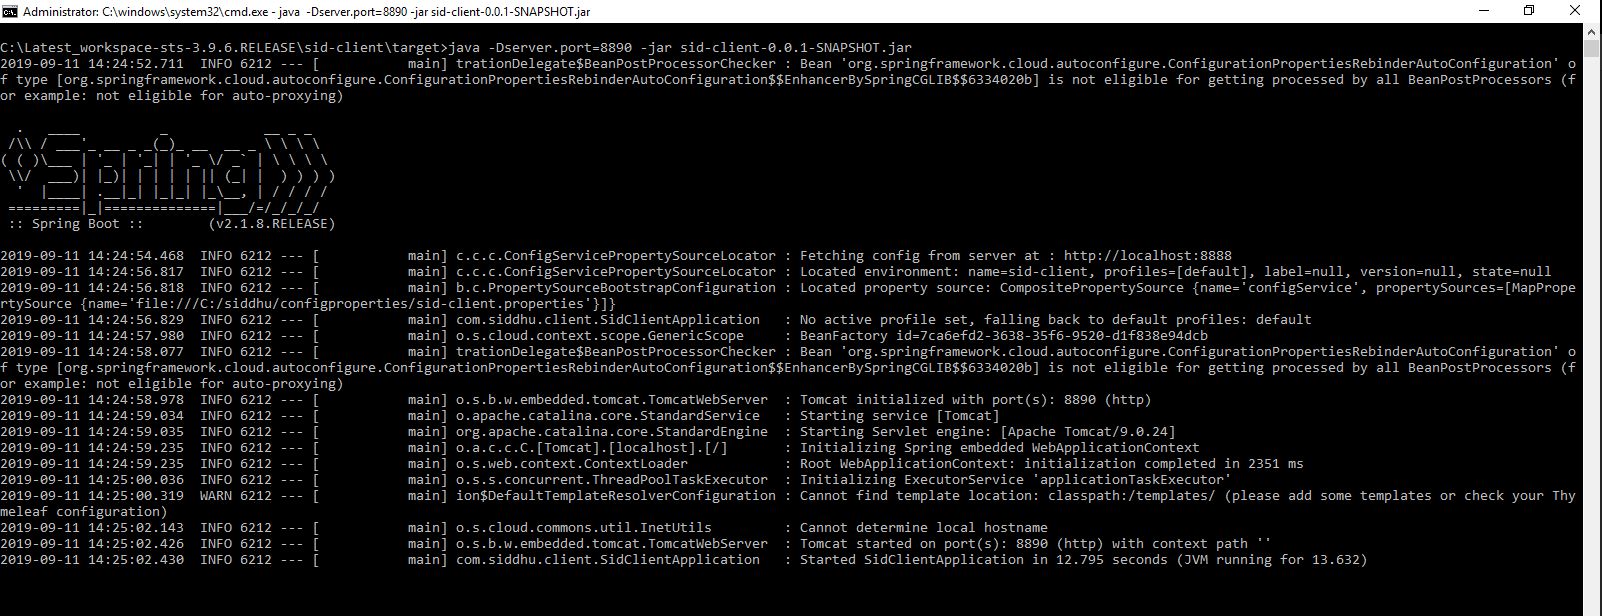
Now compile the client application and run the jar as shown in below screen using different port
java -Dserver.port=8890 -jar sid-client-0.0.1-SNAPSHOT.jar

Image17
Now hit the url http://localhost:8890/ and you will be able to see the value from the text that is described in server property files.
Image18

Monday, September 09, 2019

Spring Zuul Server

Zuul Server is provided by Spring framework to proxy your request url. It handles all the requests and does the dynamic routing of microservice applications. The Zuul Server is also known as Edge Server.
For Example, your url having this pattern /api/login is mapped to the login service and /api/user is mapped to the user service and Zuul Server dynamically routes the requests.
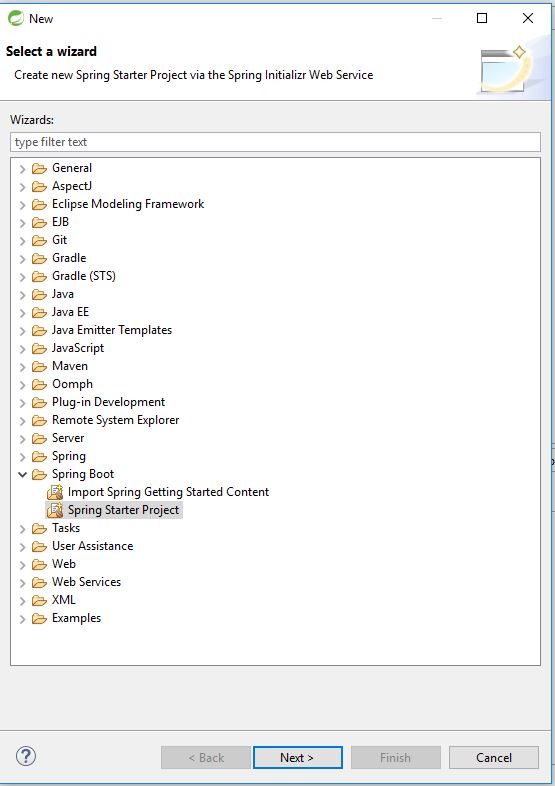
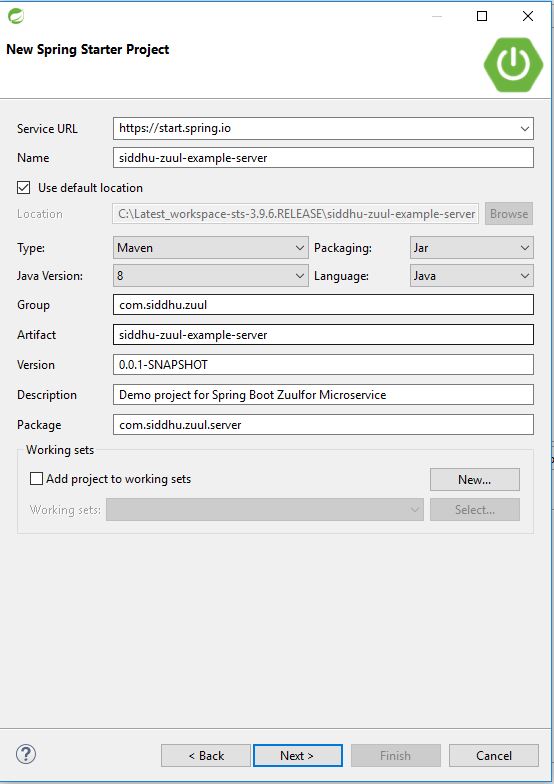
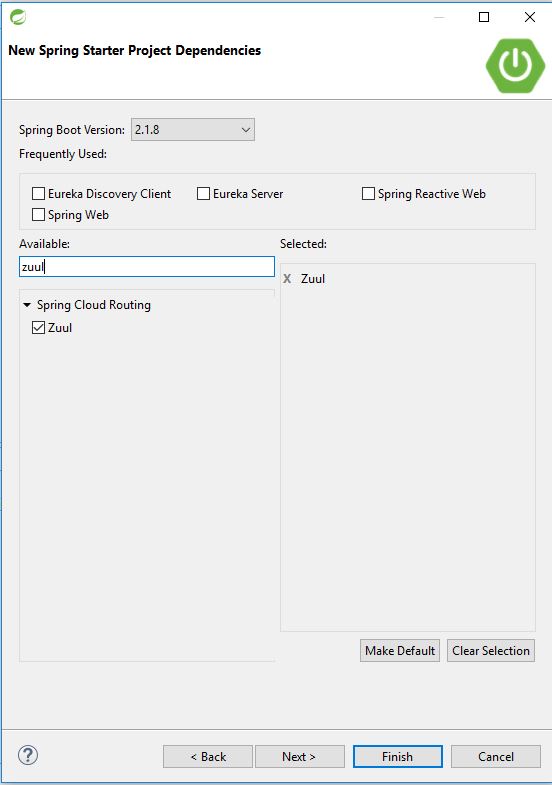
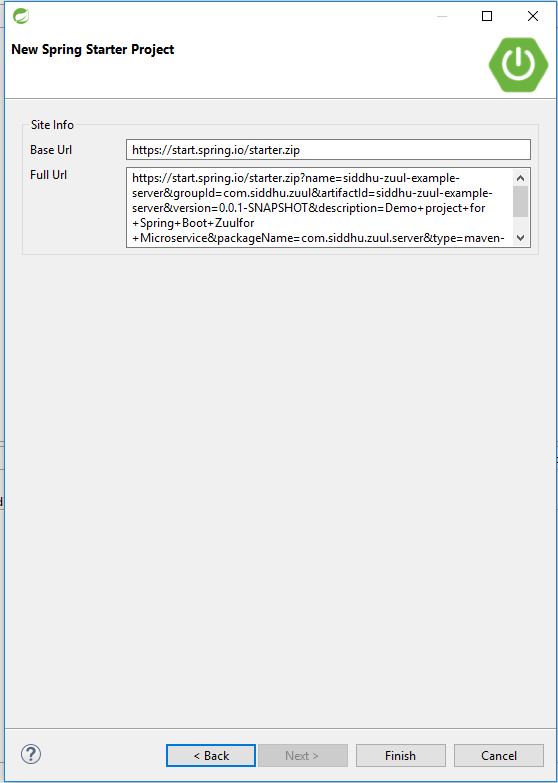
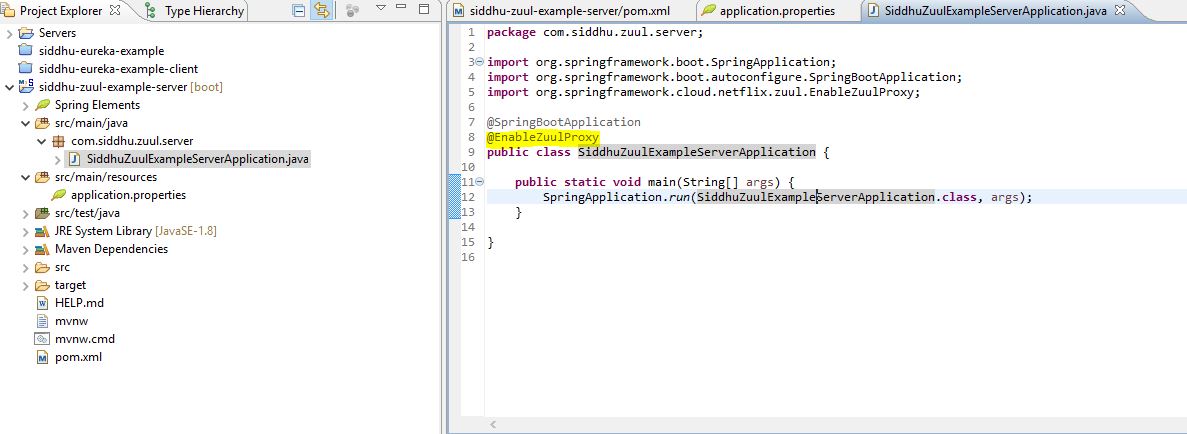
Lets first create a Zuul server
Iamge1
Image2Image3Image4Image5

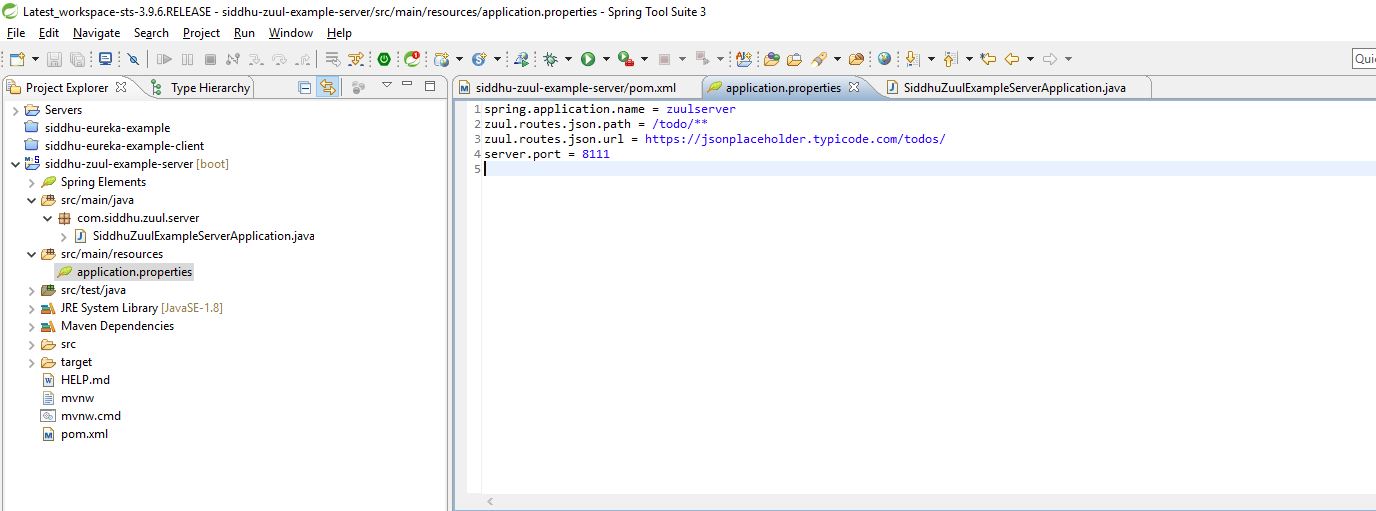
Have below given entries in your application.properties
spring.application.name = zuulserver
zuul.routes.json.path = /todo/**
zuul.routes.json.url = https://jsonplaceholder.typicode.com/todos/
server.port = 8111
Image6
Lets try to understand what each entry is saying
'- spring.application.name define the name of the Zuul sever
'- zuul.routes.products.path specify the url that will be maped for rounting
'- zuul.routes.products.url configure the original url that is going to be hit for taking the data
'- server.port port on which zuul sever is going to listen.
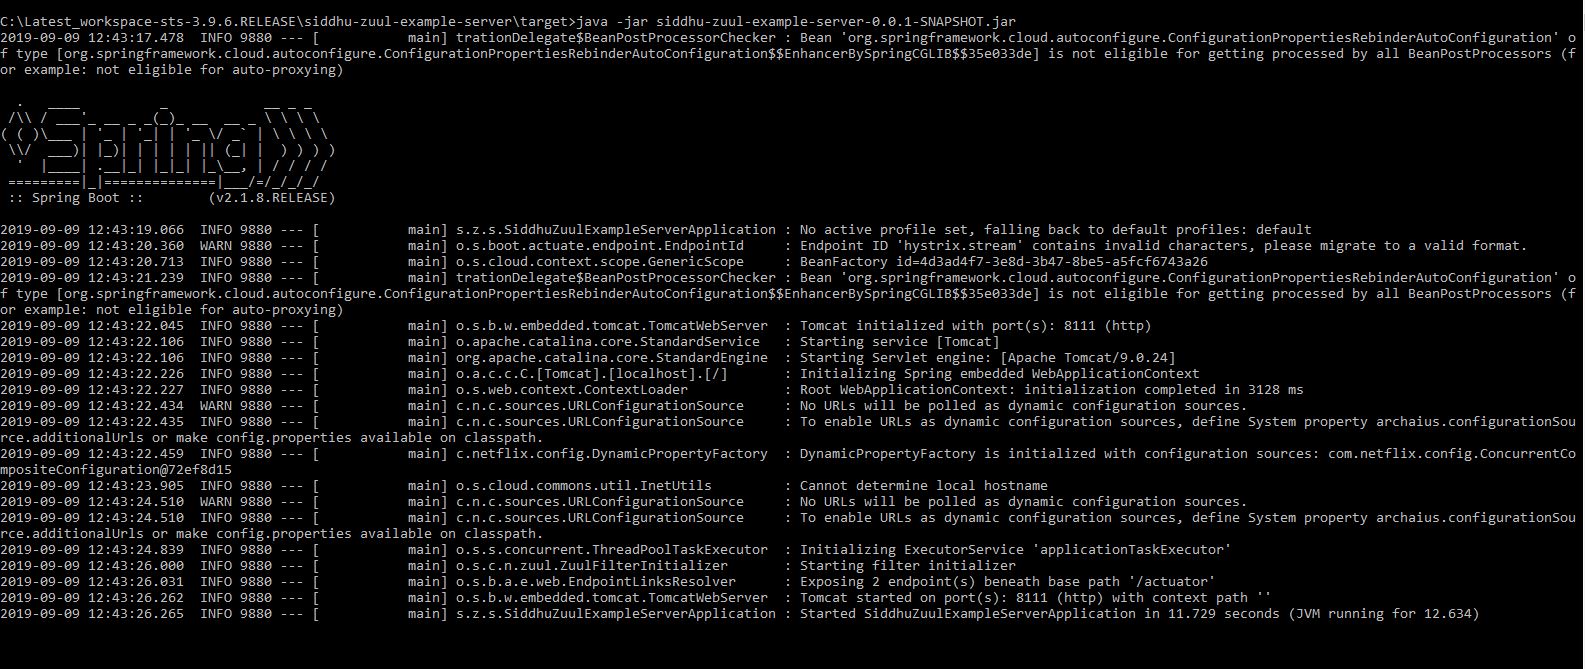
Now lets compile the maven application and create a spring boot jar and run the same using below command
java -jar siddhu-zuul-example-server-0.0.1-SNAPSHOT.jar
Image7Image8
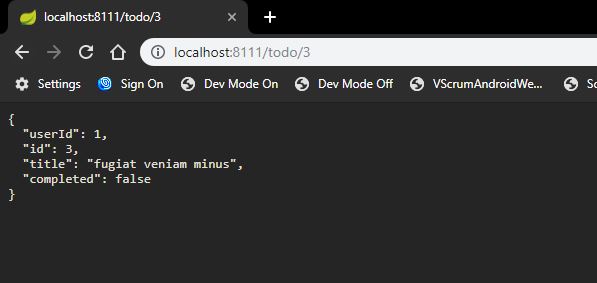
If you see above the original URL which is hit to get the data is https://jsonplaceholder.typicode.com/todos/ but the url that we hit on the broswer is http://localhost:8111/todo/3.
Zuul it self will take care of proxing the url and redirecting to perticular server.

Friday, September 06, 2019

Spring Eureka for Microservice

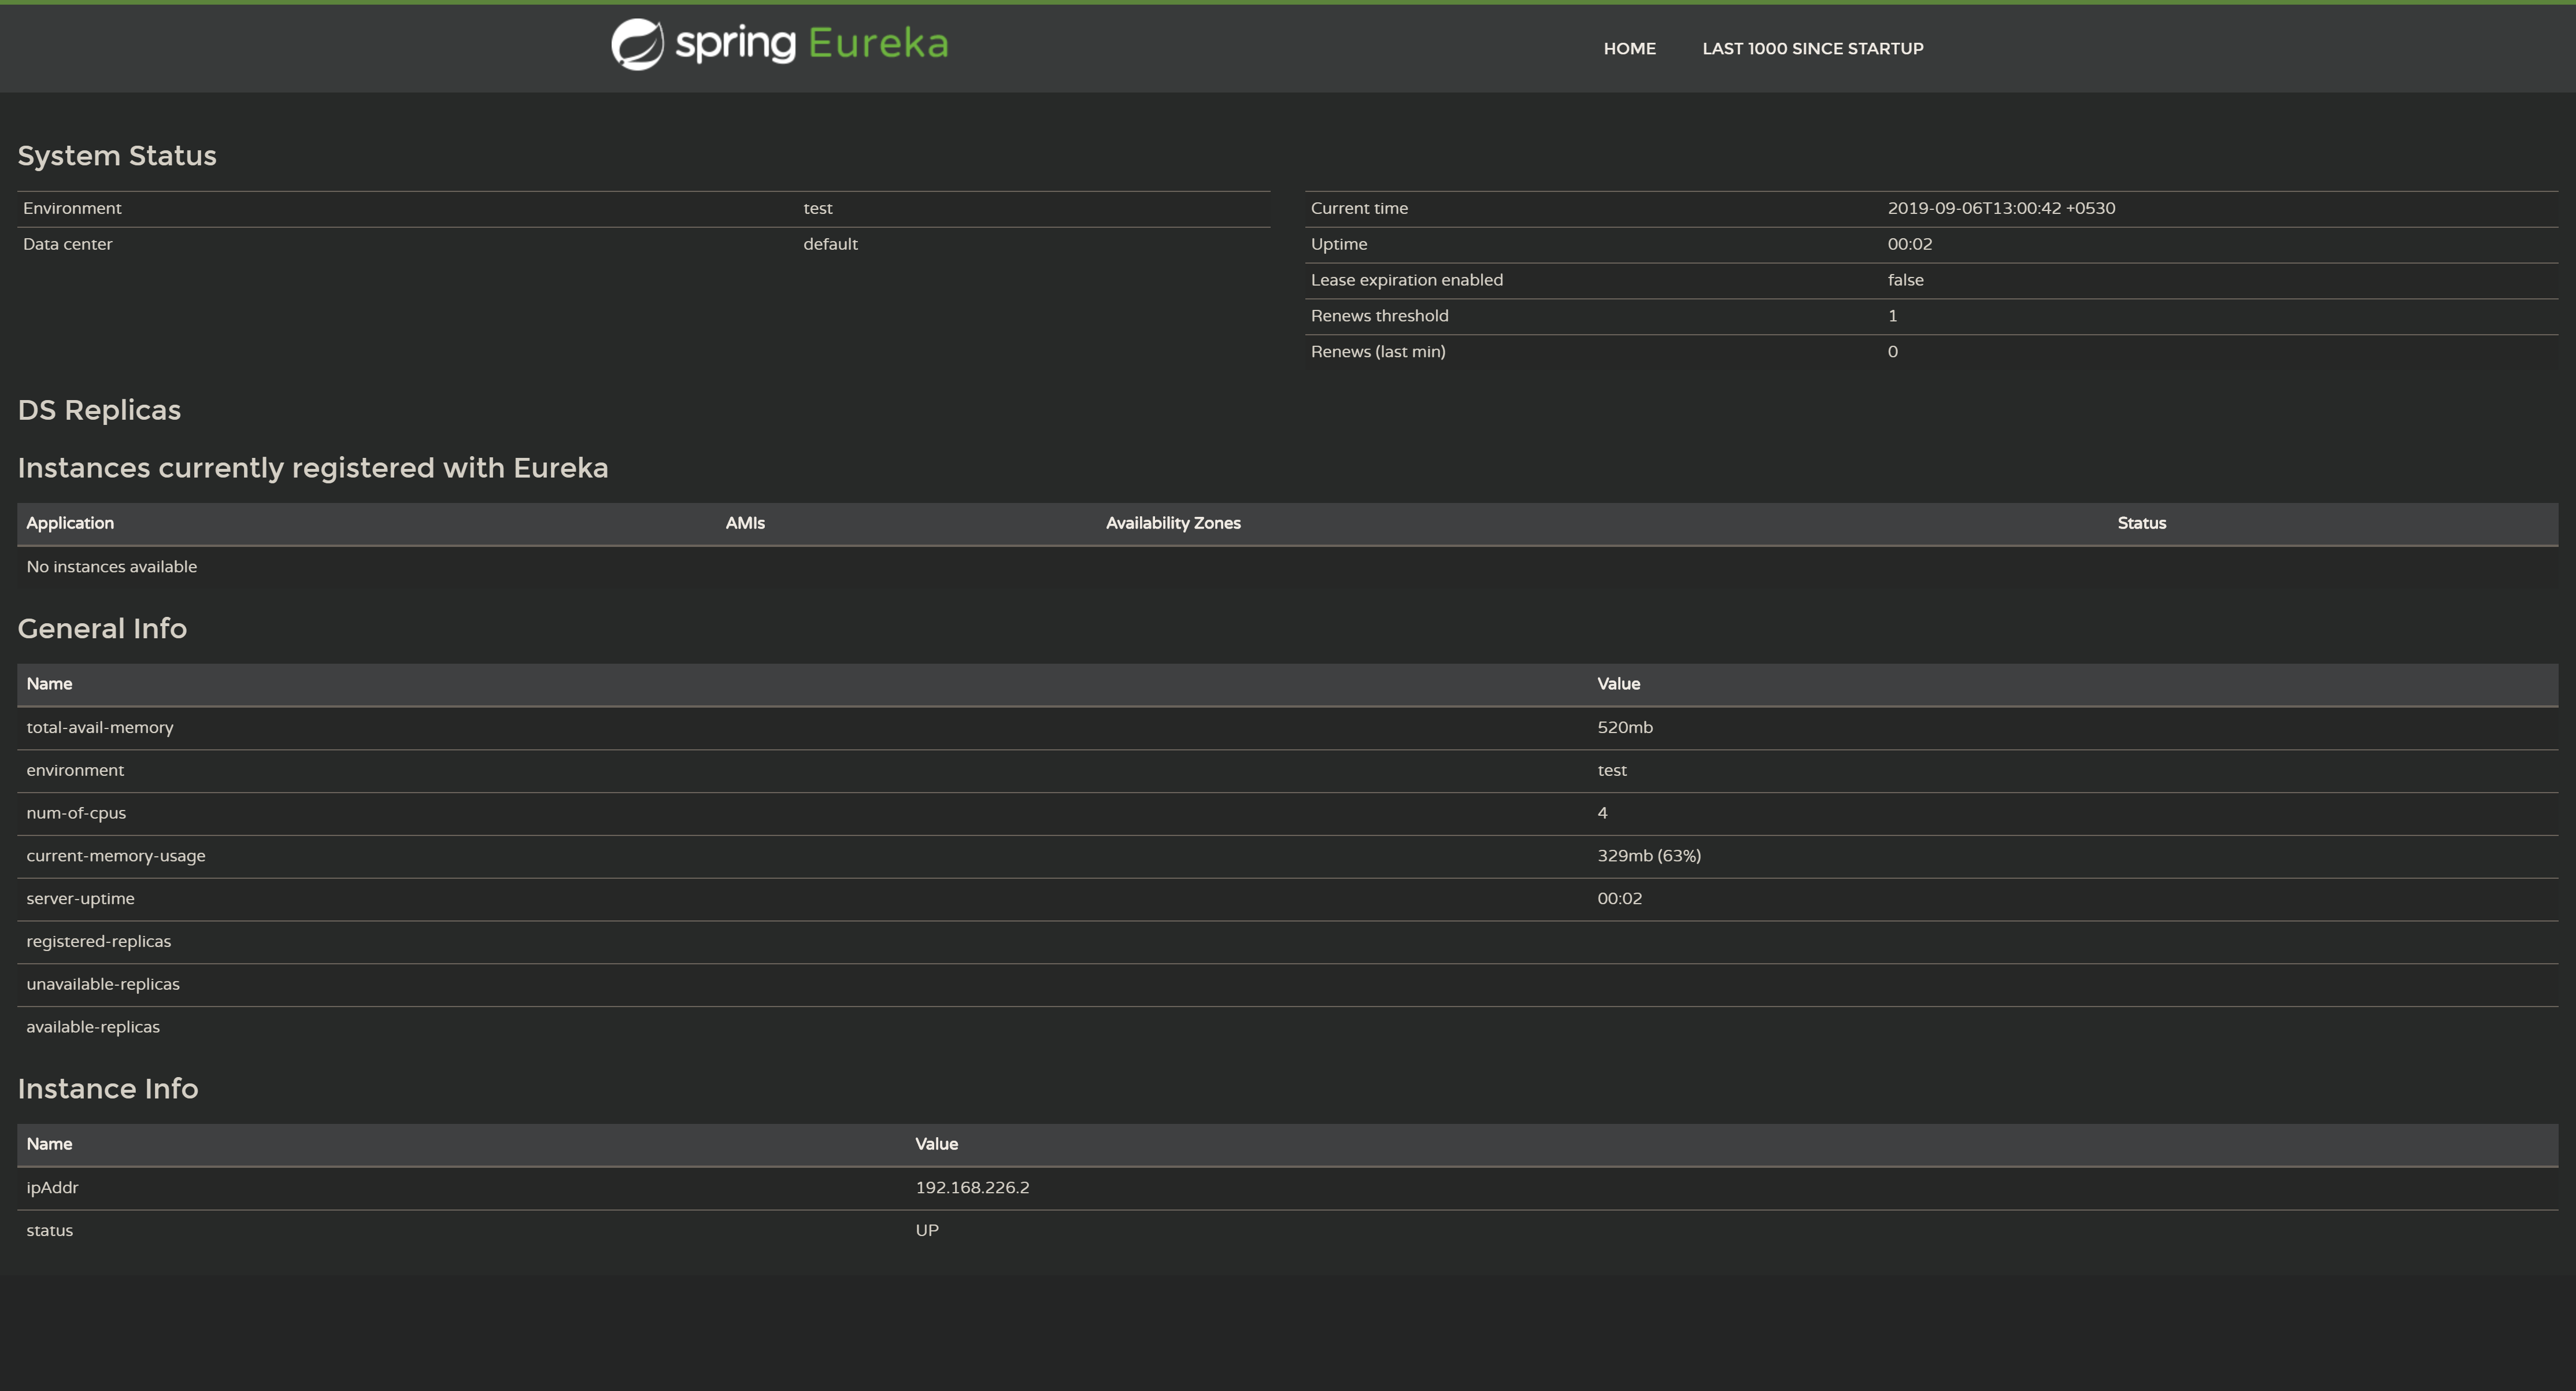
Spring Eureka Server is an application that maintains information about all client-service applications i.e. In SOA architecture where we are trying to decompose our application in many Microservice with a need where in one microservice need to contact another microservice we need to Manuel maintain all the required information like IP address, PORT etc but Eureka server does this for us. Eureka server knows all the client applications running on each port and IP address. All Microservice need to register themself to Eureka Server so that they are available to the client. Eureka service is also known as Discovery Server. So in short the Eureka server is nothing but a service discovery pattern implementation, where every microservice is registered and a client microservice looks up the Eureka server to get a dependent microservice to get the job done.

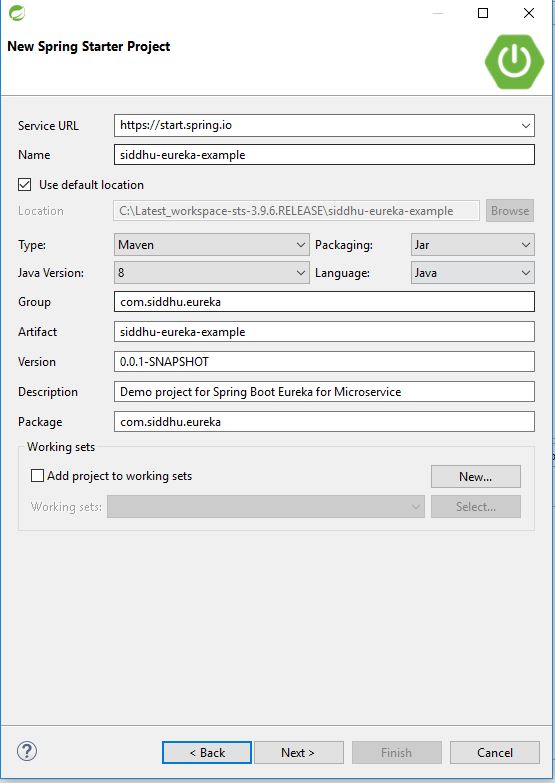
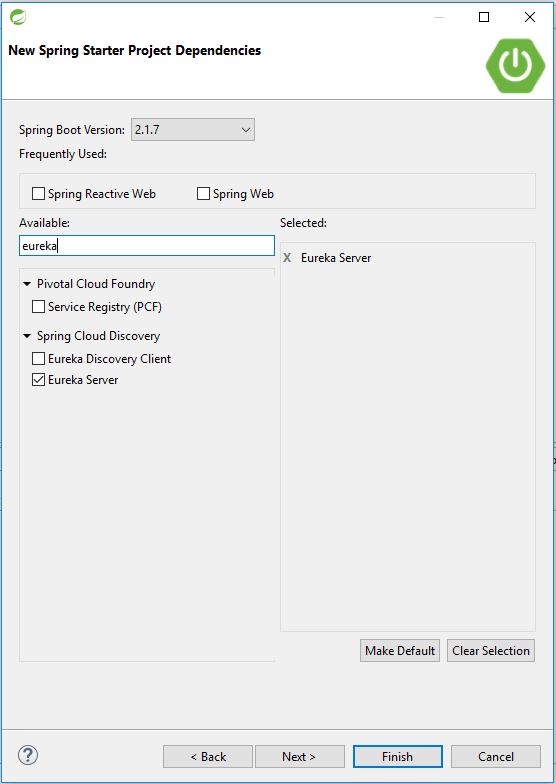
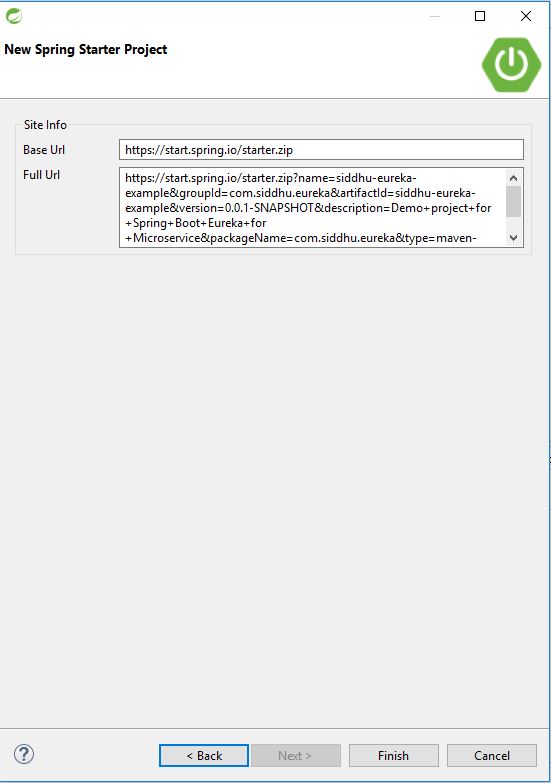
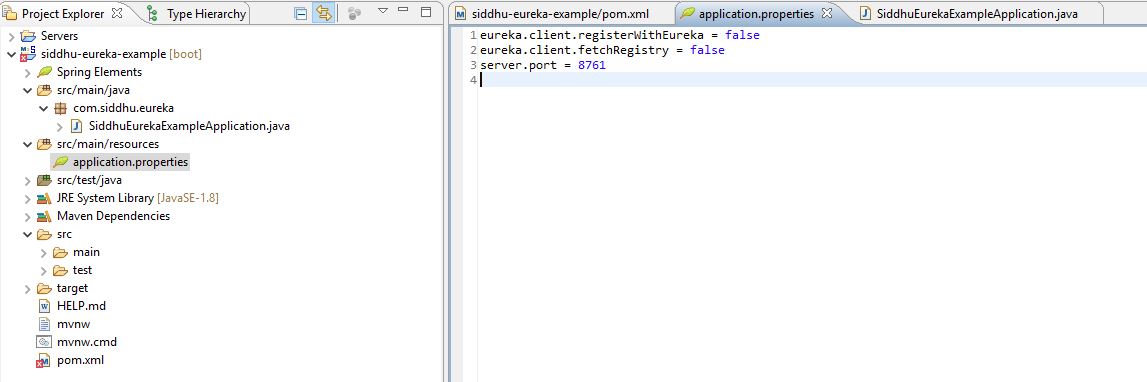
Let's create Spring Eureka Server as shown below. We are using STS IDE.
Image1
Image2

Image3
Change Property files
#Below line tell this is server and not the client
eureka.client.registerWithEureka = false
#Indicate no need to fetch client registry
eureka.client.fetchRegistry = false
#Operate on Port 8761.
server.port = 8761
Image4


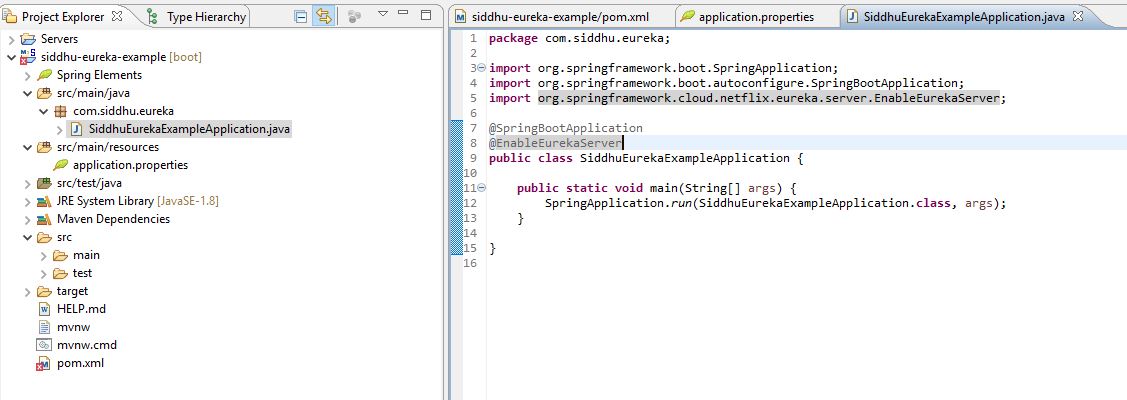
Add anotation to main Spring boot class to inform that this is Eureka Server.
Image5
Once you successfully run below maven command you will get *.jar files.
mvn clean install
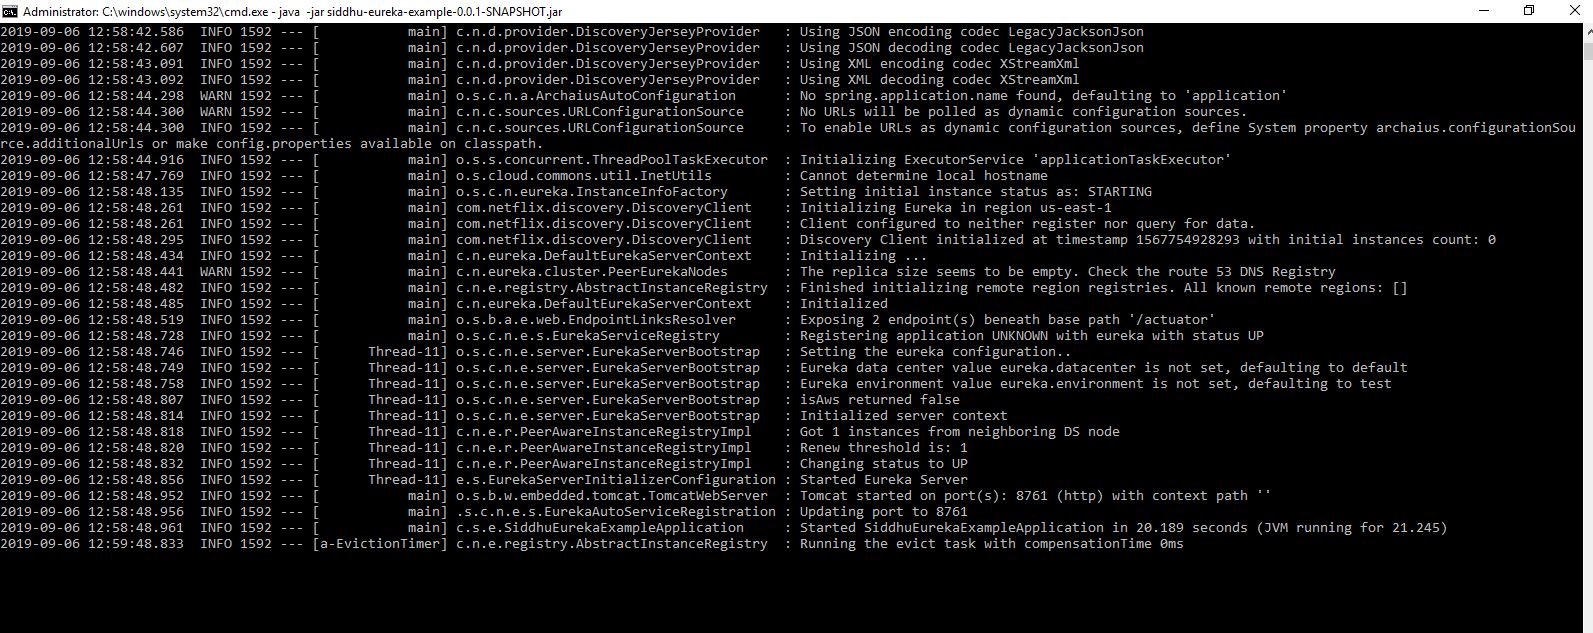
This is our Server jar and now run your Eureka Server jar

Image6
Note :- if you java.lang. TypeNotPresentException: Type javax.xml.bind.JAXBContext Exception check your JDK version.
Java 7 version: Included and Working
Java 8 version: Included and Working
Java 9 version: Deprecated
Java 10 version: Deprecated
Java 11 version: Removed
so either used JDK8 or lower version.
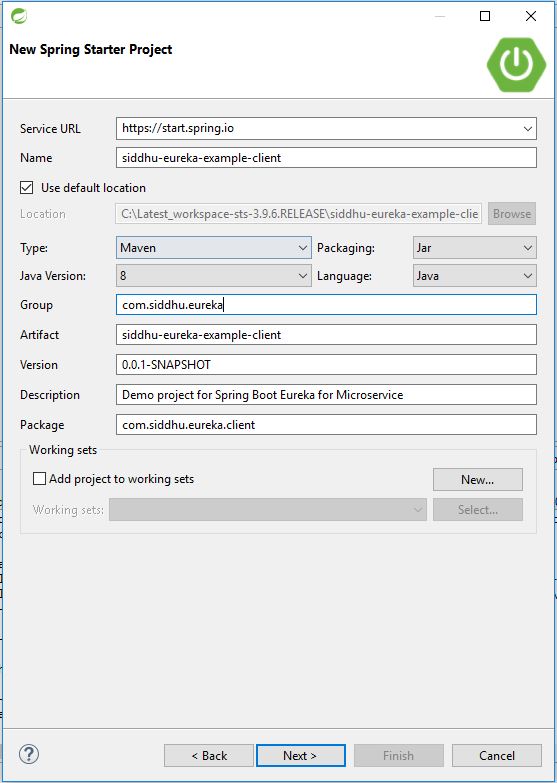
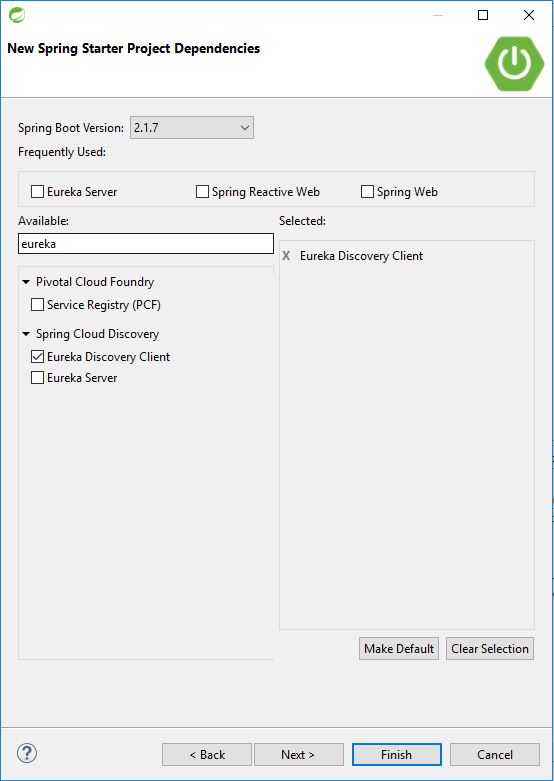
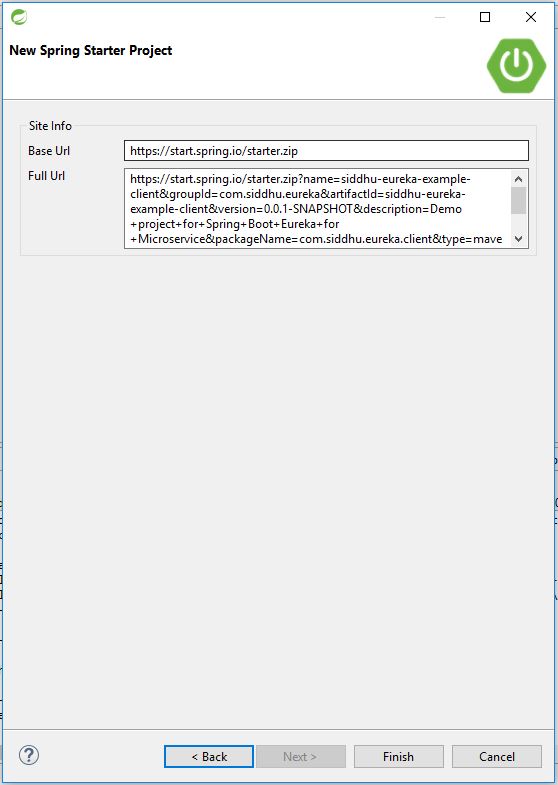
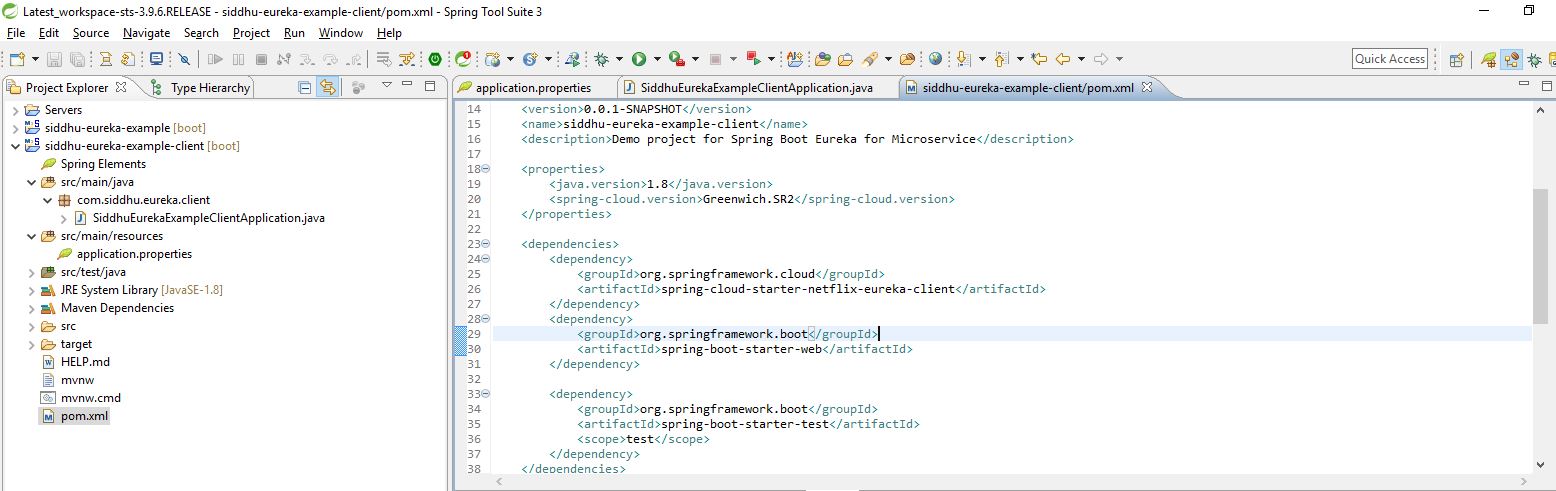
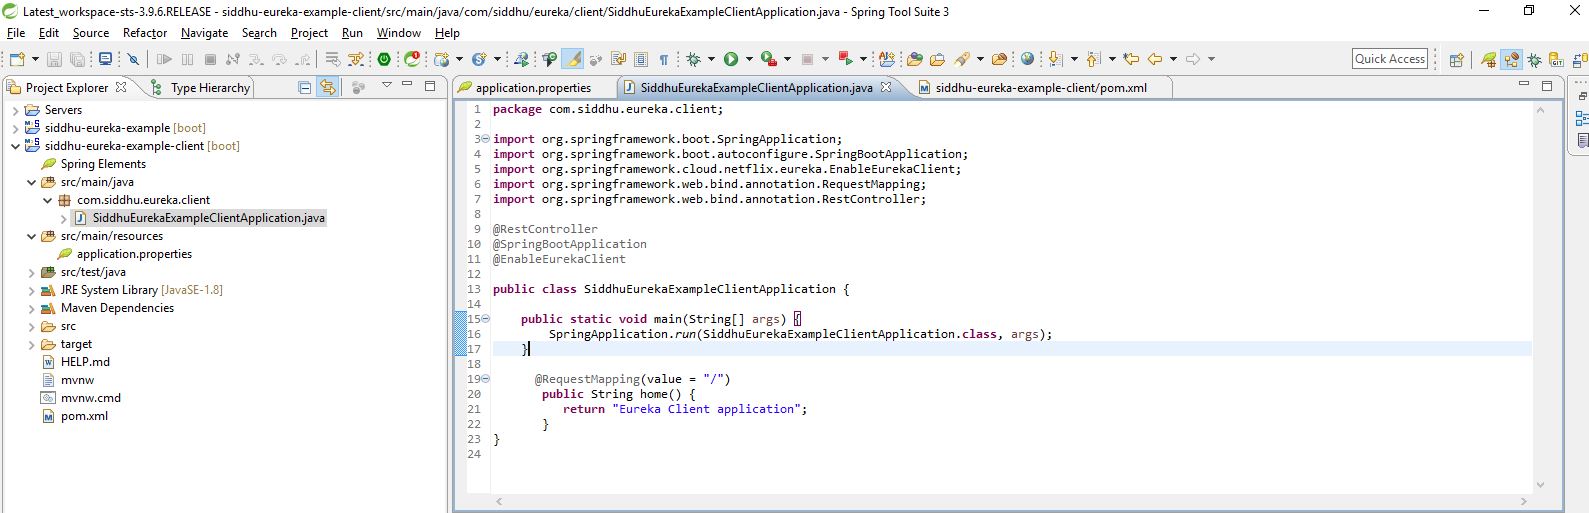
Now lets create a another Microservice as a client and register it with our above created Eureka Server.
Image7

Image7
Image8

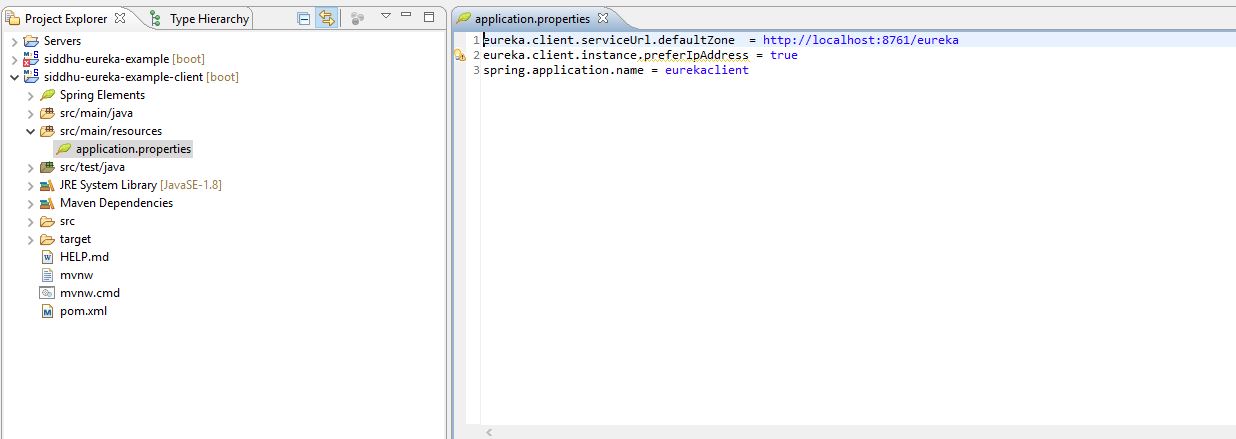
Change Property files
#Give the address of server where he need to register itself.
eureka.client.serviceUrl.defaultZone = http://localhost:8761/eureka
#Communication can be done with the help of IP address.
eureka.client.instance.preferIpAddress = true
#Itendified by below given name by Eureka Server and other client.
spring.application.name = eurekaclient

Image9

Add annotation to main Spring boot class to inform that this is Eureka Server.

Image10
Once you successfully run below maven command you will get *.jar files.
You also need add following items in the pom.xml
<dependency>
<groupId>org.springframework.boot</groupId>
<artifactId>spring-boot-starter-web</artifactId>
</dependency>
Image11
mvn clean install
Now runt the created jar file using below command
Note: As I am using different port 8888 i need to use below comments to start the spring boot eureka client.
java -Dserver.port=8888 -jar siddhu-eureka-example-client-0.0.1-SNAPSHOT.jar
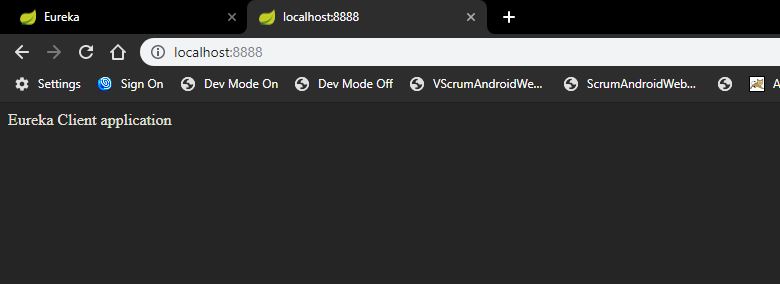
Run following command on url http://localhost:8888/
Image12Image13

Monday, August 12, 2019

Simple JAVA base Graphql Subscription Example

One of the best use of GraphQL is its ability to react onspot i.e. as in old JDK we have the concept of Observable Class and Observer Interface where in whenever any observable class change it notify all the observer class to perform some action. Same is done using RXJAVA
package com.siddhugraphql.java.siddhuuserdetails.util;
import com.siddhugraphql.java.siddhuuserdetails.resolvers.User;
import io.reactivex.Observable;

public class RxJava2Example
{
public static void main(String[] args)
{
User obj = new User("One","two",3);
//producer
Observable<User> observable = Observable.just(obj);

//consumer
//Consumer<? super String> consumer = System.out::println;
SiddhuConsumer objSiddhuConsumer = new SiddhuConsumer();
//Attaching producer to consumer
observable.subscribe(objSiddhuConsumer);
}
}
package com.siddhugraphql.java.siddhuuserdetails.util;
import com.siddhugraphql.java.siddhuuserdetails.resolvers.User;
import io.reactivex.functions.Consumer;
public class SiddhuConsumer implements Consumer<User> {
@Override
public void accept(User t) throws Exception {
// TODO Auto-generated method stub
System.out.println("--------------------"+t.toString());
}

}
As shown above for RX we have
Producer :- That produce the data and emit. It use observable class and subscribe the Consumber
Consumer :- That consume the data and work on it. For doing this it implements Consumer interface and override accept() method.

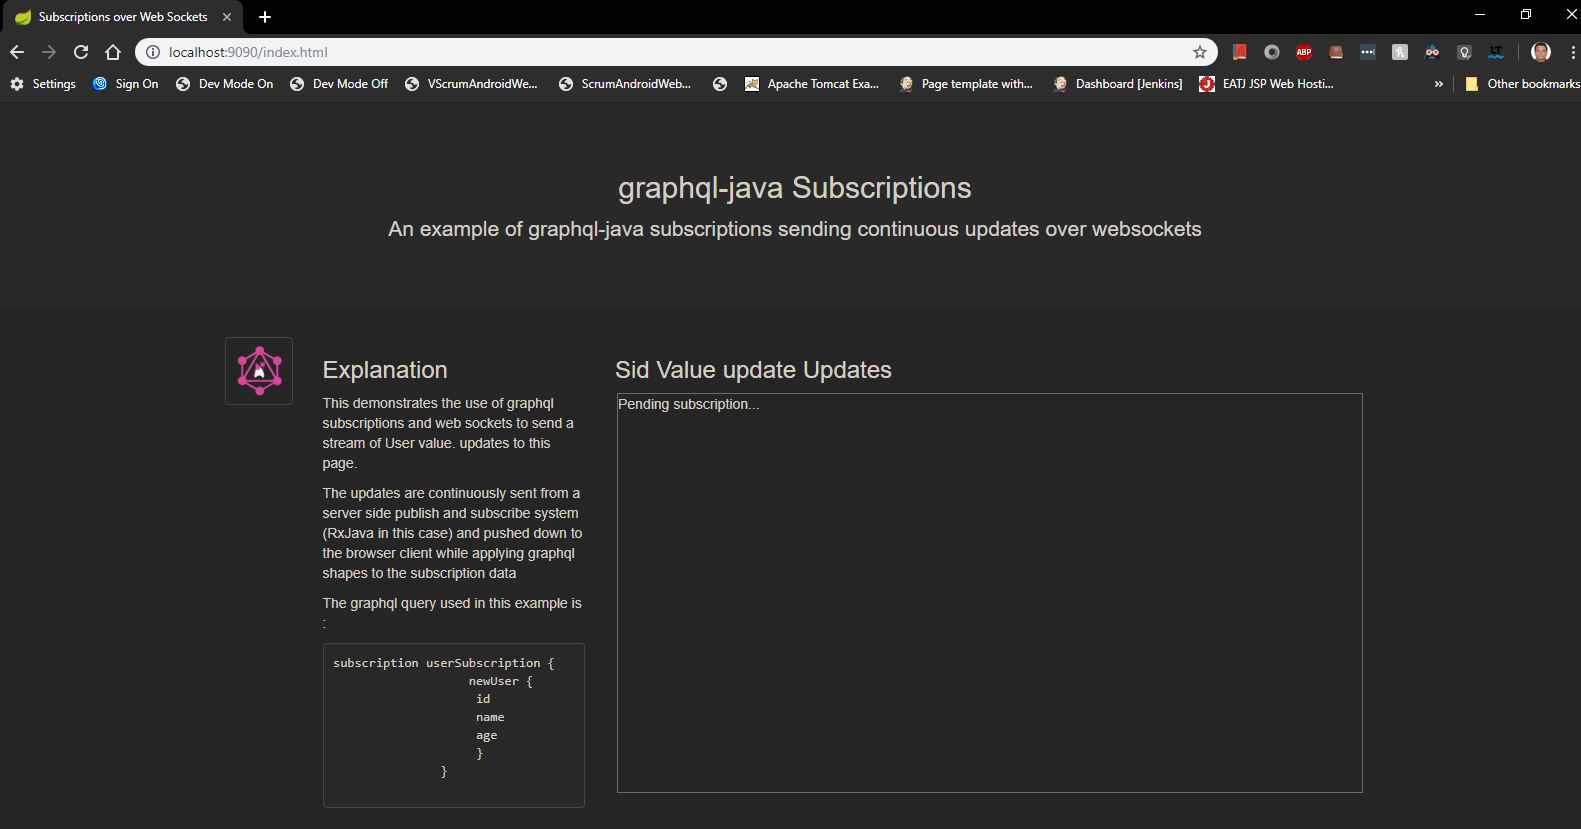
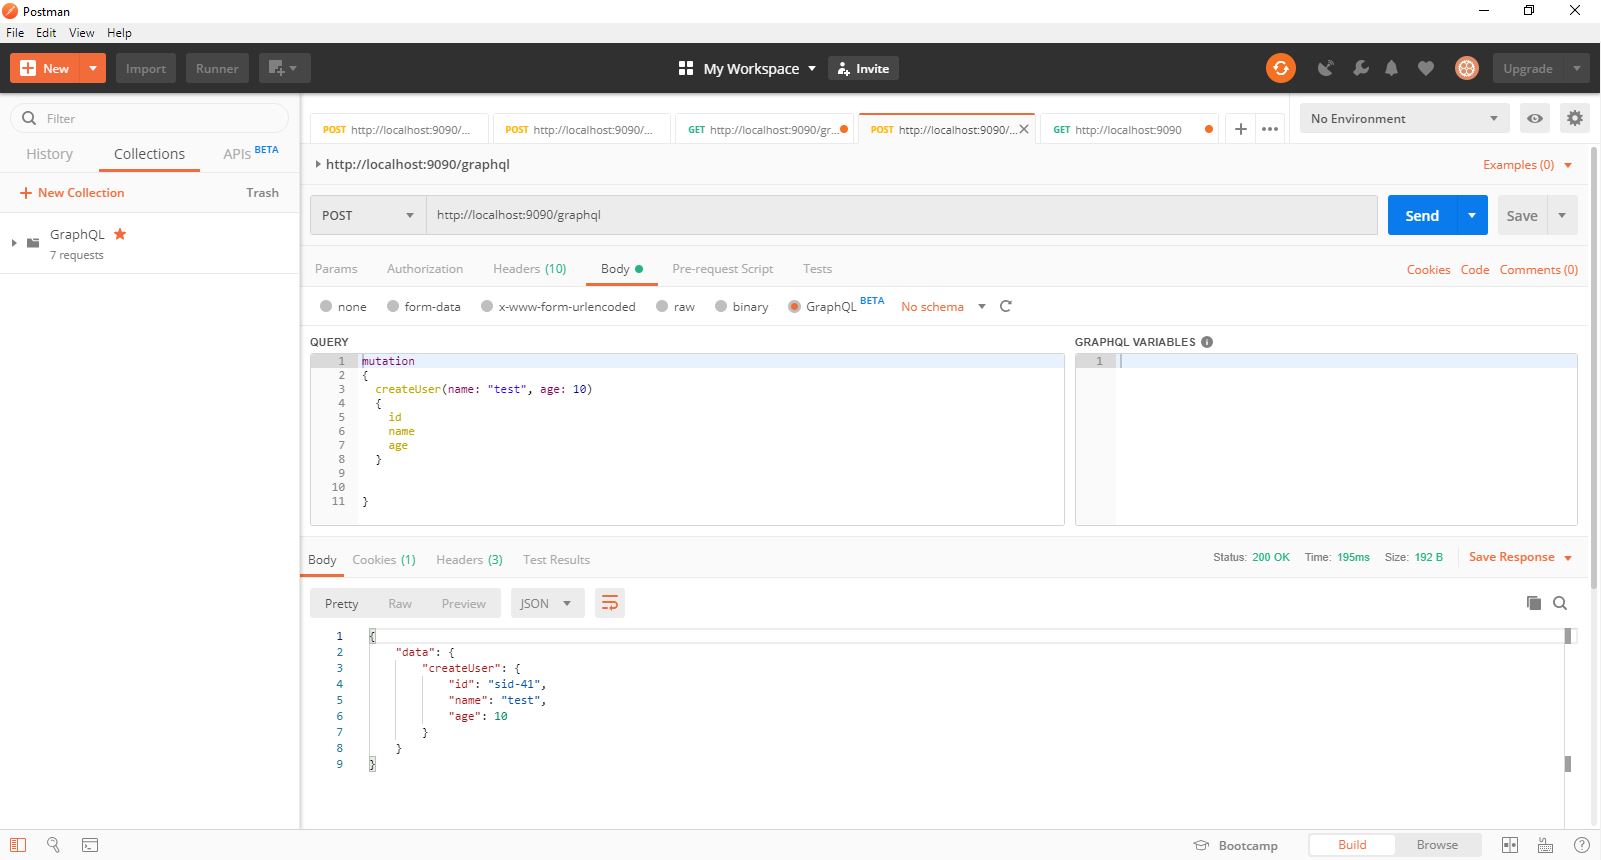
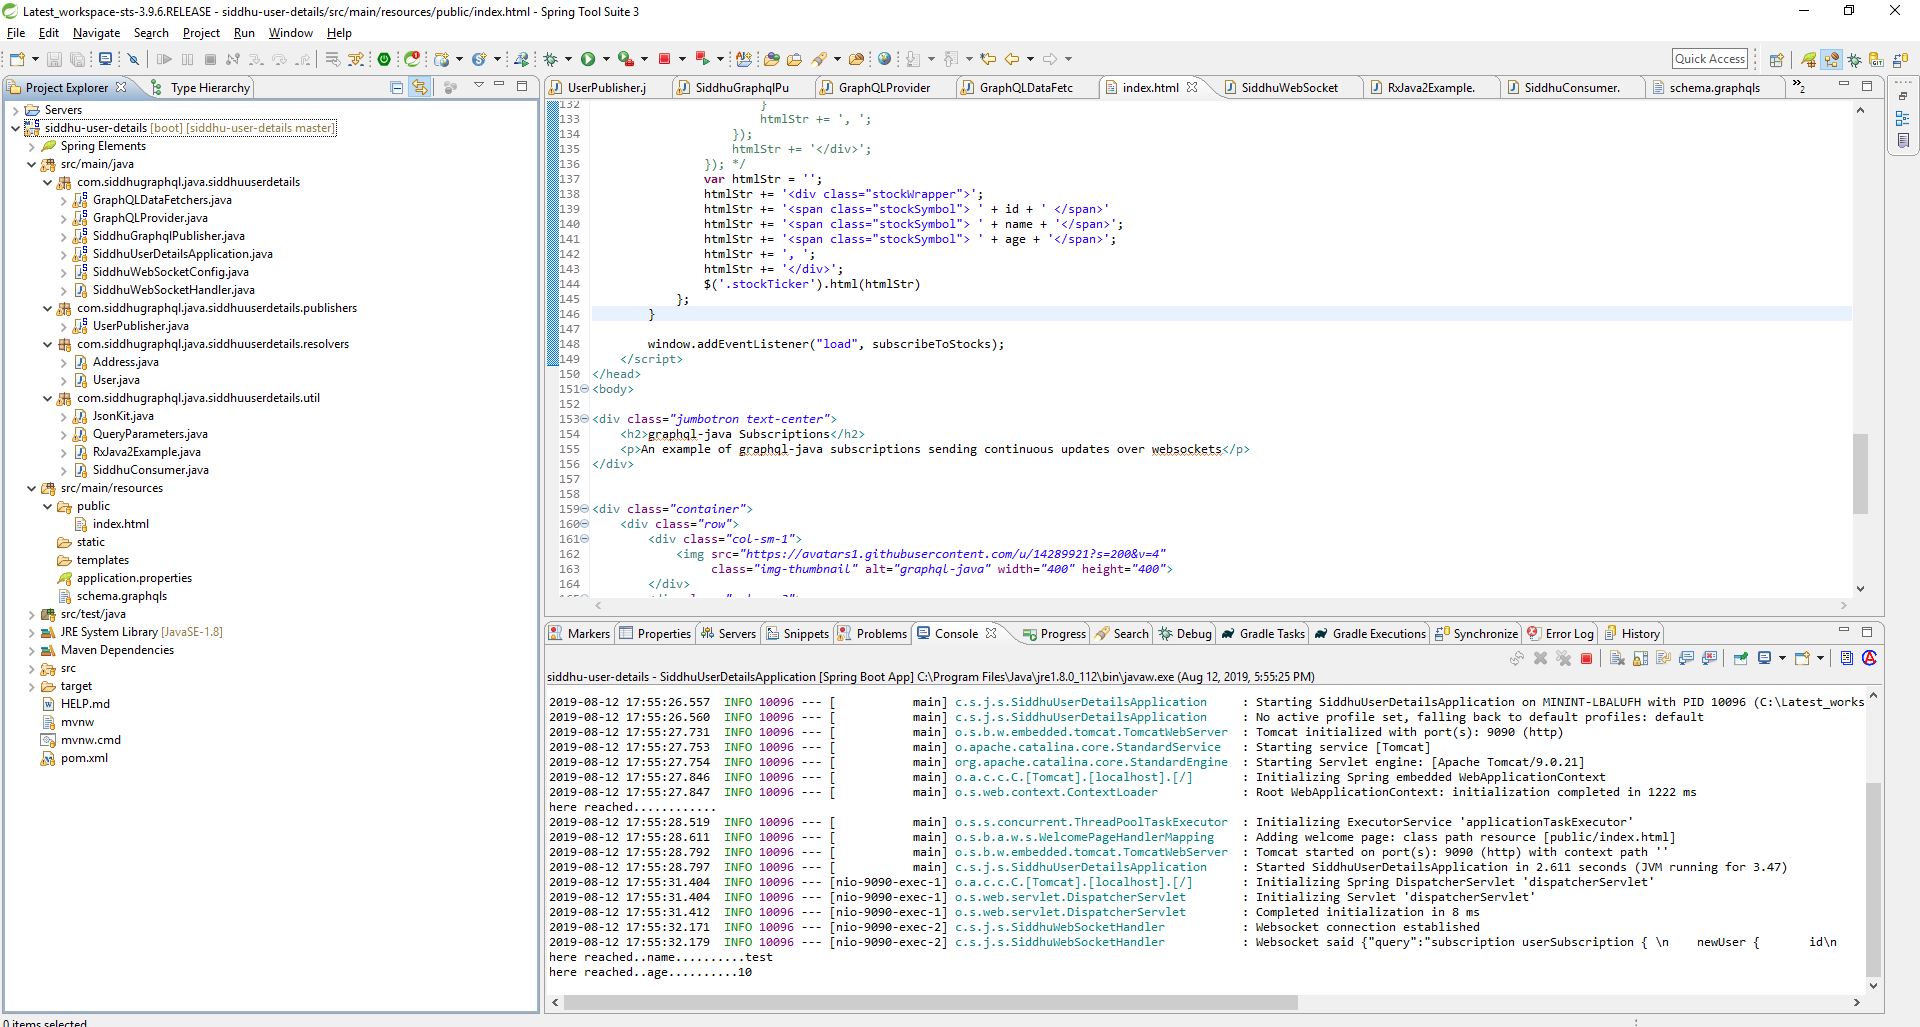
Now lets come to our GraphQL example. Lets say we want to demo an subscription example where in when we do any mutation operaion i.e createUser it will be catch by our consumber and will display it on the screen
Let me show you the screen shot
Image1
Through Post man we hit the Graph Mutation request.

Image2
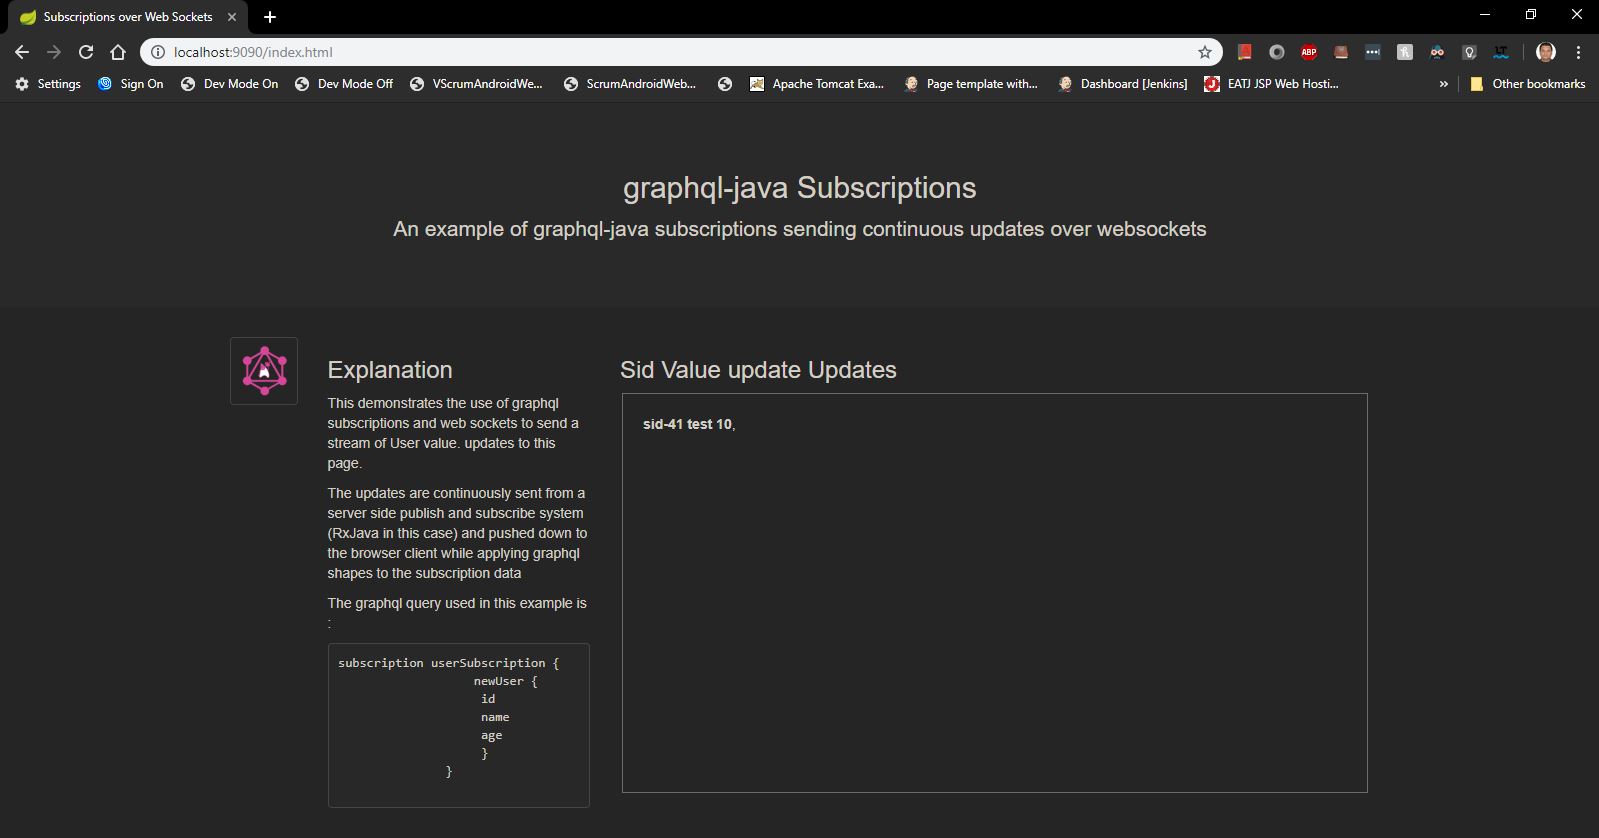
Below image shows that as soon as the mutation request is fired we find the data present in the UI

Image3
Hurrey we are done with simple GraphQL Subscription example
Now lets go in details of what we had done in code
You can download the complete running example from below GIT location

https://github.com/shdhumale/siddhu-user-details

We have use the inbuild example of graphql Subscrition example html to request subsription request.
1- index.html
Following lines are modified to hit our Subscription request
function subscribeToStocks() {
var exampleSocket = new WebSocket("ws://localhost:9090/stockticker");
networkBlip();
exampleSocket.onopen = function () {
networkBlip();
console.log("web socket opened");
var query = 'subscription userSubscription { \n' +
' newUser {' +
' id\n' +
' name\n' +
' age\n' +
' }' +
'}';
var graphqlMsg = {
query: query,
variables: {}
};
exampleSocket.send(JSON.stringify(graphqlMsg));
};
var STOCK_CODES_UPDATES = {};
exampleSocket.onmessage = function (event) {
networkBlip();
var data = JSON.parse(event.data);
console.log("data----------------->"+data);
var age = data.newUser.age;
var id = data.newUser.id;
var name = data.newUser.name;
console.log("id----------------->"+id);
console.log("age----------------->"+age);
console.log("name----------------->"+name);
var htmlStr = '';
htmlStr += '<div class="stockWrapper">';
htmlStr += '<span class="stockSymbol"> ' + id + ' </span>'
htmlStr += '<span class="stockSymbol"> ' + name + '</span>';
htmlStr += '<span class="stockSymbol"> ' + age + '</span>';
htmlStr += ', ';
htmlStr += '</div>';
$('.stockTicker').html(htmlStr)
};
}
window.addEventListener("load", subscribeToStocks);
First file which is hit when we run this url on the browser http://localhost:9090/index.html is SiddhuWebSocketConfig
From here we execute SiddhuWebSocketHandler and initialize SiddhuGraphqlPublisher.
SiddhuWebSocketHandler class is used to make the websocket connection and listen to that socket if any request is coming
SiddhuGraphqlPublisher class we read our schema.graphqls and execute it so that we can use this code as our Graphql server code to serve the request.
When we execute our SiddhuUserDetailsApplication spring applications
GraphQLProvider execute our schema.graphqls so that it will be available for all the request given by client.
In our mutation call we make a call publish with our User object.
//by siddhu for Mutation start[
public DataFetcher createUserDataFetcher() {
System.out.println("here reached............");
return dataFetchingEnvironment -> {
String name = dataFetchingEnvironment.getArgument("name");
System.out.println("here reached..name.........."+name);
int age = dataFetchingEnvironment.getArgument("age");
System.out.println("here reached..age.........."+""+age);
objUser = new com.siddhugraphql.java.siddhuuserdetails.resolvers.User("sid-41",name,age);
SiddhuGraphqlPublisher.STOCK_TICKER_PUBLISHER.publish(objUser);
return objUser;
};
}
//by siddhu for Mutaion end]
finally in our UserPublisher constructor
public UserPublisher(){
Observable<User> commentUpdateObservable = Observable.create(emitter -> {
this.emitter = emitter;
});
ConnectableObservable<User> connectableObservable = commentUpdateObservable.share().publish();
connectableObservable.connect();

publisher = connectableObservable.toFlowable(BackpressureStrategy.BUFFER);
}

public Flowable<User> getPublisher() {
return publisher;
}

public void publish(final User user) {
emitter.onNext(user);
}
that's it and you will be able to see our subscription example is running with simple java code.

Image4